Showing posts with label Gluten-free. Show all posts

Thursday, October 21, 2010

NC State Fair 2010

State Fair Menu

It's time for the North Carolina State Fair! Between the State Fair and the Renaissance Fair, fall is one of the best times of the year. Once the weather breaks and the sweltering heat stops, it's time to eat to your heart's content, hit the rides until you feel sick, win some prizes, then start all over again. The newest feature at the website is that you can search for any of the rides/games/food that you want. That way you can build a map of all the places you want to go on your visit. If you are iPhone-inclined, they also have an app for that. Here are my favorite food finds from this year's fair:

Roasted Corn

We started the day light with an ear of roasted corn. The ears are roasted en masse until the husk is charred. They are served up plain or dipped in melted butter. Then you have your choice of various toppings, including but not limited to salt, pepper, lemon-pepper, poultry seasoning, Parmesan cheese, and mayonnaise. The corn tastes great and it may be one of the healthiest items you find at the fair, certainly the only one that came directly off a plant.

Chocolate-covered Bacon

Chocolate-covered bacon was a big hit at last year's fair and it is back and as good as ever. The bacon itself is crisp and salty-sweet. It is dipped in a thick layer of good chocolate, then topped with sprinkles or other decorations. It is a little expensive for a single piece of bacon, but you won't be complaining once you bite through the chocolate shell. Just be sure to get your bacon from Steph's Strawberries as some of the other versions fall short on Steph's level of quality.

Attack of the Giant Gummies!

GGB of Raleigh has their first stand at the fair, selling the world's largest gummies. They are famous for their 5lb gummy bears and now offer a variety of other treats including a 3lb gummy worm that is about 2 feet long, gummy shot glasses, gummy tongues, and smaller 1lb gummy bears on sticks that come in about 10 flavors. Unfortunately, my stomach did not let me try these intriguing confections, but if you can find some friends to share, this would be a great novelty.

Koolaid Pickles

One of the most intriguing new offerings at this year's fair are Koolaid pickles. Before you gag at the thought, hear me out. The vendors take a jar of Mt. Olive bread'n'butter pickles, dump out the brine, and put in some red Koolaid. The outside of the pickles is a bright red color, but the interior of the pickle is that same odd shade of green. I've never been a fan of bread'n'butter pickles, but this version was actually quite tasty. The Koolaid sweetened the pickles up just a tad and made their flavor more interesting. If you're feeling adventurous (which you should be at the fair), buy a set of these pickles and see what you think. If all else fails, you can just throw them at one of the game stalls and see if you win a prize.

Fried Food Fest

State Fairs from Texas to North Carolina are known for bringing the best and worst in fried foods. The Lone Star State takes the cake (or Twinkie) when it comes to fried food. Vendors compete for the best new fried food, inventing such odd offerings as fried Coca Cola, fried beer, and even fried butter. Many of these new ideas get to the NC State Fair, and the popular ones like fried Oreos become permanent parts of the menu.

Chocolate Obsession Funnel Cake

Can a funnel cake be gourmet? Yes, yes it can. Funnel cakes have long been part of fairs. A batter is streamed into fry oil and allowed to cook until a puffed nest forms. Some vendors top them with a thick layer of powdered sugar. But the newest addition to this lineage is the gourmet funnel cake, coming in 6 flavors like apple and chocolate obsession (pictured above), which is a chocolate funnel cake topped with chocolate syrup, chocolate chips, powdered sugar, and whipped cream. It is truly decadent and very difficult to stop eating. One drawback of most funnel cakes is that after a few bites you're pretty much tired of the taste of fried batter, but these gourmet cakes keep you wanting more even after you've cleaned your paper plate.

Fried Chips Ahoy and Honeybun

The newest of the things-you-thought-they-would-never-fry category are the fried Chips Ahoy and the fried Honeybun. The Chips Ahoy, much like the fried Oreo, becomes much softer in the fryer, but it brings a lot less flavor than that chocolate cookie. All you end up with is a piece of fried batter surrounding some chocolate chips. The Honeybun, on the other hand, was marvelous. There is a lot of fried batter to get through with it, so it is best to split this behemoth. The Honeybun is heated in the frying process, making it taste absolutely delicious and wonderfully moist.

Krispie Kreme Bacon Cheeseburger

The last new item that is definitely worth mentioning was by far my favorite food at this year's fair. It is the *brace yourself* Krispie Kreme Bacon Cheeseburger. If it sounds gross, wait for it. Burger + bacon + random unnecessary toppings + cheese + 2 Krispie Kreme donuts = pure bliss. If you've ever had a McGriddle from McDonald's, this monster is very similar. It is mostly sweet with a bit of savory in the middle from the burger and cheese. The bacon unites it all (because let's face it, bacon is magical and can bring people together). Like many foods at the fair, I split this with a group of people, but this was the only food I was sad that I could only eat my share and not the entire thing. This burger was transcendentally wonderful and if you can't get to the fair to have one this year, you should make it at home.

The fair, overall, was a monumental success. Not only am I still an ace at the water-shooting games, but I went home feeling fully satisfied that I had eaten the best of this year's fair. If you live in the area and have time between now and Sunday, go to the fairgrounds. It does not matter if there are throngs of people. All that matters is that you have the chance to enjoy this unique slice of the American lifestyle.

Sunday, August 15, 2010

Homemade Yogurt

The health benefits of eating yogurt are fairly well known. If you eat a kind with live cultures, it can help your digestion. Not to mention that it is full of calcium and people who tend to eat more dairy products have better overall health. I became interested in making my own yogurt for two reasons. Firstly, I have worked with bacteria myself and I wanted to see what it would be like to use them at home. Secondly, if you start reading the ingredients in store-bought yogurts, you see that there is a lot more in those cups than just milk and bacteria. They use all sorts of stabilizers, thickeners and sweeteners to attain the proper consistency, flavor (Boston cream pie? really?) and shelf-life. With the rise in popularity of Greek yogurt, I've grown more accustomed to thick, tangy yogurt that does not need a lot of sweeteners (real or artificial). So with that, I set out on my quest to make homemade yogurt.

After some internet perusing, I found that most people buy yogurt makers to help incubate their cultures at the proper temperature until they are ready. It seems it is more difficult to get everything right on your own, but it is doable. For my first batch, I heated 1 quart of whole milk to 140 degrees F on the stove, then allowed it to cool to 110 degrees F. At this point, I mixed in a few heaping tablespoons of the starter culture (plain yogurt with active cultures). Be sure to blend the yogurt in well. If you want, you can use a small portion of the heated milk to thin out the yogurt, then add this mixture into the rest of the milk for easier mixing. Let this sit on the counter for 16-24 hours. The longer it sits, the more firm and tangy it will become. I had a moderate success with this version, though my yogurt did not set up to a rich, thick density as I had hoped.
Milk Lineup

The next step was to turn this initial pilot study into a full fledged experiment. Luckily for me, my local kitchen store was having a sale, so I got a Donvier electronic yogurt maker for a decent price. The maker comes with 8 individual cups that contain a nice size serving of yogurt. This gadget may not be ideal for making a large quantity of yogurt, but it works for my needs.

Yogurt Experiment Setup

I had heard that milks with a higher fat content made a thicker yogurt. So my first experiment was to see if this was true. I chose eight different milks: soy, skim, 1%, 2%, whole, half-and-half, heavy cream, and chocolate. The directions are pretty much the same as for the counter-top yogurt above, though the machine came with a handy thermometer that tells you when to add the starter culture. I ran the machine for 11 hours, then put the yogurt in the fridge for 12 hours.

Yogurt Experiment Results

The overall trend was that milks with lower fat content formed looser yogurts, but this was not 100% true across the board. Soy and skim milks produced very soft yogurts with a sharp tang. 1% milk made a yogurt similar in consistency to Yoplait with a decent tang. 2% and whole milk were a bit thicker and I noticed that as the fat content increased, the overall smoothness of the yogurt also increased. Heavy cream, which I expected to be even thicker, was almost as liquidy as skim milk and it just tasted very fatty.

Half-and-half Yogurt

Half-and-half, on the other hand, turned out very thick, almost like Greek yogurt. It was smooth and creamy with a good balance of tang.

Chocolate Yogurt

The real surprise of the group was chocolate. It had a thickness more like whole milk (they have similar fat contents), but the taste was amazingly earthy. The bacteria consumed the high sugar content of the milk (30g/cup compared to 13g/cup in whole milk) and left the chocolate flavor behind. So you end up with an unsweetened chocolate yogurt that was quite delicious. I may make it again at some point as a surprising dessert.

While I did have my answer, I was sad to learn that I would have to eat half-and-half yogurt to get the consistency I wanted. So next I turned to tricks to thicken up the yogurt. Many people recommend adding skim milk powder to the initial mixture to add thickness. Lastly, you can strain your yogurt through a coffee filter or paper towels set in a colander in a large bowl to collect the water. I did this with my first batch of yogurt and found I had a delicious, thick yogurt at the end. The only problem with this method is that you end up losing about 1/3 to 1/2 the volume of the yogurt and you also condense the caloric content. If you read the yogurt containers, they add either gelatin (not vegetarian) or agar (from seaweed, so it's vegetarian) to thicken up the yogurt. On subsequent batches, I have bloomed a 0.25oz package of gelatin in 1/4 cup of water, then added this to the yogurt. The result was very firm, so I will likely use only about half of a package in the future, but the gelatin definitely did its job.

Yogurt and Granola

There's nothing more satisfying than a meal for which you have made everything from scratch. One of the few ingredients you cannot buy at the store is a sense of accomplishment, and yet it is one of the best ways to make your meal taste ten times better. Homemade yogurt with homemade granola may sound simple, but you get a lot more joy crafting everything yourself than you do buying it in the refrigerator section. So go ahead, start playing with some bacteria.

Thursday, July 29, 2010

Granola

Granola is a word that can conjure many images. I often think of it as a cereal that requires a lot of work to eat. It can also evoke ideas of "hippies" and "rabbit food." Other people are quite enamored with the cereal mix and make it part of their daily lives. I think granola suffers from a large amount of variability in preparation. Some make it into extra crunchy bars. Others keep it more bland and soft. They can contain nearly any ingredient, from antioxidant-filled dried blueberries to less-than-healthy chocolate chips and candies. The only solutions are to either keep trying bag after bag until you find the one you like or craft your own to your personal preferences. Here is how, in under an hour, you can make your own tasty granola.

Granola
Yields 5 cups. Adapted from Bon Appetit magazine.

Ingredients
3 cups old-fashioned oats
1 cup coarsely chopped pecans
1/2 cup unsweetened coconut
3 tbsp brown sugar
3/4 tsp ground cinnamon
1/2 tsp ground ginger
1/4 tsp salt
1/3 cup honey
2 tbsp vegetable oil
1/2 cup dried cherries
1/2 cup dried strawberries
1/4 cup chopped dates

Directions
Preheat oven to 300F. Line a rimmed baking sheet with parchment paper.
Mix together the first seven ingredients.

Granola, Step 1

Mix honey and oil in a saucepan and cook over medium-low heat until smooth, about 3 minutes. Pour this mixture over the oat mixture and toss to coat evenly. Spread this on the prepared baking sheet. Bake for about 40 minutes until golden brown, stirring every 10 minutes. You can remove the pan from the oven earlier if you want your granola softer or leave it in longer if you want it more crunchy.

Granola, Fresh from the Oven

Allow the granola to cool completely. Stir it occasionally as it cools to ensure that clumps don't form (unless you like large clumps, then let it cool undisturbed). Stir in the dried fruit and enjoy.

Strawberry-Cherry Granola

The versatility of this recipe makes it hard not to like it. I got to put one of my favorite fruits (strawberries, in dried form) into this batch, but I could easily see many other ingredients in the mix. Nearly any nut would be great, as would pumpkin seeds, sunflower seeds, other cereals, any dried fruits, and, if your sweet tooth is acting up, various candies. I enjoyed this granola immensely, probably moreso than any other version I've tried. Part of it is, undoubtedly, that I made it with my own two hands and I knew that there were no strange chemical additives. The other part is that I tailored it to my tastes. This version was more simple, but has been great as a snack or for breakfast with milk. I will definitely make other versions of this granola in the future and it may become a delightful staple in my diet.

Saturday, June 19, 2010

Tilapia with Zucchini Pappardelle

It's definitely squash season. Know how I can tell? My biweekly community supported agriculture deliveries are overrun with zucchini of various shapes and sizes as well as those crooked-necked summer squash. Last year, I had so much zucchini that at one point I had to make a triple recipe of zucchini bread just to make a dent. I'm definitely handling the squash load better this year, thanks in no small part to new and innovative ways to use these veggies. The latest creation is based on a Gourmet Magazine recipe that uses zucchini in place of pasta.

Tilapia with Zucchini Pappardelle
Makes 4 servings

Ingredients
1 pound zucchini, trimmed
1 tbsp olive oil
4 tilapia fillets (or 2 halved fillets)
1 tbsp dried basil
2 cloves garlic, thinly sliced
2 tbsp water
1 cup basil, torn
4 lemon wedges, for garnish

Directions
Using a mandolin, thinly slice zucchini lengthwise to about 1/8" thickness. Slice these ribbons in half lengthwise to form long "noodles." Set aside.

Pat fish dry, then season with salt, pepper and dried basil. Heat oil in a large, heavy skillet over medium-high heat. Saute tilapia until browned and just cooked through, about 8-10 minutes depending on the thickness of the fillets. Remove tilapia from pan and set aside, loosely covering with foil to keep warm.

Add garlic to the skillet and cook, stirring constantly, until pale brown, about 1 minute. Add water and scrape up any brown bits left on the pan. Add zucchini to the pan and cook briefly, just until crisp-tender. Be sure to keep tossing the zucchini while it's in the pan, kind of like in stir-fry, so it does not overcook. Divide zucchini among four plates in little mounds. Season the zucchini with a little salt. Place one fillet over each mound of "pasta," then scatter the torn basil on top.

Tilapia with Zucchini Pappardelle

I'm always a skeptic when someone wants to get rid of my pasta. Whether they are trying to get me to eat my vegetables or are even just using whole wheat pasta, I'm usually not as satisfied with the dish. But this twist on zucchini is surprisingly satiating. It still had some crunch to it (dare I say al dente?) and it tasted fresh and light. The fish did very nicely with the dried basil on it and the addition of fresh basil all around the plate helped bring out the lighter side. I like to combine both dried and fresh herbs in some dishes since dried herbs can withstand some heat while fresh herbs are more fussy and best without a lot of manipulation. Not only was this meal low-carb (but who's counting?) and gluten-free, it was highly satisfying and fast.

Sunday, June 6, 2010

Kale-Kohlrabi Salad

Kohlrabi

What is this weird alien plant? Is it the offspring of an octopus and collard greens? Or is it a Pokemon? Turns out this odd vegetable is kohlrabi.

Peeled Kohlrabi

After a bit of a trim, it looks more manageable. I found these little guys at the local farmer's market. After seeing them a few times over the past few years, I decided to give them a try. Luckily, among my myriad of recipes, I had exactly one that called for kohlrabi. It was an unassuming side dish recipe from Gourmet magazine that paired kohlrabi with rough and rugged kale for some interesting vegetable vittles.

First, the kohlrabi is very thinly sliced on a mandolin. Then a marinade is prepared using the zest and juice of two limes, 2 tbsp olive oil, salt, and pepper. The kohlrabi is tossed in this marinade.

Sauteing Kale

On to the kale: two pounds of kale are chopped and wilted in batches with some olive oil and chopped garlic. The kale is then left to cool with a sprinkling of salt. The kohlrabi and kale are combined with a healthy dose of roasted pistachios for some extra crunch.

Kale-Kohlrabi Salad

This was the first time I've ever prepared and eaten both kale and kohlrabi, so I really had no idea what to expect from this side dish. The kale was a very sturdy green next to the softer rounds of kohlrabi. Both just tasted very fresh, especially with the citrus flavors from the marinade. The salty crunch from the pistachios added extra interest as well. All in all, this dish turned out surprisingly well and it made me feel healthy and satisfied.

Wednesday, May 19, 2010

Strawberry Jam

Warning: Anyone who does not find strawberries to be gifts from the heavens, rubies of pure indulgence or seed-studded sensations should pay no attention to the following series of posts. With nine pounds of strawberries in my fridge, I have been having a berry-fest to use all of these wonderful fruits while they're still at their prime. Ever since last year's picking season, I've wanted to make strawberry jam and now that I have the raw materials, I've finally realized this goal.

Jam making is both easy and difficult. Grandmothers have been jamming and canning for generations and passing their bounty (for ill or for good) onto their progeny. But for as straightforward as it can seem, there are many paths that lead to the same goal - spreadable, sweet fruit spread. All jams contain berries (duh), but the rest depends on how much work you want to do. If you want a firmer jam, you need pectin since strawberries have little natural pectin. You also need inhibit the growth of bacteria somehow. There are two main methods used - cold or heat. With cold, you have freezer jam where your end product sits in the freezer. The bitter cold prevents bacteria from growing. With heat, you have to immerse the jars of jam in boiling water for 10ish minutes in order to kill the bacteria either on the jar or in the jam. This method also seals the jar so it is stable at room temperature since it is (nearly) sterile.

I perused the internet to find my path and found it at Pick Your Own. These are step-by-step directions for strawberry jam using the heat method featuring many pictures and charts to help you on your way. I won't detail every step since the author(s) of that website have done a far better job than I (it is very difficult to remember to take pictures when your stirring molten berries or burning yourself with boiling water). I just want to point out some crucial details during the whole process.

First of all, make sure you have all of the ingredients before you start. In most cases this is a no-brainer since you know you need strawberries and most people have sugar on hand. I did not read the directions all the way through and did not see that you need 1-2 boxes of pectin (available in grocery stores by jamming and canning supplies). I would also HIGHLY recommend buying a ladle, a jar grabber and possibly a canner pot. Careful ladling makes the jar funnel unnecessary. The jar grabber is a pair of tongs modified for picking up jars by their necks while they're boiling. Don't assume you can do without because I definitely had to MacGyver a method mid-boil. I also have a very tall soup pot that I used, but a canner might work better if you don't mind another pot hanging around.

Cooking the Jam

I used about 4-5 lbs of berries for 4 large Ball jars of jam. Without additional boxes of pectin, I was not able to get the berries as set as I would have liked, but they still set up pretty well. Plus, skimming excess foam from the berries is a delicious preview of your final product. Feel free to eat as much as you can stomach.

Strawberry Jam

If you're starting from freshly picked berries, it will take a couple hours to clean, cut, cook, and can the jam, but it is so worth it. Think about it this way: I picked my berries at 8:00am and by the afternoon (I took time to see a movie) I had jam. From the vine to the jar to my toast in the same day. You can't get any fresher than that.

Jam on Toast

Wednesday, March 3, 2010

Frozen Greek Yogurt

Greek yogurt is the latest craze to happen to yogurt since fruit-on-the-bottom. It's not for the faint of heart. It's not sweetened up like American yogurts. It's tangy, but thick and luscious. What better base to use to make real frozen yogurt?

Frozen Greek Yogurt
Adapted from Gourmet Magazine. Yields 1 quart.

Ingredients
1 cup sugar
1/2 cup light corn syrup
1/4 cup water
1/8 tsp salt
2 cup Greek yogurt (2% fat)
1 cup buttermilk
5 tsp lemon juice

Directions
Warm the first four ingredients in a small saucepan over low heat, stirring, until sugar has dissolved. Transfer to a large bowl to cool to room temperature, stirring occasionally (or else a film will form on top).

Whisk in remaining ingredients and chill in the refrigerator until very cold, at least 3 hours.

Freeze yogurt in ice cream maker according to manufacturer's instructions. Transfer to airtight container and put in freezer to firm up.

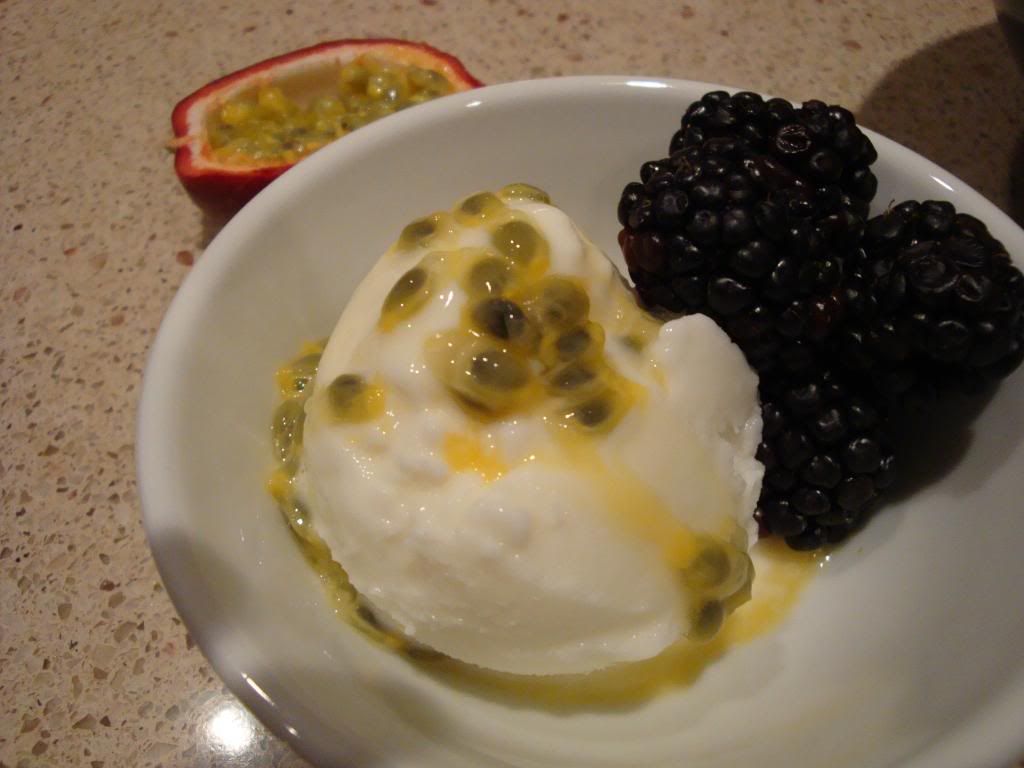
When serving, top with your choice of toppings. I used passionfruit and blackberries, but honey, strawberry jam, chocolate chips, sprinkles, etc. all would work just as well.


Frozen yogurt, like yogurt, has seen a new wave of innovation. All of a sudden, shops are appearing that are not serving frozen yogurt the ice cream substitute, but rather they are serving yogurt-based ice cream. I don't know how we ever lived on icy and flavorless frozen yogurt before this new creation came on the scene. Now you can make your own at home and enjoy the creamy tang. This version is a little sweeter than just straight yogurt, so even those who have not taken to Greek yogurt will enjoy this frozen treat. And if you don't, just douse it in chocolate sauce and still feel proud that you are getting a healthy(er) serving of dairy.

Mojo Pork with Plantains

Ever have one of those recipes where everything seems to go just perfectly? Well I found one in Food Network Magazine.


Mojo Pork Chops with Plantains
Yields 4 servings

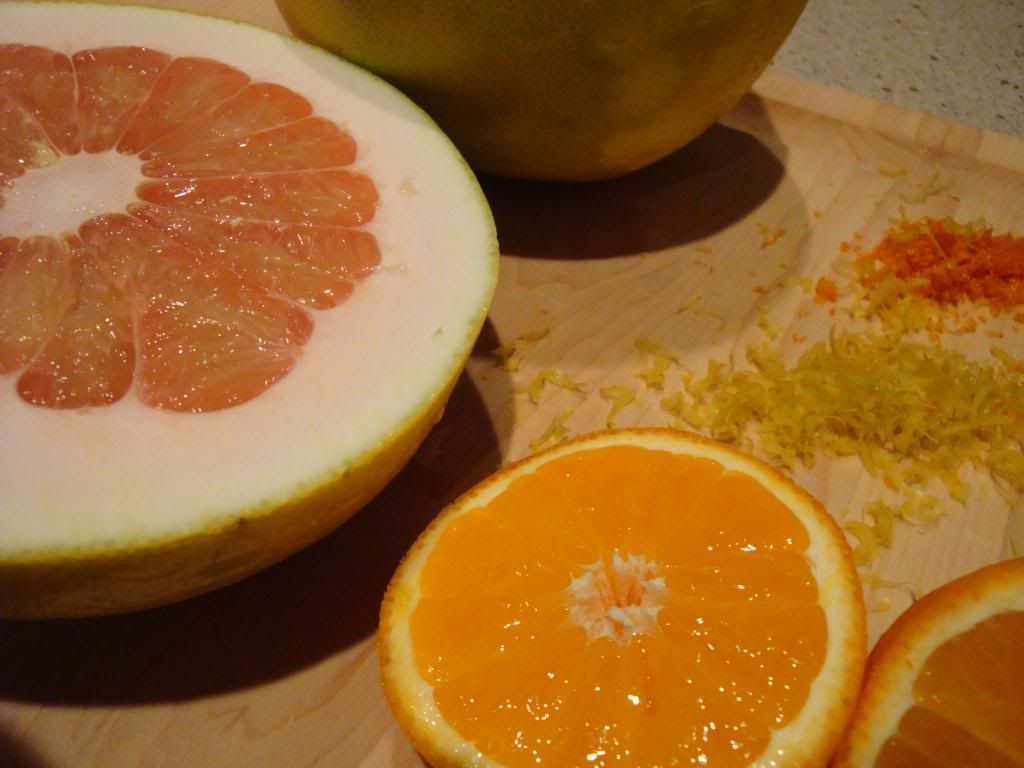
Mix the juice of one orange and half of a grapefruit (I used the pomelo seen above because it's like a sweet grapefruit) with olive oil, white wine vinegar, oregano, cumin, salt and pepper. Immerse the pork chops in this mixture and let them marinate (I let them go for about an hour).

To make the mojo, juice another orange and the other half of the grapefruit and mix in the zests of your citrus, more vinegar, olive oil, oregano, garlic, and freshly chopped parsley.

Boil three skinned and quartered plantains in salted water until they are tender. Drain them and mash with some of the cooking liquid and olive oil. Season with salt and pepper.

Pat pork dry and cook in a skillet over medium-high heat until they are golden on both sides. To plate, drizzle mojo on pork and add the side of mashed plantains.


The marinade tasted just okay when I made it. But after it sat for a little bit and was drizzled on the warm pork, the flavors came to life. The citrus and oregano and garlic stood out and zinged my tongue. I thought using plantains more or less like potatoes to make the plantain mash was just genius. Plantains have that inherent sweetness, even when they are still yellow, that keeps your tongue interested and wanting more. I would make this dish again in a heartbeat, especially if you want to wow someone with your culinary prowess without spending hours in the kitchen.

Roasted Cauliflower

Cauliflower. When most people hear that word, their brains (and tongues) shut down. Who cares about cauliflower? What's so great about it? Throw some ranch dressing on it as an appetizer, then make way for real food. Normally, I agree. Cauliflower just seems to lack a lot. It's light on flavor, calories and color. But, what you may not know is that cauliflower is not as blase as you once thought.


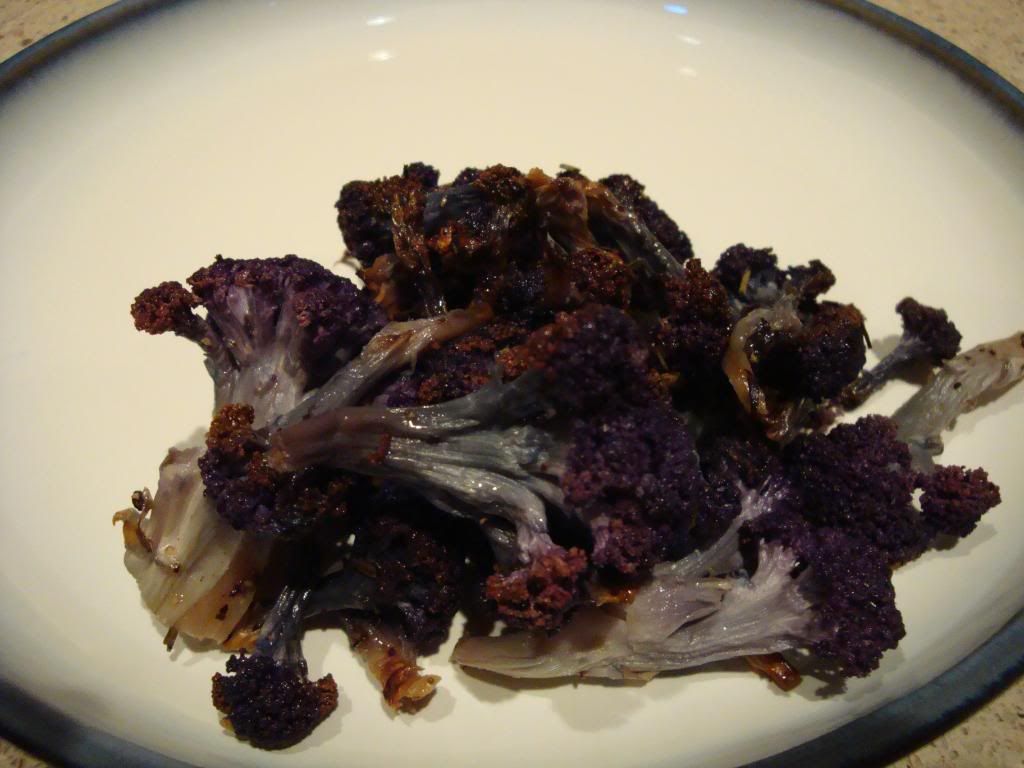
Magical things happen to this vegetable when it's roasted. You are merely one hour away from the best cauliflower you've ever had. Nothing watery and bland. How about sweet and addictive? Cut up your florets and toss them with some olive oil on a sheet pan. Sprinkle on a generous amount of salt, pepper, and whatever spices you want. I used herbs de Provence, but you could easily include some oregano, cayenne, or even curry powder if you are so inclined. Toss it all to make sure it is coated evenly. Then throw the tray into a 400 degree oven for 1 hour to 1 hour, 30 minutes. Be sure to stir it every 20 minutes or so. You are looking for the cauliflower to be browned nicely with most of the moisture gone. Let the cauliflower cool and eat...and eat and eat and eat. I used two heads of cauliflower on the above tray and the resulting roasted florets fit easily in a small casserole dish. I could eat it all too. The roasting brings out the sweeter qualities of this veggie. Roasting leaves behind more concentrated flavors, both from the spices as well as from the cauliflower itself. I'm half tempted to serve it en lieu of popcorn at my next movie night.


But cauliflower is not done with you yet. There's more...


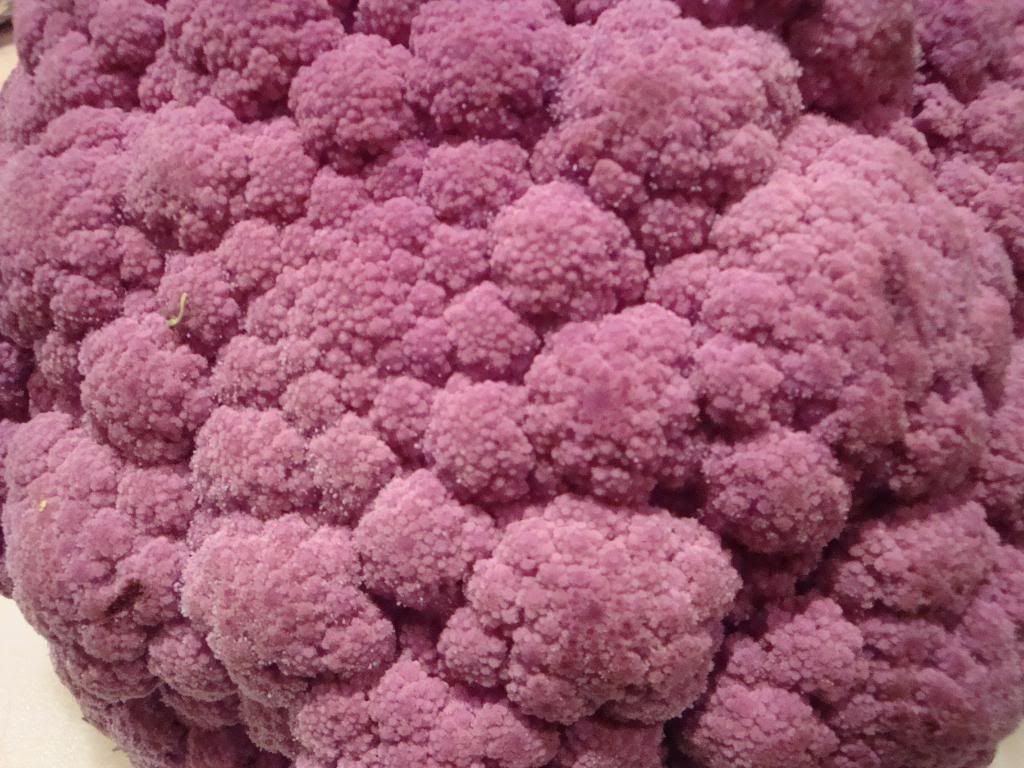
Surprise! Purple cauliflower! I saw it in the store the other day and just had to give it a try. It tastes exactly the same as normal cauliflower, but it just has a purply-blue hue. Now we've solved all of cauliflower's problems. Low on calories is never a problem. By roasting it, it now has some awesome flavor. And with the advent of a purple varietal, the color can finally stand out in pastas, salads or even just on your plate. So please, give this mistreated and misjudged vegetable a second chance.

Wednesday, February 17, 2010

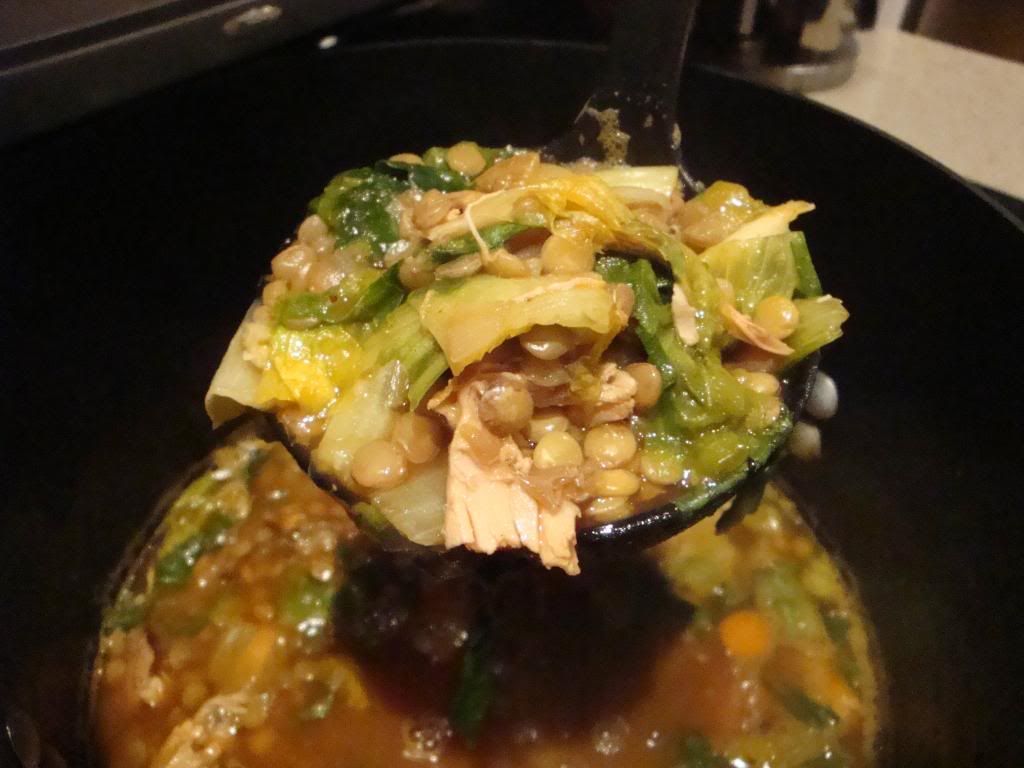
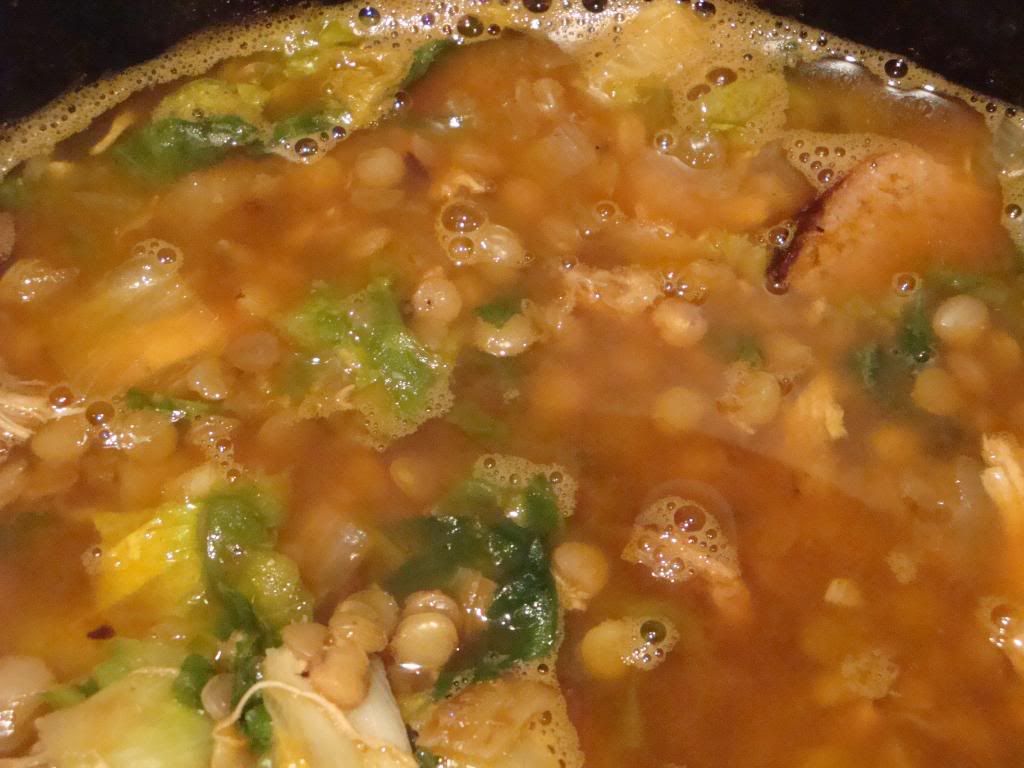
Lentil Soup

The snow is mostly melted here, but the cold is still stuck to us like white on ice. And I'm still in a soupy mood, so that's just what I've been making as of late. My last soup, potato-broccoli-cheddar, is on that edge of healthy and fatty. This soup, however, is definitely on the healthy side, but not at the cost of good, homey flavors.


Lentil Soup
Adapted from Gourmet Magazine.

Ingredients
1 2/3 cup lentils, rinsed
5 cups water
3.5 cups chicken stock
1 bay leaf
4 cloves garlic, chopped, divided
2 tbsp olive oil
1 lb turkey sausage
1 medium onion, chopped
2 medium carrots, chopped
2 tbsp tomato paste
1 cup chicken, cooked, torn
1/2 lb escarole, chopped
1 tbsp red wine vinegar

Directions
Simmer lentils, water, broth, bay leaf, and half of the garlic in a 4 quart pot, uncovered, for 12 minutes.

Heat oil in a wide 6 quart pot over medium-high heat. Cook turkey sausages until cooked through (if raw) or until browned (if pre-cooked). Remove sausages from pan and slice on a bias.

Reduce heat to medium and cook onion, carrots and remaining garlic with some salt and pepper, stirring occasionally until softened, about 5 minutes. Stir in tomato paste and cook for 2 more minutes, stirring frequently. Add the sausages back to the pan along with the chicken and lentils in their cooking liquid. Simmer the soup uncovered until lentils are tender, 3-5 more minutes.

Stir in escarole and cook until tender, about 3 minutes. Stir in vinegar to taste and season with salt and pepper. Discard bay leaf and serve.


This soup turned out quite nice. The original recipe called for uncasing the sausages, but I like to see the nice round slices of meat. And the chicken adds some more protein and texture. The soup overall has a bit of a smokey quality. It's hearty but your spoon will not stick straight up in it. The escarole contributes some more vitamins to round out this as quite a marvelous soup. And what better accompaniment for soup than some freshly baked crusty bread.


My local grocer, Harris Teeter, has a decent selection of freshly baked breads. In addition to the loads of loaves, there are also some take-and-bake selections. If the description isn't enough, here's the gist: you buy some partially-baked bread, take it home and finish baking it in your oven. That way you are guaranteed that the bread is crusty and warm. Be warned, the bread will only last a day or so unbaked before the mold starts to get it, though I think it would hold up in the freezer. Nothing beats all the benefits of fresh bread without the hassle of making it.

Thursday, June 11, 2009

Large Update - 6/11/2009

I have done a great deal of cooking in the last couple of weeks, so without wasting time, let's just start in with it.

Pineapple-Vanilla Jam

I did some apartment-sitting for a classmate while she got to vacation in Tahiti with her husband. She was very thankful and presented me with this gift upon her return. For those that don't speak French, it is pineapple-vanilla jam. The pineapple provides the stable base for the jam and the vanilla gives it a delightfully heady plume of aromatic flavor. It is very delectable on toast and just something different from your run-of-the-mill strawberry jam or orange marmalade.

CSA

My community supported agriculture has been fairly similar over the past weeks. The main features are strawberries, blueberries (not pictured), and lots of squashes: zucchini, Mediterranean zucchini and yellow squash. I accumulated so much zucchini that I had to do this:

Blueberry-Zucchini Bread

Paula Deen makes a mean zucchini bread. I had so much zucchini that I made two batches, which is supposed to make 2 loaves per batch, hence the high productivity. Instead of chocolate chips, I substituted one pint of blueberries in each batch. I also doubled up the spices (cinnamon and nutmeg) in the first batch and added some cardamom and ginger powder in the second batch. All in all, I made one large loaf, 4 mini-loaves, 4 large muffins and 6 regular muffins, all of which were delicious. On a random note, the blueberries turned the bread slightly blue-green instead of purple.

Brownie-Filled Chocolate Chip Cookies

On the subject of Southern cooking, Southern Living had on the inside cover of their latest issue something I could not resist making. They may look like normal chocolate chip cookies, but trust me, they're huge. Each has half a cup of dough in it. Plus, the real surprise is in the center: the cookie contains a brownie. That's right, Southern Living managed to stuff a baked good inside of another baked good. These treats are a tremendous endeavor to eat, but well worth it, even if you feel like you have to take a nap or hit the gym right afterward.

Polenta French Toast

Mom came into town for a visit and her birthday, so I/we did quite a bit of cooking and baking. For breakfast, I managed to find this wonderful gluten-free recipe care of Martha Stewart. You prepare one batch of polenta (with an hour of frequent stirring), adding in some milk, maple syrup, orange zest, cinnamon, and raisins. You then pour the polenta into baking dishes and let it set overnight. In the morning, you slice up the set polenta and pan-fry it until golden brown. Top it with maple syrup and some fresh North Carolina blueberries (or whatever state you happen to be in). For those who cannot eat toast, and even for those who want something out of the ordinary for breakfast, this is the perfect recipe. Just be warned that this is one of the more involved breakfast setups, but it can be well worth it.

Chocolate Pavlova

Mom brought a recipe with her to make a chocolate pavlova, also care of Martha. Pavlova is pretty much like a giant meringue cookie. This one was in the shape of a bird nest, filled with a chocolate mousse, then topped with whipped cream and chocolate shavings. This dessert had it all: chewy, creamy, crunchy, chocolate. This is a great way to end a meal with a cup of coffee on the side.

Flourless Chocolate Beet Cake

For Mom's birthday, I made this interesting flourless chocolate beet cake. You shred some beets, cook them in agave nectar until tender, then stir in some cocoa powder and some other additives, bake it for twice as long as the directions say, et voila! a cake. We topped it with some whipped cream and served it. It looks like we tried to make a red velvet cake but only got halfway there. The cake itself is a deep red-brown with a dense, moist, chocolate flavor and a subtle hint of beets, but definitely in a good way.

Funfetti Cake

Lastly, I've started a cake decorating class at Durham Technical Community College. Yesterday was our first chance to work on a cake. Above you can see the Funfetti cake I made for the class.

Decorated Cake

Two problems arose while decorating the cake. First, I did not want to make a full cake just for this class, so I used a box cake, meaning an overly moist work surface. Second, I did not own 6" cake pans, so I just cut down my cakes from 8", all without using a guide or measuring tool of any kind. End result: the whimsical cake.

Disaster Cake

I was slightly embarrassed by the cake at first, but I still wanted to bring it into my lab for everyone to eat. But my buttercream was not quite up to snuff. I probably needed another cup or so of confectioner's sugar in it (it already had 10 cups in it), so it slowly oozed down the sides of the cake. The end result: the top layer slipped off the bottom layer in a giant mess. So next week, I will stop cutting corners and shoot for the moon.

Friday, May 8, 2009

A Sweet Interlude - 5/8/2009

Amidst all of this cooking, there was definitely time for some sweet treats.

Congo Bars

Very briefly, since I refuse to give away the recipe, are congo bars, to which I may have made mention in previous posts. My version of these chocolate chip cookie bars came out decently chewy, especially since I undercooked them by about 5 minutes.

Orange Jell-o

Another simple family recipe makes a tasty and relatively healthy dessert. Adding canned pineapple and sliced bananas to orange Jell-o is satisfying on most nights. A dollop of Cool Whip really makes it, though.

Coconut Rice Pudding

A not so healthy dessert is rice pudding. I've been searching high and low over the years for a good recipe and I finally have one. Too bad it involves three cans of coconut milk. But the pudding comes out creamy, the rice is tender but not mushy and the coconut (both cooked and toasted) make the flavor of the vanilla bean hit home.
GF PB-CC Cookies

Mothers' Day is this weekend and here is the sneak peak at what I sent my mom (hopefully she won't see this until she's already eaten some). My mom cannot eat gluten products, so I do my best to find recipes for treats for her to enjoy that she would normally not be able to eat. This recipe straight out of Southern Living uses only peanut butter, chocolate chips, vanilla, egg, and baking soda. And yet the cookies form a dough easily and look like normal chocolate chip cookies. Plus peanut butter always makes things better. So if you're looking for a tasty gluten-free treat or just want to forgo the flour, try these easy cookies.

Tokyo Banana

A member of my lab brought in this international treat called Tokyo Banana. It's a bit like a banana-shaped twinkie with banana-flavored filling. I love Japanese treats because they are usually decent in quality and very innovative. Even better are the descriptions on the packaging: "People gather to TOKYO from here and there with memories of their home. And then, Tokyo gets everyone's home town."

Tokyo Banana Cross-section