Showing posts with label Desserts. Show all posts

Sunday, October 24, 2010

Peanut Butter-Filled Chocolate Cupcakes

I love cupcakes. The idea itself is genius. I would like a piece of cake that I can eat with my hands. Wherever, whenever. With a cupcake you are one paper wrapper away from a small indulgence. So, for the hell of it, I decided to open up one of my cupcake books and give this recipe a whirl (or rather, a swirl).

Peanut Butter-Filled Chocolate Cupcakes
Makes 12 cupcakes. From Martha Stewart's Cupcakes

Ingredients
Cupcakes
2/3 cup flour
1/2 tsp baking powder
1/4 tsp salt
1/2 cup unsalted butter, cut into small pieces
4 oz semisweet chocolate, coarsely chopped
2 oz unsweetened chocolate, coarsely chopped
3/4 cup sugar
3 large eggs
2 tsp vanilla extract

Peanut Butter Filling
4 tbsp unsalted butter, melted
1/2 cup powdered sugar, sifted
3/4 cup smooth peanut butter
1/4 tsp salt
1/2 tsp vanilla extract

Directions
Preheat oven to 325 degrees F. Line a muffin tin with paper liners. Whisk together flour, baking powder and salt. Put butter and chocolates in a heatproof bowl of a double boiler; stir until melted. Alternatively, microwave butter and chocolates in 10-15 second bursts, stirring in between, until melted. Cool slightly.

Whisk sugar into the chocolate mixture. Add eggs and whisk until mixture is smooth. Stir in vanilla. Add flour mixture and stir just until incorporated.

Swirling the Cupcakes

Prepare peanut butter filling by stirring together all ingredients until smooth. Spoon 2 tbsp chocolate batter into each paper liner, followed by 1 tbsp peanut butter filling. Repeat with another tbsp chocolate batter, and top with 1 tsp filling. Swirl top of cupcake batter and filling with a toothpick.

Bake until a cake tester inserted comes out clean, about 30-40 minutes. Transfer tin to a wire rack to cool completely.

PB-Filled Chocolate Cupcakes

There are two keys to making this recipe work. Firstly, remember that this is a chocolate cupcake filled with peanut butter, not a swirl cupcake. The difference is not much, but the peanut butter filling will not bake into a cake texture. Instead it stays pretty separate from the chocolate cake. Secondly, the directions are written in a very exacting Martha Stewart style. But if you follow them, you'll end up with a tasty end-product. If you're going to indulge, then chocolate and peanut butter is a great way to do it. While chocolate is always a good thing, adding peanut butter makes these cupcakes more sumptuous and rich. You may be glad you only have this mini-cake to eat per serving, because a full-sized cake of this sort would be a meal unto itself.

Thursday, October 21, 2010

Coconut Cake

Coconut seems to be one of those flavors that someone either loves or hates. I'm partial to almost all flavors, especially in sweets. But I'm still amazed by people who will run for the trashcan when they bite into a coconut truffle from a chocolate sampler. Coconut is a wonderful substance in all its forms, whether it's a pina colada or a macaroon. It has a toasty nuttiness when it has been browned and a sweet chewiness when it has not. It is the perfect companion to fruits, nuts and chocolate.

A newer member of my lab had a birthday recently. She had previously mentioned loving a coconut cake from a Thai restaurant in her home town, so I set out to find a recipe that would make a reasonable facsimile.

Coconut Cake
Makes 8-10 servings. Adapted from Darlene Schmidt.

Ingredients
For the cake
6 eggs
1.5 cups coconut milk (not lite)
7 tbsp sweetened shredded coconut
1 cup sugar
1/8 tsp salt
1 cup butter, melted
2 cups flour
4 tsp baking powder
For the icing
3 egg whites
1 cup sugar
1/2 tsp cream of tartar
1 pinch of salt
2 tsp coconut extract
1 cup sweetened shredded coconut, toasted

Directions
Preheat oven to 350 degrees. Grease two 9" cake pans, line bottoms with parchment and grease parchment.

Stir the coconut into the coconut milk and set aside to soak.

Separate egg whites from yolks. Place the whites in a medium mixing bowl. Beat egg whites with an electric mixer until stiff peaks form. Set aside.

Place yolks in a large bowl. Add sugar, salt and melted butter. Beat to a smooth consistency for about 1 minute.

Combine baking powder and flour. Add the flour mixture and coconut mixture to the yolk mixture. Beat 1-2 minutes with an electric mixer until well combined, about 1-2 minutes. Fold in the beaten egg whites into the batter. Pour batter into prepared pans and bake 30-40 minutes until a toothpick inserted in the center comes out clean. Cool completely.

To make the frosting, prepare a double boiler by placing a medium metal or glass bowl over a pan of simmering water (note - don't let the water touch the bowl). Combine egg whites, sugar, cream of tartar, and salt in the bowl. Start beating this mixture using an electric mixer at low speed. Gradually over 5 minutes, continue to beat while incrementally increasing the speed to high. Add the coconut extract as you move to the high speed and beat to combine. Remove from heat.

To assemble, place the first layer of cake on a serving plate. Top with a generous amount of icing, spreading to the edges. Place second layer on top. Cover the cake with the remaining icing (it doesn't have to be perfect). Lastly, cover the entire cake with the toasted coconut.
Coconut Cake

This cake is quite amazing. It has every form of coconut you could imagine save climbing a tree and chopping down a fresh one. The coconut meat, milk and extract all add layers of flavor and complexity to this very moist cake. The frosting tastes like a light coconut marshmallow and gives the cake a very dreamy quality. Though this cake is not for the coconut haters at your work or among your friends, for us coconut lovers it is a celebration of a delicious tropical "fruit."

NC State Fair 2010

State Fair Menu

It's time for the North Carolina State Fair! Between the State Fair and the Renaissance Fair, fall is one of the best times of the year. Once the weather breaks and the sweltering heat stops, it's time to eat to your heart's content, hit the rides until you feel sick, win some prizes, then start all over again. The newest feature at the website is that you can search for any of the rides/games/food that you want. That way you can build a map of all the places you want to go on your visit. If you are iPhone-inclined, they also have an app for that. Here are my favorite food finds from this year's fair:

Roasted Corn

We started the day light with an ear of roasted corn. The ears are roasted en masse until the husk is charred. They are served up plain or dipped in melted butter. Then you have your choice of various toppings, including but not limited to salt, pepper, lemon-pepper, poultry seasoning, Parmesan cheese, and mayonnaise. The corn tastes great and it may be one of the healthiest items you find at the fair, certainly the only one that came directly off a plant.

Chocolate-covered Bacon

Chocolate-covered bacon was a big hit at last year's fair and it is back and as good as ever. The bacon itself is crisp and salty-sweet. It is dipped in a thick layer of good chocolate, then topped with sprinkles or other decorations. It is a little expensive for a single piece of bacon, but you won't be complaining once you bite through the chocolate shell. Just be sure to get your bacon from Steph's Strawberries as some of the other versions fall short on Steph's level of quality.

Attack of the Giant Gummies!

GGB of Raleigh has their first stand at the fair, selling the world's largest gummies. They are famous for their 5lb gummy bears and now offer a variety of other treats including a 3lb gummy worm that is about 2 feet long, gummy shot glasses, gummy tongues, and smaller 1lb gummy bears on sticks that come in about 10 flavors. Unfortunately, my stomach did not let me try these intriguing confections, but if you can find some friends to share, this would be a great novelty.

Koolaid Pickles

One of the most intriguing new offerings at this year's fair are Koolaid pickles. Before you gag at the thought, hear me out. The vendors take a jar of Mt. Olive bread'n'butter pickles, dump out the brine, and put in some red Koolaid. The outside of the pickles is a bright red color, but the interior of the pickle is that same odd shade of green. I've never been a fan of bread'n'butter pickles, but this version was actually quite tasty. The Koolaid sweetened the pickles up just a tad and made their flavor more interesting. If you're feeling adventurous (which you should be at the fair), buy a set of these pickles and see what you think. If all else fails, you can just throw them at one of the game stalls and see if you win a prize.

Fried Food Fest

State Fairs from Texas to North Carolina are known for bringing the best and worst in fried foods. The Lone Star State takes the cake (or Twinkie) when it comes to fried food. Vendors compete for the best new fried food, inventing such odd offerings as fried Coca Cola, fried beer, and even fried butter. Many of these new ideas get to the NC State Fair, and the popular ones like fried Oreos become permanent parts of the menu.

Chocolate Obsession Funnel Cake

Can a funnel cake be gourmet? Yes, yes it can. Funnel cakes have long been part of fairs. A batter is streamed into fry oil and allowed to cook until a puffed nest forms. Some vendors top them with a thick layer of powdered sugar. But the newest addition to this lineage is the gourmet funnel cake, coming in 6 flavors like apple and chocolate obsession (pictured above), which is a chocolate funnel cake topped with chocolate syrup, chocolate chips, powdered sugar, and whipped cream. It is truly decadent and very difficult to stop eating. One drawback of most funnel cakes is that after a few bites you're pretty much tired of the taste of fried batter, but these gourmet cakes keep you wanting more even after you've cleaned your paper plate.

Fried Chips Ahoy and Honeybun

The newest of the things-you-thought-they-would-never-fry category are the fried Chips Ahoy and the fried Honeybun. The Chips Ahoy, much like the fried Oreo, becomes much softer in the fryer, but it brings a lot less flavor than that chocolate cookie. All you end up with is a piece of fried batter surrounding some chocolate chips. The Honeybun, on the other hand, was marvelous. There is a lot of fried batter to get through with it, so it is best to split this behemoth. The Honeybun is heated in the frying process, making it taste absolutely delicious and wonderfully moist.

Krispie Kreme Bacon Cheeseburger

The last new item that is definitely worth mentioning was by far my favorite food at this year's fair. It is the *brace yourself* Krispie Kreme Bacon Cheeseburger. If it sounds gross, wait for it. Burger + bacon + random unnecessary toppings + cheese + 2 Krispie Kreme donuts = pure bliss. If you've ever had a McGriddle from McDonald's, this monster is very similar. It is mostly sweet with a bit of savory in the middle from the burger and cheese. The bacon unites it all (because let's face it, bacon is magical and can bring people together). Like many foods at the fair, I split this with a group of people, but this was the only food I was sad that I could only eat my share and not the entire thing. This burger was transcendentally wonderful and if you can't get to the fair to have one this year, you should make it at home.

The fair, overall, was a monumental success. Not only am I still an ace at the water-shooting games, but I went home feeling fully satisfied that I had eaten the best of this year's fair. If you live in the area and have time between now and Sunday, go to the fairgrounds. It does not matter if there are throngs of people. All that matters is that you have the chance to enjoy this unique slice of the American lifestyle.

Saturday, August 21, 2010

Mixed Berry Pandowdy

Berry season is about at an end with the last of the fresh blueberries disappearing quickly and the rest of the berries are but a memory. A Southern classic with berries and, really, any fruit, is a cobbler. But to celebrate these small fruits, I wanted something a little out of the ordinary.

It turns out that cobblers are but a small subset of desserts that all have two-layer (fruit and cake) construction. Whether it's a cobbler, grunt, slump, brown betty, buckle, sonker, crisp, or crumble. The major distinctions that separate these varieties is the preparation of each layer. The fruit can be sauteed or baked. The cake layer can be crumbly, biscuit-like or cakey. Flip the layers and, technically, it's a pie. From all of these, I went for a recipe for a mixed berry pandowdy, where the berries are left whole and covered with a cake batter and baked until done.

Mixed Berry Pandowdy
Adapted from Elle's New England Kitchen, makes 6-8 servings

Ingredients
Berries:
5-6 cups mixed berries
3 tbsp maple syrup
1/2 tsp cinnamon
1/2 tsp nutmeg
Pandowdy:
1 cup flour
1/4 cup sugar
2 tsp baking powder
1/2 tsp salt
1/2 cup milk
1 egg
6 tbsp unsalted butter, melted
2 tsp vanilla extract

Directions

Berry Mixture

Preheat oven to 350 degrees F. Lightly grease a glass 2 quart baking dish (about 12"x7"). Place berries in baking dish and drizzle with maple syrup. Sprinkle with cinnamon and nutmeg and toss to combine. Bake berries for 15 minutes.

Meanwhile, whisk the flour, sugar, baking powder, and salt in a medium bowl.

After the berries have finished baking, whisk milk and egg together in a small bowl. Stir in the butter and vanilla. Stir this wet mixture into the flour mixture and pour over the hot berries. Spread out the batter with a spatula. Return to the oven and bake for 25-30 minutes or until lightly brown and a toothpick inserted into the cake comes out clean.

Mixed Berry Pandowdy

Cool for a bit, then scoop into bowls while it is still warm. The servings will be messy no matter how you do it, so you may as well give into the rustic nature of the dish. Add a touch of vanilla ice cream if you wish.

Pandowdy Bowls

The great part about this dessert is that it lets the berries shine through. In theory, the best way to enjoy berries is fresh and plain or with yogurt or whipped cream. In reality, who does not love a great berry dessert that lets the berries do their thing. The cake on top of the berry mixture is not overly sweet and helps to contrast the intense berry taste with some plain vanilla cake flavor and texture. Plus the fruit looks beautiful studded onto the canvas of the cake. This dessert has all the makings of a summer favorite - quick, easy, light, and tasty.

The Treats Truck - NYC

While the food truck business has been booming in Durham this past year, the idea started in cities like New York. One truck we tracked down is The Treats Truck. Having seen the truck on TV, we knew we wanted to find it in real life.

The Treats Truck

The truck publishes its tentative locations and times on its website, so it's generally pretty easy to track down. The desserts we were most excited about were the dessert brownies (cookies covered in chocolate, brownies and various other toppings) and the ice cream cone cupcake (cupcake placed into a sugar cone). When we arrived and had the full menu at our disposal, though, it was hard to decide. Some free samples of wonderful raspberry brownies did not help and neither did the plexiglass window offering a view of all the baked goods to be had.

Cran Almond Crispy Square

The first treat we selected was a cranberry-almond crispy square. It was literally a hunk of a cereal treat that was made for adult tastes by the addition of dried berries and nuts. Simply wonderful.

Treat Truck Cookies

On the left in the above picture are two peanut butter cookies sandwiched around chocolate filling. They were everything a PB cookie should be - crumbly, buttery, nutty, sweet. The chocolate did not hurt either. Lastly, I chose an oatmeal cookie made into a large thumbprint with a dollop of apricot jam. The cookie was good and the jam brightened its flavor to make for a sumptuous whole.

The owner, Kim Ima, was kind, gracious and pleasant to talk to, especially by New York standards. When she found out that we were from out-of-state, she made sure to recommend some places in the city we should visit. While there are fleets of food trucks from which to eat, the Treats Truck should be one you find for a nice afternoon pick-me-up in the city.

Carnegie Deli - NYC

The adventures in New York City continue! I love immersing myself in the cultural traditions of whatever area I visit. Even with all of the various cultural influences in any metropolis, there are some foods that are decidedly New York. One restaurant that I love to visit that serves a classic NYC menu is The Carnegie Deli. This eatery is nearly three-quarters of a century old, but the food is as fresh and tasty as you'll find anywhere in Manhattan. This restaurant is a typical New York-style deli with obvious Jewish influences (matzoh balls and knishes are proudly displayed at the long to-go service counter). They keep the food straightforward (simple is too, well, simplistic) but never compromise on flavor.

After sitting at our table in the middle of the hustle and bustle of a Sunday morning, we perused the menu for a while, trying to find the one thing we would order among the myriad of deletable possibilities. If they ever invent a bottomless stomach, it would make choices like this so much easier. Meanwhile, piles of sliced meats kept passing our table and immense cakes spinning in a cooler case were visible from my seat, a prelude of tastes to come.

Pickle Appetizer

After you order, a huge pile of pickles appears at the table. These Kosher dills are beautifully pickled, not as much as the ones in the store. They are perfectly crisp but packed with garlic acidity. Pickles at 11am does not usually sound like a good idea, but it's hard not to partake. When in Rome...

Hot Pastrami Sandwich

Unlike most restaurants, this deli does not attempt to have all entrees reach the table at the same time. If you order one of their sandwiches, it will be out faster than you can spell "gefilte fish." They slice the hot deli meats to order. I ordered hot pastrami on rye, which was about 5-6 inches tall in the middle of the sandwich. Most of the sandwiches passing by were combinations of hot pastrami and corned beef that were twice as thick as mine, but I decided to get the "lite" version. The meat was sumptuously warmed and just melted in your mouth from the marbled fat throughout. I had to eat half the meat with a fork, but that was not a problem. If you make food tasty enough, it does not matter how you have to eat it. Once the sandwich was manageable, I applied a smidge of deli mustard to the bread and devoured this hand-held wonder in short order.

Blintzes

The other entree we ordered which came out about 10 minutes after the sandwich was a trio of blintzes. This breakfast fare is a little like a sweet burrito. The shell is very thin and a bit crispy. The innards can be a variety of flavors and we selected cheese (a sweetened ricotta-like cheese filling) and strawberry (tasted more fresh than the saccharine berry gel you buy at the store). Both types had an amazing flavor that really is a must if you've never tried them.

Blueberry Cheesecake

As if all that was not enough, I was not going to leave without some dessert. While the Carnegie Deli's sandwiches and entrees are awesome, they have some of my favorite New York-style cheesecake in all of Manhattan. Cheesecakes come in many flavors, but the major difference between them all is texture. Some are more gritty from the incorporation of ricotta. Others are very dense (a la Cheesecake Factory) or crumbly. But in New York, you find the richest, creamiest, dreamiest cheesecake known to mankind. The Carnegie Deli makes cheesecakes in this traditional fashion, even including some fruit on top in case you need some antioxidants. It is hard to describe just how astonishingly creamy this cheesecake is, but it's almost like eating a block of sweetened, flavored cream cheese. The crust is tender enough to add a little different texture to the cake, but it does not distract you from the goods in the center of your slice. The deli sells cheesecakes from 6" to 12" in a few different flavors. They will even ship the cheesecakes overnight to anywhere in the country. The next time I'm in the mood, I might do this instead of going all the way to New York for a slice.

The Carnegie Deli is a wonderful experience that showcases New York's traditional food offerings. Like many institutions on the island, the walls are covered with signed photographs of various celebrities (we had Bret "Hitman" Hart watching over us during our meal). The restaurant is open from 6:30am until 4am and it can get quite busy during peak hours. Try to find an off time to go if you don't want to wait in line. And you can always arrange for a Carnegie Deli package to come to you via Fed-Ex.

Thursday, August 19, 2010

Magnolia Bakery - NYC

GPS is a wonderful invention. Especially now that with a decent smart phone (and a good cell signal), you can make your way around any city with ease. That is how we managed on our recent trip to New York City. One benefit of this technology, as we discovered, is that it can help you discover places that you did not know were there. That is how we stumbled across one of the Magnolia Bakery storefronts while meandering on Bleecker Street.

Over the past 14 years, the Magnolia Bakery has become a New York institution. Some credit the cupcake's recent rise in popularity to this bakery. Walking into the store, they have a "self-serve" section just for their cupcakes.

Magnolia Bakery Cupcakes

You can find all sorts of varieties including, but not limited to, chocolate, vanilla, red velvet, and lemon. The frostings appear in a range of colors with the very interesting decoration style that almost makes the cupcakes appear like they have nests on top. Some festive white sugar orbs finish off the cakes to give them a sophisticated but playful look.

Magic Cookie Bar

We, however, opted to buy some goodies out of the huge display cases. We ordered a refreshing, unsweetened, raspberry iced tea to sip on while we perused the dozens of cakes, cookies and other goodies. The banana pudding and hummingbird cake looked incredible, but I wanted something smaller. The first item I chose was the magic cookie bar. On top of a graham cracker crust sits a dense combination of coconut, nuts and chocolate chips. The cookie bar was definitely sweet, but not cloyingly so, which is often a flaw in this type of treat. It was very delicious and I made short work of it.

Red Velvet Cheesecake

By far, my favorite dessert was the most surprising - red velvet cheesecake. Somehow, the bakers have infused a light, creamy (likely no-bake) cheesecake base with the earthy chocolate flavor and ruby red of the Southern classic. This cheesecake tasted just like the original cake and it did not feel immensely heavy. It sat atop a thick Oreo cookie crust to give it some extra chocolate crunch. A dollop of whipped cream and some chocolate shavings on top made the cheesecake look especially appealing.

Not only did my phone help me find this incredible bakery by total happenstance, but I was able to see that they are great at more than just cupcakes. You can see evidence of this in the park across the street where patrons sit beneath the trees to enjoy their various sugary treats. Though if I lived in the city, I'm sure a dozen cupcakes would follow me home whenever I stopped by.

Saturday, July 17, 2010

Lime-Pistachio Angel Food Cake

For years, I said I would never make an angel food cake from scratch. I swore up and down that it was so much easier to buy a box mix. I prefer to make most cakes from scratch, but boxed angel food cake is so convenient. However, every once in a while, you get that urge to go back to basics.

Bon Appetit Magazine had a great recipe for a lime angel food cake covered with crushed pistachios. It is very lengthy and detailed, so follow the link for the full recipe. I will simply outline the overall steps. Firstly, you have to use very fine ingredients. You want the cake to be as light as possible with a moist, soft texture. To that end, you combine four-times-sifted cake flour, superfine sugar and whipped egg whites with a little vanilla and lime zest. Be careful when mixing these ingredients. Their delicate nature means that things could easily go awry. Carefully fold the dry ingredients into the whipped egg whites so they don't lose their air or volume. Simultaneously, you have to make sure the dry ingredients are thoroughly mixed in. I undermixed at this stage, so my cake ended up with the occasional pocket that was less cakey and more sticky and chewy. It was not a terrible problem, but it definitely detracted a bit from the overall experience.

Lime Angel Food Cake

Next is the easy part - baking the cake. Then you allow it to cool completely. Be sure to a) use an angel food cake pan with a removable insert, and b) invert the pan after cooking. If the cake is not inverted, it will collapse because it does not have enough structure. Also take care if you put the cake atop a bottle to cool because it will be very top heavy.

Lime-Pistachio Angel Food Cake

You could probably stop here if you really wanted. The cake would be delicious by itself or with some fresh fruit or whipped cream. But to go the extra mile (since you've already worked so hard to sift, beat and otherwise coax your ingredients to form a beautiful cake), you make a lime simple syrup to act as the glue to hold the crushed pistachios all over the cakes surface. Lastly, you drizzle a lime glaze over it all.

It is definitely true that making an angel food cake from scratch is a bit of an ordeal compared to a white or chocolate cake. You have to spend more time and take more care to ensure that everything turns out just right. But in the end, you get to control what goes into the cake. You get to flavor the batter. Plus, you avoid all of the additives put into cake mixes. I think this cake turns out a lot lighter and airier in texture compared to the boxed mixes. It feels like you are eating a cloud. The lime flavors that permeate the cake as well as in the glaze add a fresh fruitiness. The pistachio flavor is more diffuse and the small nut bits add a little crunch to the outside. Overall, I'd say this cake was a heavenly success.

Sunday, July 11, 2010

Mithai

I love an adventure, especially one for the feet and for the tongue. I was recently taken on a small road trip over to a Little India section of Cary, NC. After a delectable lunch of curried eggs (hard-boiled eggs served in a spicy red curry), we went to the store that was the purpose of our pilgrimage. The Mithai House of Indian Desserts is named after the word for all of the lovely little finger food desserts they serve.

Mithai's Refrigerator 1 Mithai's Refrigerator 2

The store has a simple interior, with a couple tables, a sales counter and a three-door refrigerator filled with sugary delights of every shape, size and color. They also offer sweetened and flavored yogurts as well as some other more savory foods if your tongue needs a break. Most of their food comes in plastic containers, ready to follow you wherever you go. I wanted to try everything, but had to settle for a few choices that I made nearly at random.

Kuju Katri

Literally only containing two ingredients (cashews and sugar), these trapezoids are called kuju katri and are dense, with a strong sweetness and a weak nuttiness. The inside is a bit mealy. They are good and different than any dessert I know of (the same is true for all three), but I'd be amazed if you could handle the sweetness of more than one of these in one sitting.

Gulab Jamun

Gulab jamun are fried milk balls that are then soaked in a sweet syrup. The syrup saturates this confection, but in a nice way. They are a little soggy, but retain their spheroid shape perfectly well. In some ways, I feel this dessert and the previous one were so packed full of sugar that you condense all the sugar your sweet tooth can handle in a small dessert. Many other desserts make you want more and more until you feel sick, but I could see eating just one of these confections after a meal and feeling satisfied.

Rasmalai

Lastly, rasmalai are a bit different from the other two. Instead of being super-sweet, this dessert is almost under-sweetened. They are milk-based with a texture that is a bit more gritty/cheesy than I was expecting. They are soaking in a lightly sweetened milk and sprinkled with pistachios. These bites were also good and would make a satisfying finish for a spicy Indian meal.

I really like to see how other cultures deal with their food, especially desserts. I will likely return to Mithai to try more of their desserts since they have so many to offer.

Tuesday, June 15, 2010

Food Truck Fiesta & Daisy Cakes

As a follow-up to my previous post on Indian Food on Wheels I looked into the origins of food trucks. Meals on wheels as we know them are the current incarnation of mobile foods. For instance, in the 1800s chuckwagons were part of wagon trains to feed cowboys and other workers out on the prairie. Chuckwagons may also have originated from the mobile kitchens in the battlefield. Later, in the twentieth century during the manufacturing boom, workers would line up at food trucks for sandwiches and burgers before going back on the line. Now in the next millennium, these food trucks are a new means of bringing food to the foodies.

Durham does very well in this new food fad. We have several trucks that move to different locations to serve up various vittles. And a couple of weeks ago, many of these trucks met up in one spot to circle the food wagons and unleash their culinary bounty en masse.

Food Truck Fiesta

Among the vendors present were Daisy Cakes with their cupcakes and other sweets, Only Burger, Indian Food on Wheels, Bulkogi Korean food, a crepe truck, a comfort food truck, and a smoothie/coffee truck.

Food Truck Fiesta

As you can see, the lines for this extravaganza were quite long. I waited in one line for about 20 minutes to get a cupcake, after which I gave up and went home. The trucks ran out of food in two hours, meaning this event was a monumental success for the vendors. But for the customers, it was not that great of an experience. The mercury was pushing 90 degrees F that day with very long lines.

Red Velvet Cupcake

The only fruit of my labor was a single red velvet cupcake from Daisy Cakes. The cake was moist with a just-sweet-enough cream cheese frosting on top. I'm disappointed that I don't have more to add about this food fest, but that may have to wait until the next food truck roundup.

Sunday, May 23, 2010

Banana "Ice Cream"

How many recipes that you know of have exactly one ingredient? Not many I would suspect. Even if you are just sauteing some spinach, you still need oil, salt and other seasonings to make it interesting. Well I have finally found a one-ingredient dessert that is as healthy as grabbing a piece of fruit.

Banana "Ice Cream"
Makes approximately 4 servings

Ingredient
4 bananas

Frozen Banana Slices

Directions
When the bananas are to the ripeness you like, slice them up. Either place them in a plastic container or lay them out individually on a baking sheet and put them in the freezer. With the baking sheet method, you obviously need more space, but you will also avoid the problem of the slices sticking together. After the bananas are frozen, be sure they are moved into an airtight container until you are ready to make dessert. This is also a good method for preparing bananas for smoothies that avoids adding tons of ice to the mix.

When you're ready to finish the recipe, remove the bananas from the freezer. Transfer the slices to a large food processor. Turn on the food processor and let it run until the bananas form a smooth paste. This will be very loud at first as your food processor struggles against the icy bananas, but soon it will chop them into a lot of small bits that will start to melt and meld together into the final product. Remove the pureed frozen bananas, place them in an airtight container and place back in the freezer to firm up, at least 30 minutes.

Banana Ice Cream

Remove the "ice cream" from the freezer and scoop into bowls. I recommend one scoop as a good serving size since it seems that you get four servings from pureeing four bananas. The one drawback of this very simple method is that the ice cream can be a little dense and icy. Since we did not use an ice cream maker to slowly freeze and churn the bananas, larger ice crystals can form. But if you let the ice cream sit out for a couple minutes, it will soften up. Other than that, this is one of the healthiest desserts I've ever made. It involves no addition of other sources of calories and it is 100% fruit. You taste nothing but unadulterated banana goodness. No fake flavors here (think Laffy Taffy) or strange additives. This is the perfect treat if you are watching your calories or if you want a break from overly processed foods.

Banana Ice Cream with Strawberry Jam

If you do want to add some interest, feel free to doctor up this recipe as you wish. You can make a sundae out of it or just add your favorite ice cream accompaniment. I added some of my homemade strawberry jam, but you can use chocolate sauce, whipped cream, nuts, maybe even peanut butter if you're so inclined. Granted, this does deter from the healthiness of this dessert, but you start with a healthy base so a few more calories won't hurt, right?

Strawberry-Lime Cupcakes

With the close of strawberry season, this will be my last in this series of berry-inspired eats. I stumbled across this cupcake recipe a few years ago and knew I would make it some day because it combines some of my favorite flavors. I just had to wait for the right place (Durham) at the right time (the peak of berry season). When making a recipe that showcases a particular ingredient, you want to get it at its prime. So now this fruit treat has come to fruition.

Strawberry-Lime Cupcakes
Adapted from Food Network, makes 6 large cupcakes

Ingredients
Cupcakes
1.5 cup flour
1.5 tsp baking powder
1/4 tsp salt
2 eggs
2/3 cup sugar
3/4 cup unsalted butter, melted
2 tsp vanilla extract
1/2 cup milk
Icing
1 1/3 cup powdered sugar
1.5 tbsp lime zest
2 tbsp lime juice
1 drop green food coloring
Assembly
6 strawberries, hulled
Mint

Directions
Preheat oven to 350 degrees. Grease a jumbo muffin tin with cooking spray. Whisk flour, baking powder and salt together in a medium bowl.

Using a standing mixer or an electric beater, beat the eggs and sugar until light and foamy, about 2 minutes. While beating, gradually add the butter and vanilla. Turn mixer to slow and gradually add half the flour mixture. Mix in all of the milk, then the other half of the flour mixture. Divide batter evenly amongst muffin cups.

Bake cupcakes until a toothpick inserted in the center comes out clean, 25-30 minutes. Remove from oven and cool in the tin for 10 minutes, then remove and cool completely on a wire rack.

To make the icing, whisk the powdered sugar, lime zest and lime juice in a medium bowl. You can add more lime juice if your icing is still too thick to spread. Mix in food coloring to make a pale green color.

Inserting the Strawberry

Use a paring knife to cut a cone out of the center of the cupcake. Don't worry if it takes a couple of tries to get the hole big enough. Just be sure not to cut all the way through the cupcake. Insert one hulled strawberry into the opening.

Hiding the Strawberry

Cover the strawberry with part of the cupcake that was removed. I took the cone of cake and cut off the top part to help hide the berry. This does not have to be that pretty or complete as you have icing to hide any imperfections.

Strawberry-Lime Cupcakes

Spread the icing over the tops of the cakes. Try to make it as even as possible. Garnish with mint leaves, if desired.

Hidden Strawberry Surprise

The end result is a large, delicious treat bearing a hidden surprise inside. I prefer to keep my baked goods a mystery, especially when they are stuffed with something and let tasters find it on their own. The cake itself is a simple white cake with good sweetness and vanilla flavor. The lime icing really brings it all together with a sweet-tartness to accentuate the berry and add interest to the cake without overwhelming it with too much sugar. If you use the mint, it adds an almost mojito like taste to the cupcake, which now makes me want to try making a mojito with strawberries muddled together with the mint. I would definitely make these if you want to wow some friends, family or coworkers. These cupcakes are an excellent coup de grace for what has been a delicious whirlwind of a strawberry season.

White Chocolate Strawberries

One of the classic and elegant ways of preparing strawberries is to simply dip them in chocolate. In fact, I don't believe I've ever had a chocolate-berry combination that I did not like. And another of my goals for this season's haul was to make my own chocolate-dipped strawberries. Had I known this was so easy and tasty, I would have been doing this myself years ago.

White Chocolate Strawberries

White Chocolate Strawberries with a Twist
From Bon Appetit, makes 16

Ingredients
2 tbsp sugar
1/2 tsp orange zest, chopped
1/2 tsp lemon zest, chopped
6 oz white chocolate, chopped
16 large, ripe strawberries

Directions
Line a baking sheet with foil or a silicone mat. Using fingers, mix sugar and citrus zests in a small bowl until well mixed. Be sure to chop the zest, otherwise you'll end up with larger globs of this citrus sugar that aren't as appealing to the eye.

Melt chocolate either over a double boiler (in a glass bowl set over a saucepan of simmering water) or in short bursts in the microwave. Stir to be sure it is smooth.

Hold strawberry by its leaves and dip into chocolate. Allow excess to fall off the berry. Turn berry pointed-end-up and sprinkle with the citrus sugar. Place on baking sheet. Repeat with remaining berries. Chill in the fridge until the chocolate sets (room temperature just doesn't do the trick).

The best part about these berries is that the citrus really livens the flavor of the berry. I've come to appreciate that when pairing strawberries with other flavors, it is a good idea to play off of their bright zestiness. Champagne pairs well because of the effervescence. Citrus flavors, particularly lime and orange, go very well with berries too. A balsamic vinegar-based sauce is also an excellent option. In this recipe, the white chocolate (a more subdued chocolate since it is more vanilla than cocoa) provides a nice base for the citrus, both in structure and in taste. The citrus is more subdued than I originally thought, so it does not overwhelm the senses and allows the chocolate and the berries to shine through. If you're not in the mood to bake a dessert, these berries are a quick crowd-pleaser.

Sunday, May 9, 2010

Chocolate-Mango Whoopie Pies

Mangoes are in season right now and they are life-changingly good. I was slicing one the other day and one taste sent me into a frenzy. Before I knew it the flesh was gone and I was gnawing on the pit. I went out and bought a whole slew of mangoes and, while I was elbow deep in one, I thought to myself, "What else could I do with one of these beauties?" One idea came to mind: whoopie pies!

Chocolate-Mango Whoopie Pies
Adapted from 13 Bakery, makes about 12 pies
Cakes
1.75 cups flour
3/4 cup cocoa powder
1.5 tsp baking soda
1/2 tsp salt
1/2 cup butter, softened
1/2 cup sugar
1/2 cup brown sugar
1 cup milk
1 egg
1 tsp vanilla extract
Filling
1 mango, peeled, diced
1 tbsp grated ginger
1 tbsp sugar
1/2 cup butter, softened
8 oz cream cheese, softened
1 tsp vanilla
3 cup powdered sugar

Preheat oven to 375 degrees and cover a cookie sheet with parchment paper or a silicone mat. Whisk together flour, cocoa powder, baking soda, and salt.
In medium bowl, cream together butter and sugar until light and fluffy, about 2 minutes. Add the egg and beat to combine. Beat in milk and vanilla. Beat in flour mixture just until combined.

Using an ice cream scoop, drop mounds of batter onto cookie sheet. Try to keep the mounds as round and even as you can because the pie halves will retain whatever shape you give them at this point. In other words, if you make ugly mounds, you'll get ugly pies. Bake 8-12 minutes until top springs back when touched. Cool completely on wire rack.

For the filling, start by cooking the mango in a saucepan over medium heat. Add grated ginger and sugar and cook mixture until the mango is soft. Cool completely. Beat the butter and cream cheese until well combined and fluffy. Add in vanilla and mango mixture and beat until combined. Gradually beat in powdered sugar until mixture is smooth. Feel free to add more powdered sugar if you want a stiffer filling.

To assemble the pies, spread a large dollop of the filling on the bottom of one of the pie halves. Then affix another pie half on top of this (the round sides should both be facing out). I'll leave the quantity of filling to be used up to you since some people like theirs oozing over the sides while others prefer a more modest amount.

Chocolate-Mango Whoopie Pies

These pies were very good. The chocolate in some respects overwhelmed the mango in the middle, but mango definitely made its presence known. Perhaps some sort of ginger or spice cake on the outside may be better next time, but chocolate is the classic flavor. Plus, everyone loved these whoopie pies. They did not quite elicit the yells of "Whoopie!" like the story of this dessert's Amish roots, but that may be because everyone had their mouth full.

Saturday, March 27, 2010

Guinness Chocolate Cupcakes

This update is a little slow in coming, but I was proud of the results so here's my contribution to the St. Patrick's Day festivities: Guinness chocolate cupcakes with Bailey's Irish cream frosting.

Guinness Chocolate Cupcake

I have wanted to use Guinness in a baking recipe for a couple of years, so when I saw this post from Le Petit Pierogi, I knew I had found my opportunity. She gives a good recipe on her page, so I won't bother to copy it here.

Christmas

For decorating, I must first ask a holiday riddle: what is Christmas without the red?

St. Paddy's Day

The answer is St. Patrick's Day! I received some Christmas-themed sprinkles around the holidays and I thought I could repurpose them. I plucked out the red sprinkles to make a topping appropriate for this holiday.

Guinness Cupcakes

The beer flavor mostly cooked out of the cupcakes. A couple people claimed they could taste it a bit, but for the most part the Guinness just accentuated the chocolate and kept the cakes moist. The frosting was a little more alcoholic. Even though only a few tablespoons of Irish cream go into the buttercream, the flavor is pretty intense. The pairing of chocolate and Irish cream, though, is marvelous. These little treats disappeared pretty quickly among my green-clad colleagues. So the next time you have a leftover stout, go ahead and throw it into a cake for a new Irish experience.

Wednesday, March 3, 2010

Immune Cell Cupcakes

This post will be brief in that it is more about making a treat look good than it is about the actual cooking.


Last week one of my classmates took her prelim, the exam that determines if you are a tried-and-true PhD candidate. She works on immunology, so a friend and I decided to make her some sciency cupcakes. The cakes themselves are Pillsbury Funfetti and the frosting is a basic buttercream with some lemon extract mixed in. After choosing our designs and colors, we went to town. We made T-cells, B-cells, follicular dendritic cells (the giant octopus-thing above), antibodies, and even a little mouse cartoon. I mostly wanted to share this picture because it shows that with a little thought you can impress your friends and family with simple pandering to their tastes. Mom will love a cake with her favorite flowers on it, even if they are a little roughly (read "rustically") done.

Frozen Greek Yogurt

Greek yogurt is the latest craze to happen to yogurt since fruit-on-the-bottom. It's not for the faint of heart. It's not sweetened up like American yogurts. It's tangy, but thick and luscious. What better base to use to make real frozen yogurt?

Frozen Greek Yogurt
Adapted from Gourmet Magazine. Yields 1 quart.

Ingredients
1 cup sugar
1/2 cup light corn syrup
1/4 cup water
1/8 tsp salt
2 cup Greek yogurt (2% fat)
1 cup buttermilk
5 tsp lemon juice

Directions
Warm the first four ingredients in a small saucepan over low heat, stirring, until sugar has dissolved. Transfer to a large bowl to cool to room temperature, stirring occasionally (or else a film will form on top).

Whisk in remaining ingredients and chill in the refrigerator until very cold, at least 3 hours.

Freeze yogurt in ice cream maker according to manufacturer's instructions. Transfer to airtight container and put in freezer to firm up.

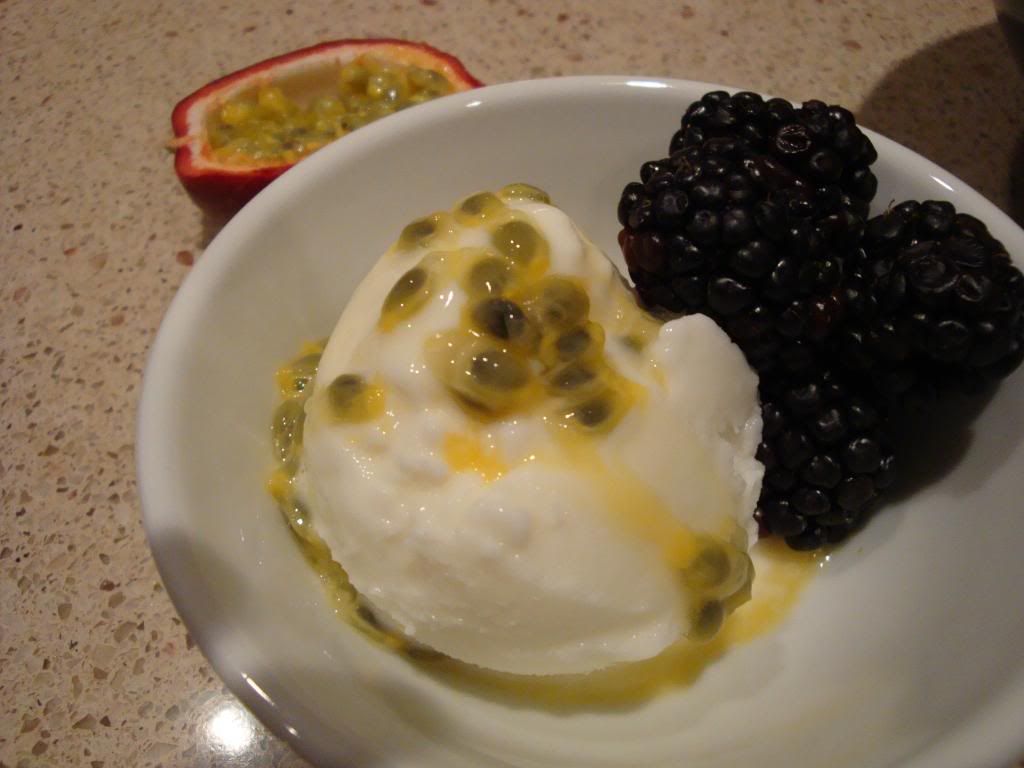
When serving, top with your choice of toppings. I used passionfruit and blackberries, but honey, strawberry jam, chocolate chips, sprinkles, etc. all would work just as well.


Frozen yogurt, like yogurt, has seen a new wave of innovation. All of a sudden, shops are appearing that are not serving frozen yogurt the ice cream substitute, but rather they are serving yogurt-based ice cream. I don't know how we ever lived on icy and flavorless frozen yogurt before this new creation came on the scene. Now you can make your own at home and enjoy the creamy tang. This version is a little sweeter than just straight yogurt, so even those who have not taken to Greek yogurt will enjoy this frozen treat. And if you don't, just douse it in chocolate sauce and still feel proud that you are getting a healthy(er) serving of dairy.