Showing posts with label Breakfast. Show all posts

Sunday, August 15, 2010

Homemade Yogurt

The health benefits of eating yogurt are fairly well known. If you eat a kind with live cultures, it can help your digestion. Not to mention that it is full of calcium and people who tend to eat more dairy products have better overall health. I became interested in making my own yogurt for two reasons. Firstly, I have worked with bacteria myself and I wanted to see what it would be like to use them at home. Secondly, if you start reading the ingredients in store-bought yogurts, you see that there is a lot more in those cups than just milk and bacteria. They use all sorts of stabilizers, thickeners and sweeteners to attain the proper consistency, flavor (Boston cream pie? really?) and shelf-life. With the rise in popularity of Greek yogurt, I've grown more accustomed to thick, tangy yogurt that does not need a lot of sweeteners (real or artificial). So with that, I set out on my quest to make homemade yogurt.

After some internet perusing, I found that most people buy yogurt makers to help incubate their cultures at the proper temperature until they are ready. It seems it is more difficult to get everything right on your own, but it is doable. For my first batch, I heated 1 quart of whole milk to 140 degrees F on the stove, then allowed it to cool to 110 degrees F. At this point, I mixed in a few heaping tablespoons of the starter culture (plain yogurt with active cultures). Be sure to blend the yogurt in well. If you want, you can use a small portion of the heated milk to thin out the yogurt, then add this mixture into the rest of the milk for easier mixing. Let this sit on the counter for 16-24 hours. The longer it sits, the more firm and tangy it will become. I had a moderate success with this version, though my yogurt did not set up to a rich, thick density as I had hoped.
Milk Lineup

The next step was to turn this initial pilot study into a full fledged experiment. Luckily for me, my local kitchen store was having a sale, so I got a Donvier electronic yogurt maker for a decent price. The maker comes with 8 individual cups that contain a nice size serving of yogurt. This gadget may not be ideal for making a large quantity of yogurt, but it works for my needs.

Yogurt Experiment Setup

I had heard that milks with a higher fat content made a thicker yogurt. So my first experiment was to see if this was true. I chose eight different milks: soy, skim, 1%, 2%, whole, half-and-half, heavy cream, and chocolate. The directions are pretty much the same as for the counter-top yogurt above, though the machine came with a handy thermometer that tells you when to add the starter culture. I ran the machine for 11 hours, then put the yogurt in the fridge for 12 hours.

Yogurt Experiment Results

The overall trend was that milks with lower fat content formed looser yogurts, but this was not 100% true across the board. Soy and skim milks produced very soft yogurts with a sharp tang. 1% milk made a yogurt similar in consistency to Yoplait with a decent tang. 2% and whole milk were a bit thicker and I noticed that as the fat content increased, the overall smoothness of the yogurt also increased. Heavy cream, which I expected to be even thicker, was almost as liquidy as skim milk and it just tasted very fatty.

Half-and-half Yogurt

Half-and-half, on the other hand, turned out very thick, almost like Greek yogurt. It was smooth and creamy with a good balance of tang.

Chocolate Yogurt

The real surprise of the group was chocolate. It had a thickness more like whole milk (they have similar fat contents), but the taste was amazingly earthy. The bacteria consumed the high sugar content of the milk (30g/cup compared to 13g/cup in whole milk) and left the chocolate flavor behind. So you end up with an unsweetened chocolate yogurt that was quite delicious. I may make it again at some point as a surprising dessert.

While I did have my answer, I was sad to learn that I would have to eat half-and-half yogurt to get the consistency I wanted. So next I turned to tricks to thicken up the yogurt. Many people recommend adding skim milk powder to the initial mixture to add thickness. Lastly, you can strain your yogurt through a coffee filter or paper towels set in a colander in a large bowl to collect the water. I did this with my first batch of yogurt and found I had a delicious, thick yogurt at the end. The only problem with this method is that you end up losing about 1/3 to 1/2 the volume of the yogurt and you also condense the caloric content. If you read the yogurt containers, they add either gelatin (not vegetarian) or agar (from seaweed, so it's vegetarian) to thicken up the yogurt. On subsequent batches, I have bloomed a 0.25oz package of gelatin in 1/4 cup of water, then added this to the yogurt. The result was very firm, so I will likely use only about half of a package in the future, but the gelatin definitely did its job.

Yogurt and Granola

There's nothing more satisfying than a meal for which you have made everything from scratch. One of the few ingredients you cannot buy at the store is a sense of accomplishment, and yet it is one of the best ways to make your meal taste ten times better. Homemade yogurt with homemade granola may sound simple, but you get a lot more joy crafting everything yourself than you do buying it in the refrigerator section. So go ahead, start playing with some bacteria.

Thursday, July 29, 2010

Granola

Granola is a word that can conjure many images. I often think of it as a cereal that requires a lot of work to eat. It can also evoke ideas of "hippies" and "rabbit food." Other people are quite enamored with the cereal mix and make it part of their daily lives. I think granola suffers from a large amount of variability in preparation. Some make it into extra crunchy bars. Others keep it more bland and soft. They can contain nearly any ingredient, from antioxidant-filled dried blueberries to less-than-healthy chocolate chips and candies. The only solutions are to either keep trying bag after bag until you find the one you like or craft your own to your personal preferences. Here is how, in under an hour, you can make your own tasty granola.

Granola
Yields 5 cups. Adapted from Bon Appetit magazine.

Ingredients
3 cups old-fashioned oats
1 cup coarsely chopped pecans
1/2 cup unsweetened coconut
3 tbsp brown sugar
3/4 tsp ground cinnamon
1/2 tsp ground ginger
1/4 tsp salt
1/3 cup honey
2 tbsp vegetable oil
1/2 cup dried cherries
1/2 cup dried strawberries
1/4 cup chopped dates

Directions
Preheat oven to 300F. Line a rimmed baking sheet with parchment paper.
Mix together the first seven ingredients.

Granola, Step 1

Mix honey and oil in a saucepan and cook over medium-low heat until smooth, about 3 minutes. Pour this mixture over the oat mixture and toss to coat evenly. Spread this on the prepared baking sheet. Bake for about 40 minutes until golden brown, stirring every 10 minutes. You can remove the pan from the oven earlier if you want your granola softer or leave it in longer if you want it more crunchy.

Granola, Fresh from the Oven

Allow the granola to cool completely. Stir it occasionally as it cools to ensure that clumps don't form (unless you like large clumps, then let it cool undisturbed). Stir in the dried fruit and enjoy.

Strawberry-Cherry Granola

The versatility of this recipe makes it hard not to like it. I got to put one of my favorite fruits (strawberries, in dried form) into this batch, but I could easily see many other ingredients in the mix. Nearly any nut would be great, as would pumpkin seeds, sunflower seeds, other cereals, any dried fruits, and, if your sweet tooth is acting up, various candies. I enjoyed this granola immensely, probably moreso than any other version I've tried. Part of it is, undoubtedly, that I made it with my own two hands and I knew that there were no strange chemical additives. The other part is that I tailored it to my tastes. This version was more simple, but has been great as a snack or for breakfast with milk. I will definitely make other versions of this granola in the future and it may become a delightful staple in my diet.

Saturday, June 19, 2010

A Tale of Two Muffins: Orange-Peanut Butter & Carrot-Raisin

This month, I'm in charge of bringing breakfast for my lab-mates on Friday mornings. I like to break from the usual bagels or ho-hum store-bought coffee cakes, so last week I took a different route - homemade muffins. This is by no means groundbreaking, but it is rare that anyone makes anything with their own two hands for our TGIF meal. So just to make it extra special, I decided to make two muffins. One sumptuous, indulgent and surprising; one healthy, fresh and wholesome.

Orange-PB Muffins

Orange-Peanut Butter Muffins
Makes 12 servings

Ingredients
1/4 cup canola oil
1/3 cup honey
1/3 cup chunky peanut butter
1/4 cup orange marmalade
1 large egg
1 cup fresh orange juice
1.5 cups flour
1/2 tsp baking soda
1/2 tsp salt

Directions
Preheat oven to 400 degrees F. Spray a standard-sized, 12-cup muffin pan with non-stick cooking spray; set aside.

In an electric mixer, beat together the oil, honey, peanut butter, orange marmalade, egg, and orange juice.

In a medium bowl, whisk together flour, baking soda and salt. Gently beat in flour mixture into PB-orange mixture just until incorporated.
Divide batter among greased muffin cups. Bake for about 20 minutes or until a toothpick inserted in the center comes out clean. Cool in muffin pan on wire rack for 10 minutes, then remove from pan and allow to cool completely.

These muffins turned out quite deliciously. The oil and peanut butter give the muffin a smooth, moist texture. The peanut butter and orange are in harmony on your tongue, neither pounding you over the head with their individual flavor, but instead both blending into the background. These could also make a great cupcake with any number of frostings (off the top of my head I could think of vanilla, peanut butter, orange, honey, cinnamon, or chocolate, but the possibilities are endless).

Carrot-Raisin Muffins

Carrot-Raisin Muffins
Makes 12 servings

Ingredients
1 cup flour
1/2 cup whole wheat flour
1/2 cup sugar
2 tsp baking powder
1/4 tsp salt
1/2 tsp ground cinnamon
1/4 tsp ground allspice
1/4 tsp ground nutmeg
1/2 cup unsweetened applesauce
1/4 cup canola oil
2 large eggs, lightly beaten
1 large carrot, peeled and shredded
1/2 cup raisins

Directions
Preheat oven to 400 degrees F. Spray a standard-sized, 12-cup muffin pan with non-stick cooking spray. Set aside.

In a large bowl, combine flours, sugar, baking powder, salt, and spices.

Using a standing mixer, beat applesauce, oil and eggs. Add shredded carrot and raisins and beat mixture until well combined. Stir in flour mixture just until incorporated. Divide batter among 12 muffin cups (about 2/3 full). Bake about 15-20 minutes until a toothpick inserted in the center comes out clean.

Cool in pan on a wire rack for 10 minutes. Remove from pan and allow to cool completely.

This may sound weird, but of these two muffins, the carrot-raisin were my favorite. Don't get me wrong. I'm a huge peanut butter fan. But when I think muffin, these beauties are what I imagine. The tops are rough and rugged, emphasizing the extra fiber from the whole wheat flour within. Instead of more oil, unsweetened applesauce makes the muffins moist. The carrot and raisin provide their own sweetness and nutrients to the mix. You could easily add some nuts or sunflower seeds to these. If you're so inclined, the addition of some rolled oats could make these into granola muffins. And for all of their nutritional good, they also play nice with your taste buds, imparting their fresh flavors.

Cupcake Courier

As an aside, I want to mention my newest kitchen acquisition - the cupcake courier. I've seen various people carrying these and they really are a good idea. I bought mine from Amazon. Not only can it carry three dozen muffins or cupcakes in three stacked layers, but as you can see from the picture, it even separates the layers with enough room to decorate the cupcakes. In the past I've used the disposable foil bake-ware from the grocery store, but even then you often can't get all of your cupcakes in one tin. It does take up some extra storage space in my house, but it's well worth it.

Both of these muffins are delicious in their own particular ways. When it comes down to it, even without getting into food preferences, these two muffins offered my co-workers their own ways for starting their Friday. If you need that boost of sugar and feeling of luxury on your lengua to trick yourself into finishing the week, then there's a muffin for that. If you like to start your morning feeling healthy and empowered, there's a muffin for that. Now I just need to figure out how to make a muffin that can wash the dishes.

Wednesday, May 19, 2010

Strawberry Jam

Warning: Anyone who does not find strawberries to be gifts from the heavens, rubies of pure indulgence or seed-studded sensations should pay no attention to the following series of posts. With nine pounds of strawberries in my fridge, I have been having a berry-fest to use all of these wonderful fruits while they're still at their prime. Ever since last year's picking season, I've wanted to make strawberry jam and now that I have the raw materials, I've finally realized this goal.

Jam making is both easy and difficult. Grandmothers have been jamming and canning for generations and passing their bounty (for ill or for good) onto their progeny. But for as straightforward as it can seem, there are many paths that lead to the same goal - spreadable, sweet fruit spread. All jams contain berries (duh), but the rest depends on how much work you want to do. If you want a firmer jam, you need pectin since strawberries have little natural pectin. You also need inhibit the growth of bacteria somehow. There are two main methods used - cold or heat. With cold, you have freezer jam where your end product sits in the freezer. The bitter cold prevents bacteria from growing. With heat, you have to immerse the jars of jam in boiling water for 10ish minutes in order to kill the bacteria either on the jar or in the jam. This method also seals the jar so it is stable at room temperature since it is (nearly) sterile.

I perused the internet to find my path and found it at Pick Your Own. These are step-by-step directions for strawberry jam using the heat method featuring many pictures and charts to help you on your way. I won't detail every step since the author(s) of that website have done a far better job than I (it is very difficult to remember to take pictures when your stirring molten berries or burning yourself with boiling water). I just want to point out some crucial details during the whole process.

First of all, make sure you have all of the ingredients before you start. In most cases this is a no-brainer since you know you need strawberries and most people have sugar on hand. I did not read the directions all the way through and did not see that you need 1-2 boxes of pectin (available in grocery stores by jamming and canning supplies). I would also HIGHLY recommend buying a ladle, a jar grabber and possibly a canner pot. Careful ladling makes the jar funnel unnecessary. The jar grabber is a pair of tongs modified for picking up jars by their necks while they're boiling. Don't assume you can do without because I definitely had to MacGyver a method mid-boil. I also have a very tall soup pot that I used, but a canner might work better if you don't mind another pot hanging around.

Cooking the Jam

I used about 4-5 lbs of berries for 4 large Ball jars of jam. Without additional boxes of pectin, I was not able to get the berries as set as I would have liked, but they still set up pretty well. Plus, skimming excess foam from the berries is a delicious preview of your final product. Feel free to eat as much as you can stomach.

Strawberry Jam

If you're starting from freshly picked berries, it will take a couple hours to clean, cut, cook, and can the jam, but it is so worth it. Think about it this way: I picked my berries at 8:00am and by the afternoon (I took time to see a movie) I had jam. From the vine to the jar to my toast in the same day. You can't get any fresher than that.

Jam on Toast

Wednesday, March 10, 2010

Vin Rouge Brunch

Continuing my goal to explore the Triangle's best bruncheries, we wandered over to 9th Street in Durham. Vin Rouge is already known for good dinners, but their brunch should not be underestimated.


First up are the eggs Mediterranean, which are scrambled eggs with smoked salmon, shallots and capers. These fillings make for fairly salty eggs, but the eggs made a nice vehicle for the salmon and capers. The side of pommes frites helped to balance out the flavors. Just so you feel a little healthier, there's also a simple side salad. A good breakfast, but it pales in comparison to our other entree.


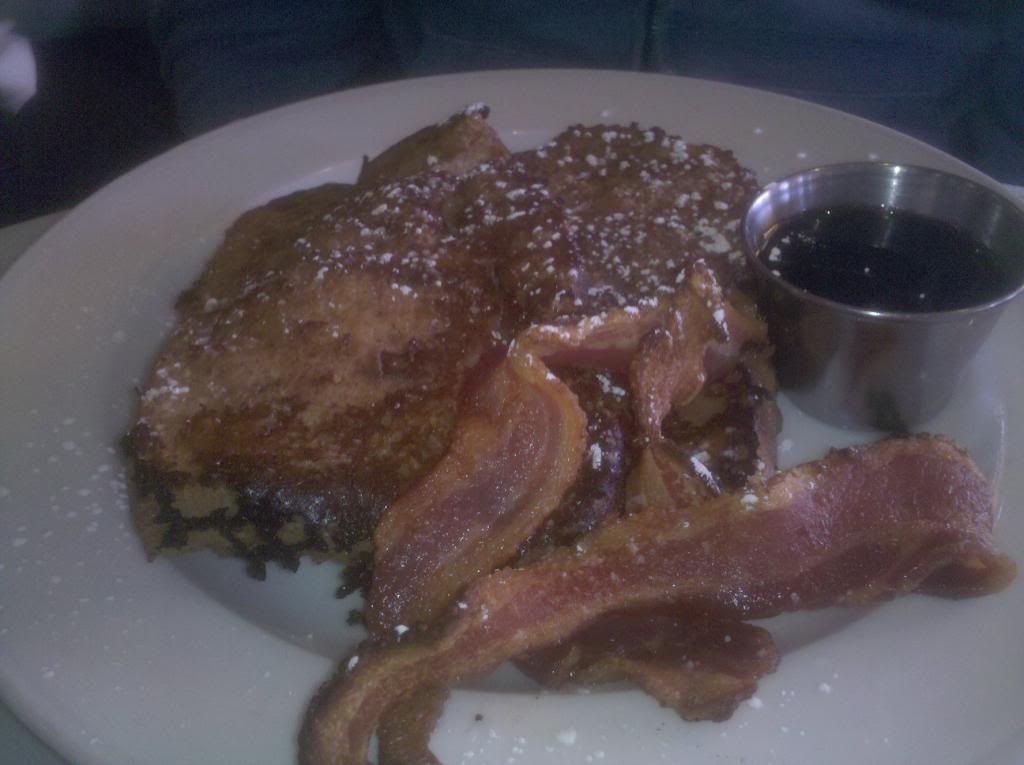
Vin Rouge serves some unbelievable French toast. Their bread is baked as these large rounds, so they take one slice and cut it in half to make a huge portion of French toast. Crisp yet soft on the inside with cinnamon and maple syrup, this brunch staple is probably one of the best French toasts I've ever had, not to mention the bacon on the side.

A word of advice to the Sunday bruncher: be sure to make a reservation or be prepared to wait. While Elmo's next door may have a larger amount of traffic, Vin Rouge does get very busy shortly after they open. You can make reservations online, which would probably save a lot of time. Their electronic seating system seems confusing, even to the staff. In the end, we only waited 15 minutes for a table, but just keep this in mind when planning your lazy Sunday morning.

Tuesday, March 9, 2010

Ye Olde Waffle Shoppe

Recently, Sunday mornings have become one of the most relaxing times of my week. I sleep in as much as I can. After waking up, I putz around the web and the house, not trying to accomplish anything except not trying to accomplish anything. Then, once my stomach is fully awake, I begin to ponder what I want for breakfast. Sunday is a day that some restaurants in town take off, but there are many that open for breakfast and/or brunch. I'm usually a huge proponent for at least 3 meals a day, but starting with a rich meal around 11am or noon makes it difficult to justify two more meals before the day is over. So when it comes to Sunday brunch, I'm looking to go all out. And this past weekend, that is exactly what I got at Ye Olde Waffle Shoppe in Chapel Hill.

You have two options for going to Ye Olde Waffle Shoppe: get there early or wait. This restaurant is on the main street of Chapel Hill, Franklin Street, right across from UNC campus, so it is very popular, especially amongst the church-going crowd. The restaurant is very deep but not very wide. In the front are some bar seats that are first come-first serve and great if you're dining alone or if you are lucky enough to find a couple open seats. The remainder of the restaurant are smaller booths either next to the open kitchen or clustered in the back half of the building. There are some Old English decoration features in the back, but this eatery is a Southern diner through and through. We were extremely fortunate to arrive during a lull time and were seated in 5 minutes, just before a line 20-30 people deep formed.


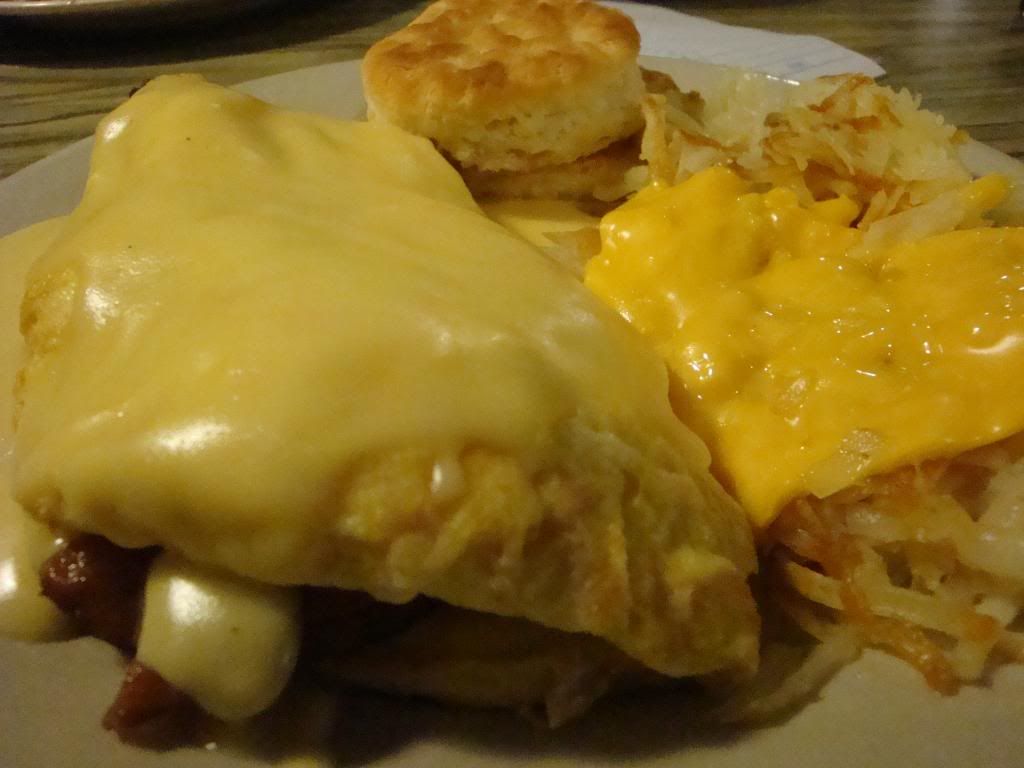
Firstly, we had an omelet (I think it was called the Big Bird). Three eggs wrapped around sliced turkey, bacon and tomato, covered in cheese sauce. On the side were cheese-covered hash browns and a biscuit. The omelet tasted great. The cheese sauce seemed a little much at first, but it really brought the omelet together, especially since it had no cheese on the inside. The biscuit was good, though nothing special considering this is the South. Hash browns were classic and perfect: crunchy outside with tender inside.


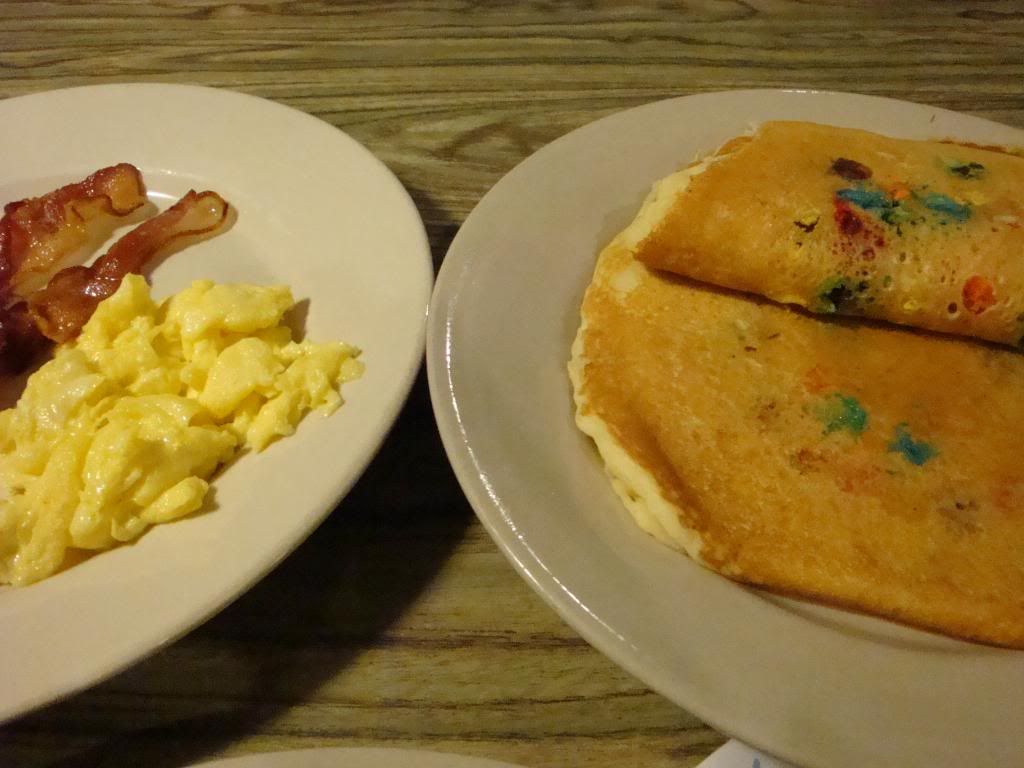
The other meal we had was a pancake combo with scrambled eggs and bacon. But the most interesting feature is this: the pancakes were filled with M&M's! The candies melt into the pancake, giving it the taste of a chocolate chip pancake, but the candy coating gives it an indescribable quality that makes you want to order another stack of these rich beauties. The menu also claims they can use Reese's Pieces in the pancakes as well, so we might be going back to Ye Olde Waffle Shoppe soon to do a side-by-side comparison of these candy-filled griddle cakes.

Monday, January 11, 2010

Honey-Clementine Corn Muffins

Clementines

Clementines are in season. You can find them at your local grocery store in a wood carton containing about 50 of these little orange delights. The ones I had are called Cuties with some punny little stickers on them. So the next few recipes that I'll be posting will be clementine-derived. So if anyone is fighting about of scurvy, these recipes should make you right as rain.

Muffin Sandwich

Honey-Orange Corn Muffins
Unknown Source

Ingredients
Cooking spray
1 cup cornmeal
1 cup flour
3 tbsp baking powder
1/2 tsp salt
1 large egg
1/4 cup honey
3/4 cup clementine juice (orange works too)
3/4 cup vegetable oil

Instructions
Grease and flour a 12-cup muffin tin. Pre-heat oven to 400 degrees. In a large bowl, combine cornmeal, flour, baking powder, and salt, mixing well; set aside. In a medium bowl, beat egg, then mix in honey, juice, and oil. Add liquid mixture to the dry mixture. Stir until all the flour is wet, but avoid overmixing. Fill muffin cups approximately 3/4 full. Bake 15-20 minutes or until edges are golden and a toothpick inserted into the center comes out clean. Allow to cool completely in pan, then remove.

Corn Muffin Duo

These corn muffins came out very moist. One problem that can happen with cornmeal is that it can make dry baked goods. We've all had experiences eating cornbread or a corn muffin where we have to down a liter of water afterwards because the bread was a veritable desert. The honey comes through very subtly, but the orange flavor was not there at all. If I made these again, I would add some zest for that little extra punch of flavor.

Honey-Clementine Corn Muffins

Muffins are usually an excellent excuse to have cake for breakfast. But these corn muffins do not feel as decadent or indulgent. They could feasibly be part of a balanced breakfast. Add a little butter and/or some orange marmalade and you're set for a good day.

Tuesday, September 29, 2009

When Life Gives You Cherries...You Make Cherry Scones

Every year my mom goes to Michigan and sends me a care package of whatever local goods that she finds. This year, among many other goodies, I received dried Michigan sour cherries. These aren't like Craisins or any of the other sweetened fruit bits; they're the real deal. Tart, chewy and just plain wonderful. Now what to do with these new treats?

Cherry Scones

My record with many doughs sucks. There's no nice way to say it. I often fail to make the doughs for pie crusts and biscuits. My guess is that I've either been too slow and let the butter warm up, or I have over-worked the dough. So I set out this time to be quick and to keep everything and chilled as possible. From what I understand, keeping the butter cold prevents it from fully melding with the other ingredients. That way the butter bits can release steam during the baking process and make the product tender and flaky.

I used a recipe from Gourmet Magazine for cherry scones. I did use my food processor to cut the butter into the flour since 10 seconds of blending vs. 5 minutes of blending by hand would mean less heating. The dough in the end was still a little dry and could have used a bit more cream, but in the end it did not really matter. The scones came out tender and flavorful, especially when studded with the tart cherries. They ended up making the perfect breakfast treat for my lab. I'm hoping this represents a turning point in my ability do deal with doughs, but we'll just have to wait and see.

Tuesday, August 25, 2009

Breadmen's

There's nothing like a leisurely Sunday morning. After sleeping in, you wake up, read a magazine and overall relax before starting anything. At some point you decide it's probably a good idea to get something to eat. What better place to visit than one of Chapel Hill's institutions, Breadmen's. Don't let the Tarheel footprints outside fool you, this restaurant is an equal opportunity sports enthusiast. At least that's what I gathered from the many years of sports posters for all the local universities on the walls. The restaurant can often be quite busy, but we were lucky to get seated right away on a Sunday in the early afternoon. Many students like to frequent this eatery, and, according to the clientele we saw, it seems to be a good "morning after"/hangover hangout from obvious sunglasses being worn indoors. Anyways, on to the good stuff (the food stuffs):

Breadmen's

We had two decent sized platters of breakfast foods. The pancakes were good - decently fluffy and about medium thickness. Eggs and breakfast meats were par for the course. Honestly, I find most diner eggs and meats to be pretty basic, so I never use them as a proper judge of character. Home fries, on the other hand, are a good meter stick. Breadmen's potatoes were well seasoned and delicious. Finally, the coup de grace was the biscuits and gravy. The biscuits are soft but the edges were browned slightly to add a little crispiness to a dish that could easily get too mushy. The gravy was great with good body and that meaty salinity that I love. It also made a good topping for the potatoes (I love to mix and match my food). Overall I was quite satisfied with breakfast at Breadmen's. It made a slow-start Sunday even more enjoyable.

Thursday, June 11, 2009

Large Update - 6/11/2009

I have done a great deal of cooking in the last couple of weeks, so without wasting time, let's just start in with it.

Pineapple-Vanilla Jam

I did some apartment-sitting for a classmate while she got to vacation in Tahiti with her husband. She was very thankful and presented me with this gift upon her return. For those that don't speak French, it is pineapple-vanilla jam. The pineapple provides the stable base for the jam and the vanilla gives it a delightfully heady plume of aromatic flavor. It is very delectable on toast and just something different from your run-of-the-mill strawberry jam or orange marmalade.

CSA

My community supported agriculture has been fairly similar over the past weeks. The main features are strawberries, blueberries (not pictured), and lots of squashes: zucchini, Mediterranean zucchini and yellow squash. I accumulated so much zucchini that I had to do this:

Blueberry-Zucchini Bread

Paula Deen makes a mean zucchini bread. I had so much zucchini that I made two batches, which is supposed to make 2 loaves per batch, hence the high productivity. Instead of chocolate chips, I substituted one pint of blueberries in each batch. I also doubled up the spices (cinnamon and nutmeg) in the first batch and added some cardamom and ginger powder in the second batch. All in all, I made one large loaf, 4 mini-loaves, 4 large muffins and 6 regular muffins, all of which were delicious. On a random note, the blueberries turned the bread slightly blue-green instead of purple.

Brownie-Filled Chocolate Chip Cookies

On the subject of Southern cooking, Southern Living had on the inside cover of their latest issue something I could not resist making. They may look like normal chocolate chip cookies, but trust me, they're huge. Each has half a cup of dough in it. Plus, the real surprise is in the center: the cookie contains a brownie. That's right, Southern Living managed to stuff a baked good inside of another baked good. These treats are a tremendous endeavor to eat, but well worth it, even if you feel like you have to take a nap or hit the gym right afterward.

Polenta French Toast

Mom came into town for a visit and her birthday, so I/we did quite a bit of cooking and baking. For breakfast, I managed to find this wonderful gluten-free recipe care of Martha Stewart. You prepare one batch of polenta (with an hour of frequent stirring), adding in some milk, maple syrup, orange zest, cinnamon, and raisins. You then pour the polenta into baking dishes and let it set overnight. In the morning, you slice up the set polenta and pan-fry it until golden brown. Top it with maple syrup and some fresh North Carolina blueberries (or whatever state you happen to be in). For those who cannot eat toast, and even for those who want something out of the ordinary for breakfast, this is the perfect recipe. Just be warned that this is one of the more involved breakfast setups, but it can be well worth it.

Chocolate Pavlova

Mom brought a recipe with her to make a chocolate pavlova, also care of Martha. Pavlova is pretty much like a giant meringue cookie. This one was in the shape of a bird nest, filled with a chocolate mousse, then topped with whipped cream and chocolate shavings. This dessert had it all: chewy, creamy, crunchy, chocolate. This is a great way to end a meal with a cup of coffee on the side.

Flourless Chocolate Beet Cake

For Mom's birthday, I made this interesting flourless chocolate beet cake. You shred some beets, cook them in agave nectar until tender, then stir in some cocoa powder and some other additives, bake it for twice as long as the directions say, et voila! a cake. We topped it with some whipped cream and served it. It looks like we tried to make a red velvet cake but only got halfway there. The cake itself is a deep red-brown with a dense, moist, chocolate flavor and a subtle hint of beets, but definitely in a good way.

Funfetti Cake

Lastly, I've started a cake decorating class at Durham Technical Community College. Yesterday was our first chance to work on a cake. Above you can see the Funfetti cake I made for the class.

Decorated Cake

Two problems arose while decorating the cake. First, I did not want to make a full cake just for this class, so I used a box cake, meaning an overly moist work surface. Second, I did not own 6" cake pans, so I just cut down my cakes from 8", all without using a guide or measuring tool of any kind. End result: the whimsical cake.

Disaster Cake

I was slightly embarrassed by the cake at first, but I still wanted to bring it into my lab for everyone to eat. But my buttercream was not quite up to snuff. I probably needed another cup or so of confectioner's sugar in it (it already had 10 cups in it), so it slowly oozed down the sides of the cake. The end result: the top layer slipped off the bottom layer in a giant mess. So next week, I will stop cutting corners and shoot for the moon.

Monday, July 14, 2008

Baked Ziti Primavera & Breakfast Sammy - 07/13/08

It's the eve of me leaving town to begin my trip to Europe, so I figured I would update the blog with my latest cookins before I take off.

Baked Ziti Primavera

First up is a form of baked ziti. You first cook up half a pound of ziti. Then you cook 2 chopped onions and some tomatoes together and pour this over the cooked pasta. Then you cook ground turkey with some thyme and oregano, then pour this on top of the pasta. Add in some canned green beans, broccoli and sour cream to put it all together. Pour this into a baking dish and sprinkle generously with permesan cheese. The recipe itself did not call for a lot of spice, so I made sure to use some garlic, salt and lots of Italian spices to give the dish some flavor. Bake everything in a 400 degree oven for about 25 minutes until brown and the cheese has melted. Many restaurants and recipes like to finish off their pasta sauces with some cream or milk for a creamier taste. I liked how this recipe used sour cream to prevent adding in so many calories and adding a little flavor. I liked the crispy edges on it and I would have liked more of those, but I'm sure that would have dried it all out. This dish makes a lot and is reasonably healthy, so it's perfect for families or even small get-togethers.

Breakfast Sammy

I didn't think much of this originally, but I loved this so much I wanted to post it. This is an awesome morning sandwich if you want a change of pace from cereal or run-of-the-mill toast and eggs. While some bread was toasting, I cooked up my eggs with some pepper and garlic salt. My two favorite egg cooking methods are poaching (tricky unless you have a poaching tray for your pan like I do, but that's for a different blog post )and what I affectionately call a half scramble but what others might see as over-hard. Over hard is pretty much over-easy eggs that are cooked through more and the yolks are broken. On a side note, if you like to dip your eggs, but you don't want them still a little runny in the whites, you can order them over-medium in any restaurant. As the eggs were finishing, I threw on a slice of mild cheddar cheese to let it melt a little. Once the toast was done, I sprayed it with butter (spray butter is easier than regular butter for me in the morning) and topped one piece with the eggs. I tried to keep all the eggs together in one lump so I did not have lots of little bits falling everywhere. Now, here comes the surprise: I put three slices of turkey pastrami. I know many people may have used bacon or even turkey bacon, but I had the random idea to use the pungent and spicy flavors of some turkey pastrami I had handy. I let the meat get a little brown on each side and then I put it on top of the eggs and cheese. This was, to my surprise, one of the best breakfast sandwiches I've tasted in a while. I've actually made it for the past few mornings with small variations in the spices because I liked it so much. Too much of a good thing? Never heard of it.

Monday, July 7, 2008

Easy Entertaining with David McDonello - 7/7/2008

I've had guests for nearly a week. Here are the goodies I made for them during their stay.

Ina Garten

To greet my friends when they arrived, I decided to make a nice treat. Ina Garten (the Barefoot Contessa) has a number of baking mixes out, so I decided to give this one a try. It is for PB&J bars (similar to ones I wanted to make on my own). One problem was I noticed something wrong with the directions, then I spied this sticker on the box:

Oops

Silly Ina Garten. Anyways, the mix was very straightforward and the bars were very addicting. The peanut butter taste was strong and they had raspberry jam, my second favorite after strawberry.

PB&J Bars

For the next day's breakfast, I made some outstanding waffles. I don't have a picture because they are too good not to eat immediately. They are very crisp on the outside and soft on the inside. If you want the recipe for yourself, it is here: Waffle recipe. Be sure to use buttermilk in the recipe for the perfect results.

Apple-Walnut Muffins

Breakfast the following morning featured some delicious apple-walnut muffins. They did not raise up into perfect Starbucks muffins and they were not super sweet, but they were still good nonetheless.

Gnocchi

For dinner one night, we made gnocchi from scratched. Gnocchi are little pasta dumplings made from potatoes or potato flour. We chose the former and I will hopefully never had to use this method again. The gnocchi turned out pretty good, but the consistency was a little off and the recipe took forever. For the sauce, we mixed together some ground beef, ground pork, garlic salt, pepper, and vodka sauce. The sauce was very good and we were so hungry by the time we finished making it, I forgot to take a picture, so I had to take one of my second helping plate (sorry).

Pool Cake

Have you ever seen those recipe books next to the cash register in your local grocer? Well I bought one from Jell-O and Cool Whip that had this recipe in it. You pretty much bake a yellow cake and let it cool completely. Meanwhile, make two packets of berry blue Jell-O and refrigerate it for about 2 hours. Once the cake is cooled, invert it onto your serving plate or platter. Cut out a large portion of the cake's center (without going all the way through the cake). Pour the semi-solidified Jell-O into the cake. Return the cake to the fridge for another 2 hours. Frost the cake with room temperature Cool Whip. Decorate it with Teddy Grams, Graham Crackers, Swedish Fish, Life Savers, and any other candy you deem appropriate. Cocktail umbrellas would be cool too. This is a very nice cake for summer-themed events and it is nicely delicious, though some people may have an issue with the mixed textures. My friends had a great time and I'm hoping they'll visit again soon.

Sunday, April 13, 2008

Sweet Breakfast - 4/13/08

My lab was having a day to work on some special recipes for patients on a high-fat, low-carbohydrate diet, so I went ahead and made some carb-tastic breakfast treats for everyone to enjoy. For avid readers, you may remember my banana bread trio was for a very similar event.

Monkey Bread

Monkey pull-apart bread is a wonderful treat and quite easy to make. The only drawback is you have to let it sit for a while before you can do anything with it. First, buy frozen bread dough. Thaw one loaf of dough and rip it into balls about three-quarters to half the size of a golf ball. Melt half of a stick of butter and set it aside. Mix together three-quarters cup of sugar with 1.5 tsp of cinnamon and one-half cup of chopped nuts (walnut, pecan or another softer nut). Grease a Bundt or other round pan with a hole in it. Dip each bread dough ball into the butter and then into the cinnamon-sugar-nut mix. Place the balls into the greased pan in an even manner. I find the best way to do all of this is to have one hand grab the dough ball, dip it in butter and toss it into the cinnamon-sugar-nut mix bowl. Have the other hand cover the ball in the mix and place it in the pan. You can use this same method for breading meats with an egg wash/buttermilk and breadcrumbs/cornflakes. Next, you have to let the dough balls rise for 3-6 hours in a warm, draft-free location until they are doubled in size. After the dough has risen, you can refrigerate it until you are ready to bake it and the dough will remain raised. Bake in a 350 degree oven for 25 minutes. When you remove it from the oven, invert it onto a serving plate. Allow this to cool for a few minutes then eat it by pulling the balls out by hand. This is a very communal food, so germophobes need not attempt it unless they want it all for themselves.

Muffins & Muffin Bars

I also made some muffins for breakfast. The first ones are cranberry-orange muffins that turned out a little dry (probably my fault). The other ones are apple-raisin-walnut mini- and regular-sized muffins. The second batch made so much batter that I made the minis, upgraded to the regulars and still had enough batter left over to make a muffin cake. I greased a 9" baking pan and filled it with what I had. I baked it until it was just done (it turned out very moist). To add insult to injury, I made a confectioner's sugar icing, flavored it with vanilla extract and drizzled it over the top of the sectioned pieces. Everyone raved about the food and devoured it quickly, which probably means I did something right.

Tuesday, March 11, 2008

Banana Crunch Muffins - 03/07/08

What do you do with ripe bananas that you don't have time to eat (or at least that you do not want to eat for fear of potassium overload)? You bake with them!

Banana Crunch Muffins

I originally wanted to make banana bread, but I did not have enough bananas. I found this recipe on the Food Network website from Ina Garten (the Barefoot Contessa). She is the second chef on Food Network known for using a lot of butter, and these muffins are no exception. They have mashed bananas as well as chopped bananas to add extra texture. She recommends granola, nuts and coconut both in and on top of the muffins. I chose to only use the granola and I added some leftover chocolate chips to them. They turned out quite delicious and kept pretty well over time. I displayed them on my cupcake/muffin tree, pictured above. For some reason, they designed the tree to have 13 spots and regular-sized muffin tins make 12 muffins (like this recipe), so I suppose I'll have to make double batches in the future to be able to use the tree properly. I'm sure my friends would not object to that.

Sunday, January 20, 2008

Toad-in-the-Hole - 1/19/2008

I made breakfast yesterday morning and decided to share my mom's "secret recipe." Don't start drooling yet because it is very simple, but still quite enjoyable.

Toad-in-the-Hole

These creations go by many names: Toad-in-the-Hole, Eggs in a Basket, Eggy in a Toasty, Birds in a Nest. You can see them in the movie "V for Vendetta." All you have to do is cut out some holes (any shape you want) with a cookie or biscuit cutter. Butter the remaining piece of bread and the cutout and put them in a hot pan. Add an egg to the hole in each piece of bread. Cook until it is flippable, then flip and finish cooking. Be sure not to overcook them so you can dip in to the runny yolk with your bread cutout. It may not be anything fancy, but it is a recipe that always reminds me of breakfast at home.

Thursday, November 22, 2007

Thanksgivings - 11/22/2007

Happy Thanksgiving everyone! One result of having divorced parents is that I have to celebrate all of the holidays twice (good for presents, bad for the waistline). In previous years, I have enjoyed two full Thanksgiving dinners separated by about an hour, but this year was a little different. My mom was shooting for a non-traditional Thanksgiving brunch this year. Last night we put together a sweet potato bake, almond-banana bread, sausage bread, waldorf salad, and a Texas sheet cake. This morning, we assembled a mulled cider, sausage-stuffed mushrooms and pina colada pancakes (version 2 for those keeping count).

Pina Colada Pancakes

This time around, I put shredded coconut and coconut milk into the pancake batter. The "syrup" is made from pineapple preserves that were heated to make them more liquidy. For further topping, I put a dollop of whipped cream and some toasted coconut. Next time, I will thin out the pineapple preserves with some water, but these turned out delicious anyways. Worth noting is that I used a gluten-free pancake mix because my mom has a gluten allergy. Usually, these mixes come out rather gritty, but I could not tell the difference with these.

After brunch, I had a 3 hour reprieve until Thanksgiving dinner. At dinner, we had the usual delicious fare: turkey, gravy, potatoes, sweet potato pudding, stuffing, cranberry sauce, rolls, pumpkin pie, apple pie, chocolate bread pudding (made with croissants for extra buttery fatness), and my contribution: carrot cake.

Carrot Cake

My stepmom and I are big fans of carrot cake, so I thought this would be a nice treat. In the cake and between the layers are also chunks of pineapple for an added twist. On top are candied carrot ribbons made by simmering the carrot in a simple syrup. Special thanks to my mom for helping me asseble this monstocity. I hope everyone else had a wonderful and belt-busting holiday as I did.