Showing posts with label Birthday. Show all posts

Tuesday, February 9, 2010

Nutella Cake

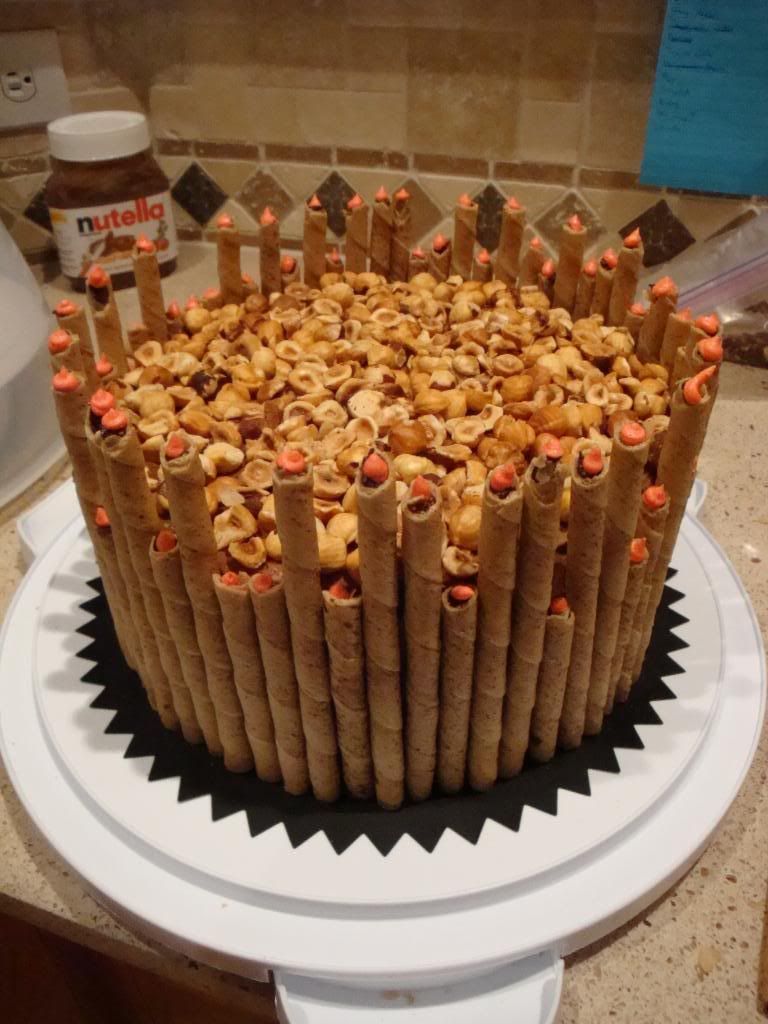
Last week, we celebrated another birthday in my lab. When I was pondering, I came up with the idea to make a Nutella cake. Little did I know this would fit right in with World Nutella Day. It seems my finger is always on the pulse of the culinary community, even when I don't know it.


I drew inspiration for the outside of the cake from Rose Levy Beranbaum's book Rose's Heavenly Cakes, specifically her "chocolate tomato cake." The cake is surrounded by Pirouette cookies of varying heights. Each of these cookies is topped by a small dollop of red frosting to act as little candles. If you want to make this cake for an age-conscious birthday person, please note that I had to use 67 cookies to completely surround the cake.


The inside of the cake, however, was my own creation. I used my basic chocolate cake recipe. This cake normally uses 1.5 cups of coffee to accentuate and darken the chocolate flavor, but I substituted one-third of that with Frangelico, a hazelnut liqueur. As a third surprise layer, I baked my traditional banana bread recipe in a round cake pan. The banana bread stays wonderfully moist and I may use it to make a full cake one day.


So far, this cake is not very Nutella-y. That's where the frosting comes in to bind it all together, both in construction and in flavor. I mixed together 1 cup of Nutella with 3 cups of powdered sugar and 2 tablespoons of milk to produce just enough frosting to cover this 3-layer, 9-inch cake. On top of all this, I placed some toasted, chopped hazelnuts. The result is a behemoth cake that astounded everyone. I have a hard time deciding if it had too many elements or just enough to make it a really good cake. All of the flavors blended together beautifully to produce a cake that will be tough to beat for the next birthday.

Monday, January 25, 2010

PB&J Cheesecake

Another lab birthday and luckily this person likes cheesecake. It was nice to take a departure from the standard two-layer cake to make this rich, creamy cheesecake.

PB&J Cheesecake
Makes 10 servings

Ingredients
Crust
1.75 cup Nilla wafer crumbs
1 cup finely chopped almonds
1/2 cup melted butter
1/3 cup sugar
Filling
24oz cream cheese, softened
1.5 cups brown sugar, packed
3/4 cup peanut butter
1 egg yolk
3 eggs
1/3 cup heavy whipping cream
12oz strawberry jam
1 pint strawberries, sliced (plus one whole for decoration, if desired)

Directions


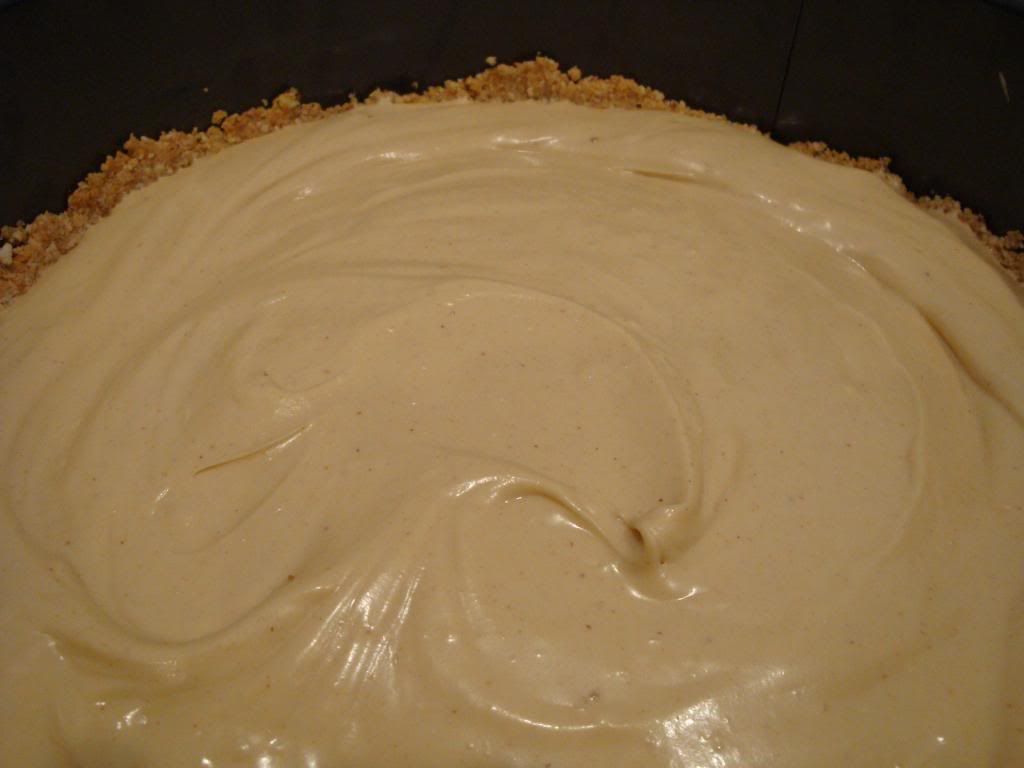
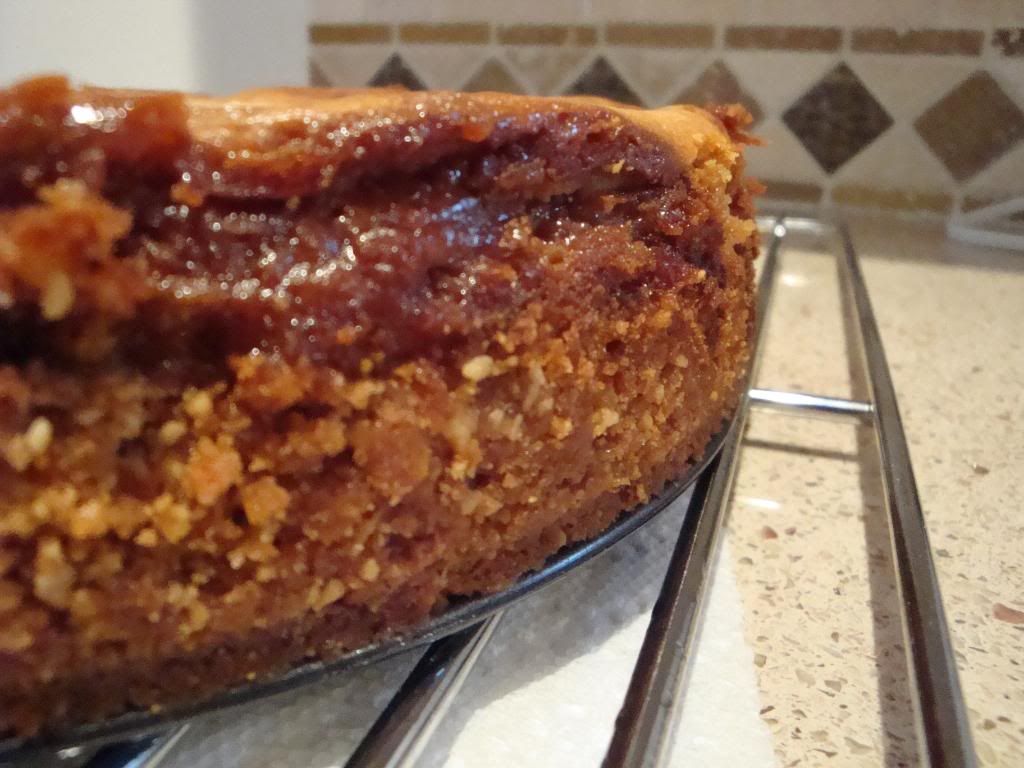
Preheat oven to 325 degrees. Combine all of the crust ingredients in a mixing bowl. Press the mixture in the bottom and one inch up the sides of a 10" springform pan. Bake crust for 10 minutes; cool. Above is what the crust must feel like from the inside of the pan.


Using a mixer, beat the cream cheese until it is light and fluffy. Gradually add in the sugar, then the peanut butter and egg yolk and whole eggs, beating well after adding each ingredient. While beating on low speed, add cream. Pour half of this mixture into the cooled crust (see above).


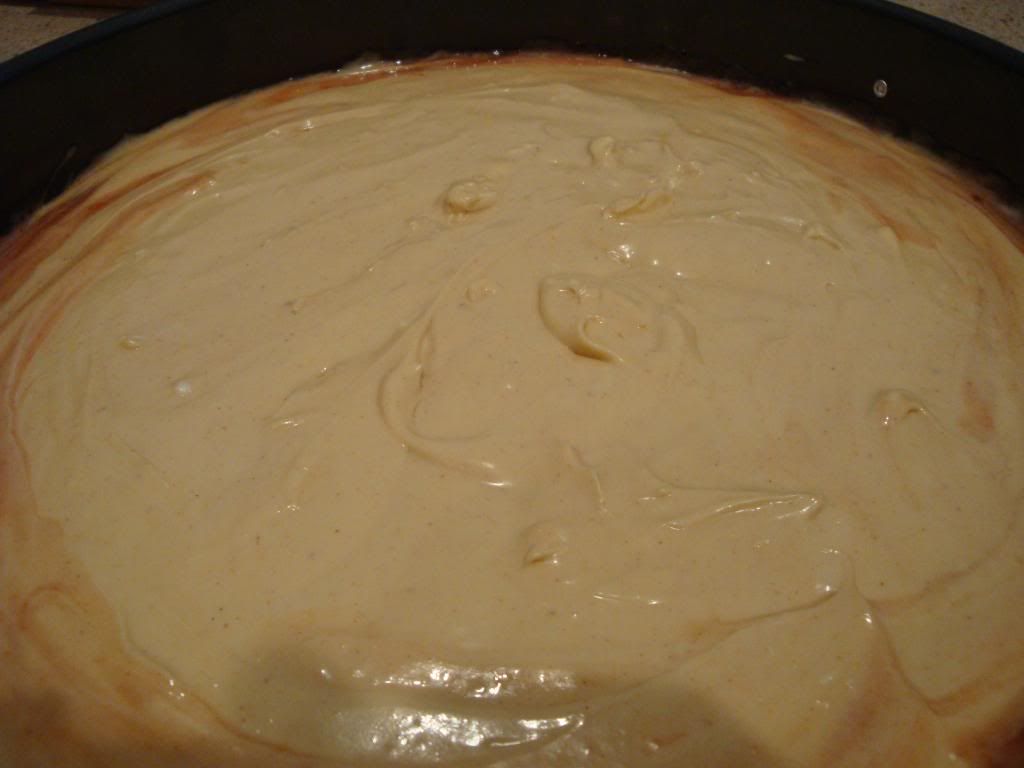
In a microwave-safe bowl, melt strawberry jam. Heat on high for about 3 minutes, stirring after 30 second bursts. Jam should be very smooth. Slowly drizzle all of the jam over the PB batter.


Swirl the layers with a knife. Pour on remaining batter.


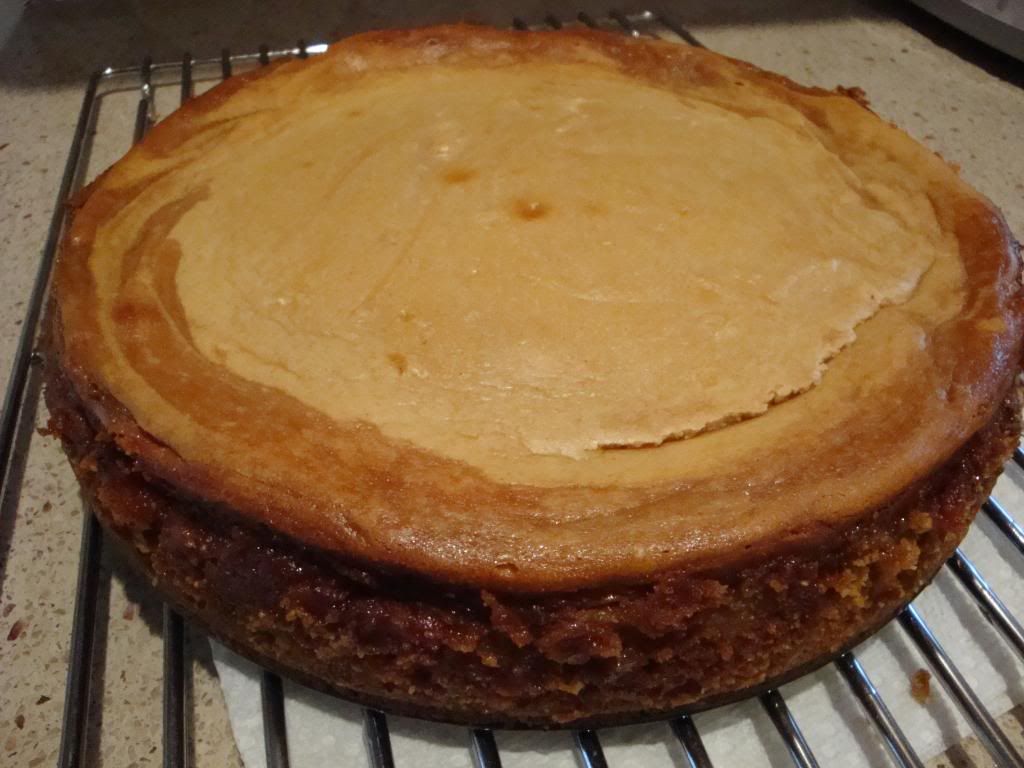
Bake cheesecake for 75 minutes. Remove from oven and cool completely on a wire rack. Gently run a knife around the edge of the cake and release the side. Cover cheesecake and refrigerate for at least 8 hours.


I arranged the sliced strawberries in concentric overlapping circles. When you're slicing the strawberries, you can reserve some of the smaller slices for the innermost circle. In the middle, I also cut a berry part of the way through to fan it out. The result is a cheesecake that wowed everyone. It enchants you with it's beautiful looks (like a red and white flower) but the real test is the taste. The peanut butter is only a small portion of the batter, but the end result was amazingly peanut buttery. You could taste some of the strawberry, but the main character in this show was PB. The berries add a different texture and a nice fresh contrast to the cheesecake. And it is also worth mentioning that this is the creamiest cheesecake I've ever made. Often, cheesecake can end up fluffy or a little dry. This one was just like they make in NYC. I would make this cheesecake again in a heartbeat, though I should probably wait a few weeks for my body to deal with the overall richness of this dessert.

Saturday, December 5, 2009

Reese's PB Cup Cake

Have you ever had a vision in your head that you knew you had to bring to life? Ever since this summer, I've wanted to make a cake in the shape of a Reese's peanut butter cup, one of my favorite candies of all time. So I bided my time, waiting for the right time to whip up my creation.

Reese's PB Cup Cake

A birthday is the perfect time to make someone feel special by going all out for them. Luckily for me this birthday celebratee was a huge fan of PB cups as well. So I set to work. First I baked two of my standard chocolate cakes. For the peanut butter filling, I took a recipe for peanut butter fudge and omitted half of the powdered sugar. I wanted to make sure the fudge in the center was sliceable. I baked the cakes in 9" cake pans and I poured the fudge into an 8" pan to set. Once it was decently solid, I placed the fudge between the two cake rounds. Next I shaped the cake by cutting the sides at an angle. I frosted the entire thing with chocolate frosting. For the sides, I used a petal tip to pipe on overlapping lines of frosting to create a ridged effect. I tried a few other tips but this one seemed to be the best. In the end, I was very satisfied with the cake. The peanut butter fudge in the center was a delicious complement to the chocolate and was as much of a giant PB cup as I had envisioned.

Friday, October 16, 2009

Five-Spice Fall Cake

Two people in my lab had birthdays last week, so we had a joint celebration for them. I volunteered to make the cake (as if I’d pass up the opportunity). With autumn finally arriving, bringing with it cooler weather and various gourds in the grocery stores, I’m in the mood to take advantage of fall flavors. Some of my favorite spices are the warm, hearty spices that come with this season: clove, cinnamon, ginger, nutmeg, etc. Here’s how I combined all of these into a cake.

Five-Spice Fall Cake

As far as flavors are concerned, I decided to do a two layer cake with each layer having a distinct flavor. I baked up a pumpkin cake and a gingerbread cake. I had a bit of a time crunch while making the buttercream frosting, so I left the flavor as plain vanilla. I did want to color the frosting red since this cake was for a Chinese person and a Taiwanese person, but a pure, bright (Communist) red is extremely difficult to achieve. Mine ended up pink by the time I ran out of red coloring gel, so I started using tones of burgundy, pink and black. The end result was something that was a bit purple-maroon. Thus, I had to change my plans a bit. I decided to go more simple in my design, so with some borders piped in blue, I added happy birthday wishes in both English and Chinese. I found the Chinese version on a couple different websites, and I just did the best I could to replicate the characters.

Gingerbread Cupcakes

There was enough of the gingerbread batter left over to make some cupcakes. Normally, I eat the cupcakes myself, but I thought I’d bring them in for the birthdays too. I had originally planned on cutting out a circle of white chocolate for a mock-up of the Taiwanese flag, but since I could not get a good red buttercream, I used the white chocolate to fill the cupcakes. For frosting, I made a chocolate buttercream to which I added five-spice powder. The anise and spice tones of five-spice powder are a welcome addition to my fall repertoire and they paired nicely with the gingerbread. On top of the cupcakes, I piped messages of “36” and “ox” since those are the birthday boys’ ages and star signs, respectively.

Cake Aftermath

As you can see above, the cake and cupcakes were a hit. The cakes stayed very moist, especially the pumpkin. I think adding vegetables or applesauce to cakes does a fantastic job of keeping them moist. The only issue you face in assembling a cake is that the layers will fall apart because they have so much delicious moisture. That is one of the paradoxes of cake baking - too moist and you cannot make it look fancy, too dry and most people will find it too hard to swallow. And the great news about these cakes is that all of my Chinese writing was legible and understandable. My worst fear would be to misplace a line and all of a sudden I accidentally insulted someone’s mother. But that did not happen and everyone seemed very happy to celebrate the start of fall with a big ol’ slice of this well-balanced and surprising cake.

Thursday, July 30, 2009

Let Them Eat Cake! - 7/30/2009

Cake class at Durham Tech just wrapped up this week and it's time I update on the wide and varied cakes I've been making.

Surf-day Cake 1

Surf-day Cake 2

My PI had a birthday a couple weeks ago, so I had to find out some more about him for his cake. I heard he liked surfing and had transient obsessions with Goldfish crackers. So from that I came up with this surf-day cake. The cake was vanilla with a chocolate buttercream. The sand for the beach was a combination of brown sugar and confectioners' sugar with a touch of white sprinkles. The surfboard to the side was made of gumpaste. I felt the Duke D came out nicely, but the trade-off was that my goldfish were a little rough. I think this cake was my most creative in decoration of the entire class and it went over well at our birthday get-together.

Hydrangea Cake

Last week was how to build multi-layered cakes (>3 layers). There are some architectural features that are involved in this process, such as stabilizing the layers with extra pieces of cardboard and vertical supports through lower layers. Most people in the class made cupcake-shaped cakes. I chose instead to make hydrangeas in a basket. The hardest part is determining when you're done when trimming up the cake. I would have definitely cut mine down too much if I didn't have input from my classmates. The cake was chocolate with a touch of mint. The filling was mint chocolate chip and the flowers were vanilla buttercream. Even though this cake was twice as tall as usual, almost all of it went in one day when I brought it into lab.

Sequencing Cake

My labmates loved the chocolate cake from the previous week so much, that this past week I decided to use the same recipe (scroll down for the cake recipes), except I mixed raspberry jam into the cake. For the filling I used the previous week's chocolate buttercream and mixed in some more raspberry jam and some pine nuts for a nice, soft crunch. Then I frosted the cake in vanilla buttercream. Our summer undergraduate student is leaving this week, so I decorated the cake with DNA sequence tracings as a farewell. As promised, below are the cake recipes as well as my basic buttercream recipe that can be retooled any number of ways:

Vanilla Cake - makes 3x9" round cakes

2 cups cake flour
1.75 cups + 1.5 tsp all purpose flour
2.5 tsp baking powder
2 sticks unsalted butter
3 cups granulated sugar
0.75 tsp salt
1 tbsp vanilla extract
1 cup egg whites (from ~7 eggs)
1.5 cups milk

Heat oven to 350 degrees. Spray pans with nonstick cooking spray, line bottom with parchment paper and spray again. Sift together flours, baking powder and salt. Combine butter and sugar in a mixer on medium speed until fluffy. Add the vanilla. Set mixer on low and gradually add the egg whites. Alternately add the flour mixture and the milk in two batches beginning with the flour mixture. Scrape down the sides of the bowl between each addition and beat just until everything is mixed together. Divide batter between pans and bake about one hour or until a tester comes out clean. Allow cakes to cool about 20 minutes then remove from pans. Wrap and store.

Chocolate Cake - makes 3x9" round cakes

2 2/3 cups all purpose flour
1.25 cups + 2 tbsp cocoa powder
2 tsp baking powder
1 tsp baking soda
1 tsp salt
1 cup sour cream
1 tsp vanilla extract
1 tsp almond extract
2 sticks unsalted butter
2 cups granulated sugar
2 eggs
1.25 cups strong coffee

Heat oven to 350 degrees. Spray pans with nonstick cooking spray, line bottom with parchment paper and spray again. Sift together flour, cocoa, baking powder, baking soda, and salt. In a separate bowl, combine the sour cream and extracts. In the bowl of a standing mixer beat the butter and sugar until smooth. Set mixer on low, add eggs one at a time. Alternately add the sour cream mixture and the flour mixture starting and ending with the flour mixture. Scrape the sides of bowl down between additions. Slowly add the coffee. Scrape down the bowl, and beat thoroughly until combined. Divide the batter between the cake pans and bake about an hour or until the toothpick comes out clean. Allow the cakes to cool about 20 minutes, then remove from pans. Wrap and store.

Basic Buttercream - makes 2.75 cups

1 stick butter, softened
1 tsp vanilla extract
1/8 tsp salt
16 oz powdered sugar
3-5 tbsp milk

Beat the first 3 ingredients at medium speed with an electric mixer until creamy. Gradually add powdered sugar alternately with 3 tbsp milk (1 tbsp at a time), beating at low speed until blended and smooth after each addition. Beat in up to 2 tbsp of additional milk for desired consistency.

Monday, June 22, 2009

Cake Decorating Win - 6/22/2009

Good news! I'm not totally inept at making cakes!

Chocolate-Macaroon Cake

After last week's cake-wreck, I was glad to find out that I have some skills with the baked goods after all. They key is not taking shortcuts with the cake or frosting. The cake itself is vanilla-cherry with some cherries mixed in. The frosting is dark chocolate with almond extract. In between the layers, in addition to buttercream, is crumbled coconut macaroons. To top it off, I sprinkled on some toasted coconut. This cake was for the birthday of someone in my lab who likes coconut, and it was a big hit. My next goal is to make cakes with more intricate and involved decorations now that I have a handle on the more understated techniques.

Basil-Eggplant Rolls

I did do a good deal of cooking this week myself, but I will not claim these delightful hors d'oeuvrs as my own. These are the wonderful creation of my new beau. From what he told me, they are eggplant slices wrapped around tomato paste and fresh basil, then breaded and baked. Quite wonderful.

Baked Tea Salmon

The main course to follow the above eggplant rolls was this baked salmon. It was seasoned with dried tea leaves (sadly I cannot remember which type of tea) and seafood seasoning. It was grilled in the foil packet that you can see above. It came out very moist and well flavored. Who would have thought tea could be so versatile?

I will mention some of the other food I made this week, even if I ate it so fast I forgot to take pictures: fresh local berries with balsamic syrup, roasted green beans with cashews, cantaloupe wrapped in prosciutto, garlic bread, and grilled corn with orange-hoisin butter. I also got a start on this week's cake, but I won't ruin the surprise.

Sunday, November 30, 2008

Birthday Dim Sum - 11.29.08

For my birthday, Mom and Moe took me to a Chinese-Vietnamese restaurant in Pinellas Park that serves dim sum. Dim sum is a plethora of small dishes that most restaurants only serve for a limited time during the week. This restaurant, however, serves it all the time. I will apologize for the quality of the pictures as I used my phone to take them.

Chicken Feet

We started with a peculiar oddity that seemed to be a favorite of the Asians in the restaurant: chicken feet. They were marinated and cooked in a sweet-spicy sauce. They had good flavor, though the edible portion of the feet is mostly skin and softer tissues, not so much muscle meat. They were nicely tasty once I got over the weirdness of eating them.

Spare Ribs

Next off of the cart was some spare ribs. They are pork ribs (I think) that are chopped through the bone into small pieces, then slow cooked until tender and exuding savory flavor.

Sticky Rice Wrapped Sticky Rice Unwrapped

In order to get some carbohydrates going, we ordered some sticky rice. It came wrapped in lotus leaves, which gave it an earthy tone. The rice was very sticky (glutenous) and was made more delicious by the addition of mushrooms, pork and Chinese sausage slices (not too much but just enough). Other carby dishes that I did not photograph were some rice noodles wrapped around shrimp and drizzled with sweet soy sauce, shrimp tempura sandwiched between slices of Japanese eggplant, and steamed shrimp-chive dumplings.

BBQ Pork Bun

On the slightly sweeter side, we had some buns filled with chopped, barbecued pork. The pork was mostly sweet, but not overwhelming as a filling in the bun.

Fried Taro

Lastly, we had deep fried taro. I have no idea how this was made or how taro was used in the dish, but the end result were some football shapes with a crispy, delicate exterior, a soft, taro-flavored interior, and a shrimp-mushroom stuffing. Even after all of this food (and a bubble tea for dessert), I was not overly full, but I was definitely very content.

Thanksgiving - 11.27.08

Happy Thanksgiving, everyone! I'm sorry to say I did not do a lot of cooking while I was back home (then again, it was very restful). My only real contribution was a zucchini salad.

Zucchini Truffle Salad

This is a salad we had in Italy. Use a carrot peeler to thinly slice some zucchini. Top it with broken up parmesan, toasted pine nuts and a healthy drizzle of truffle oil. Truffle oil is a little pricey, but, used sparingly, it is a delicious addition to the salad.

Blue Velvet Cake

My mom surprised me with a birthday dessert on Thanksgiving. She would not tell me what kind of cake it was. To my surprise, while cutting the cake the knife started showing a blue-green tinge. After I cut a few slices, I figured it out: she had made a blue velvet cake. She took a red velvet cake recipe and substituted blue food coloring for red. She did it in honor of my new school colors. Even given the difference in color, the flavor of the cake was the same (delicious) with the classic cream cheese frosting to boot.

Sunday, November 23, 2008

Fakesgiving - 11.23.08

The other students in my program decided to follow through with my Fakesgiving idea (the one that my friends and I have been doing for the past 4 years). We had a great get-together with all sorts of classic and non-typical Thanksgiving fare. Here are my contributions:

Tomato Bread Pudding

I found this idea in Gourmet Magazine (where they also tend to take pictures of food in its more natural state, hence my half-eaten photo). It is for a savory tomato bread pudding. You start by roasting some halved plum tomatoes that have been coated in olive oil, salt, pepper, and herbs de Provence for about 45 minutes until they are cooked down and the flavors are concentrated (tomato confit). Next, cube one loaf of French or Italian bread, coat with some olive oil and cook on a cookie sheet until they are golden brown on the edges, like underdone croutons. Let everything cool once it comes out of the oven. Place the bread into a buttered baking dish. Mix together 1 cup of heavy cream, 2 cups of whole milk, 8 eggs, a head of roasted garlic, 2 cups of grated Fontina cheese, and 1/2 cup parmesan cheese. Pour this mixture over the bread. Top it all with the tomatoes, inserting some of the tomatoes in between the bread. Bake this for about an hour, let cool slightly and enjoy. Warning: though delicious, almost no bread pudding is by any means healthy. They usually involve lots of cream and, in the case of the sweet ones, lots of sugar. One of the best bread puddings I've had was one made with chocolate and croissants instead of normal bread. If you don't care about calories, cooking is a simple equation: delicious = fat + sugar.

Mocha Marble Cake

We had a birthday at Fakesgiving, so I took it upon myself to make a cake. I was going to be very fancy, but decided to go more straightforward with it. I made a marble cake (vanilla batter + chocolate batter + butter knife swirling) with mocha frosting (confectioners' sugar, cocoa powder, coffee, vanilla, butter, and a little half-and-half). Marble cake is not one of my favorites, but this one came out moist and the frosting's deep chocolate and coffee flavors made it all the more delectable.

Wednesday, August 6, 2008

Rhonda's Birthday - 07/16/08

I know I have not updated in a few weeks, but I have a good excuse. I've been out of the country for a little over 2 weeks, so I'm going to be posting a few blog updates to catch up. My step-mom, Rhonda, had her birthday before we left on vacation, so here's what we prepared:

Strawberry Dream Cake

Every year, my dad prepares Rhonda's birthday cake: devil's food cake with layers of sliced strawberries and Dream Whip, an instant whipped cream. This year, though, the responsibility ended up on my shoulders. I tried to be a little more artistic with the placement of the strawberries. The cake is nice because it is light (in feeling, not in calories) but still flavorful.

Edge Brownies

There are individuals who love edge brownie pieces, but are plagued by the lack of these pieces in most brownie pans. This is why they invented the edge brownie pan. Every piece, if cut right, is an edge and there are far more corner pieces too. I used an Ina Garten brownie recipe. You may notice that the recipe uses ungodly amounts of butter and chocolate. But these were the fudgiest brownies I've ever eaten. Don't be disappointed by this blog entry, the best is yet to come.

Wednesday, June 25, 2008

Post-Move Cooking - 6/25/2008

The move to North Carolina is finally over. All of the furniture and my items are in place and I've been cooking again too. I have about 3-4 posts worth of food that I'm going to post as a single entry, so get ready for marathon fooding.

Baked Cauliflower

My first meal in the house came after the Fathers' Day/Anniversary hooplah. I've been wanting to try this recipe for oven-baked cauliflower for a while, so I gave it a shot. You blanch the full head of cauliflower for about 6 minutes and let it cool. Then you place it in a pan, base-up, and pat in some breadcrumbs that have been cooked with olive oil and shallots. Bake this in the oven for about 25 minutes until it is fork tender. The sauce on the side is mostly plain yogurt with some Dijon mustard and fresh chives blended into it. Though just a side dish, this came out very nice and the cauliflower seemed very meaty, if that makes any sense. The other side was some oven-baked French fries with Italian spices. I made sure to use my mandolin this time so the fries were about the same size.

Oven-Fried Chicken

The main feature of this first meal is oven-fried chicken. I used the tenderloins instead of breasts for a more chicken finger-like presentation. First you crush some corn flakes and add to them whatever spices you want. I used salt, pepper, garlic powder, parsley, paprika, and smoked paprika (the last two gave it all a nice subtle kick of heat). You dip the chicken into some buttermilk and then (with a dry hand) roll it around in the corn flake mixture. Arrange them in a pan and bake them until they are just done. This was a nice alternative to frying or pan-frying the chicken and is pretty low in fat compared to other methods.

Fettuccine Geechee Rosa

Next meal is for my dad's birthday. The main dish is called fettuccine geechee rosa (I don't know why). It is spinach fettuccine with its healthy green color in a sauce of olive oil, garlic, clams, clam juice, lemon juice, and sun-dried tomatoes. The dish, in the end, needed a little extra punch of some sort. Next time, I would add a little more salt or some lemon zest to it to see if it helps.

Zucchini Gratin

The side dish of the meal is an Ina Garten recipe for zucchini gratin. This may sound familiar because of the similarities to potatoes au gratin, a deliciously cheesy and calorie-packed side. This version starts with cooking 2 sliced onions in copious amounts of butter until tender. Then 4 sliced zucchini are added to the pan and steamed a bit. Some flour, salt and nutmeg (surprise) are added and mixed thoroughly to make a bit of a roux. Then milk (I used 1%) is added and allowed to mix with the roux until the sauce thickens a bit. This is poured into a smaller baking dish and topped with a mixture of breadcrumbs and shredded havarti (or gruyere, if you prefer). Bake it for 20-25 minutes until bubbly and the top is browned. This came out very delicious and I will need to remember it for future occasions.

Bananas Foster

Dessert for dad's b-day is one of his favorites: bananas foster. They often make this dish in nice restaurants right next to your table for the theatrics of it. I actually had a little difficulty with the dish on getting the proper stove temperatures, so this will take a little while to perfect. You first melt 6 tablespoons of butter in a skillet over medium to medium high heat. Then you add in 1 cup of brown sugar and 1/2 teaspoon of cinnamon. Stir this together until the sugar is fully melted. Add 4 bananas that have been sliced in half lengthwise and then cut in the middle. Stir them around until they are tender and brown. Here's a picture of what they should look like at this point:
Making Bananas Foster

Add 1/4 cup of banana liquer to thin out the sauce. Then add 1/2 cup of dark run, stir it around a bit and take the pan off the stove. Ignite the pan and let the fire burn off the stove until it goes out. Serve the bananas with some sauce over vanilla ice cream. Eat it fast before the ice cream melts, unless you like it that way. I had an idea of mashing the mixture at this point and then putting it into an ice cream maker to make bananas foster ice cream. Maybe I'll give it a shot one of these days.

Basa in Foil & Coconut Rice

Last, but not least, is this meal: Japanese basa and coconut rice. I've never seen, heard of or cooked basa before, but it looked very delicate, so I cooked it like orange roughy or some thinly filleted tilapia. I sliced some baby bok choy and cubed up some graffiti eggplant (it's mottled purple and white). I mixed together, in a bowl, mirin (sweetened sake), rice wine and rice vinegar. I don't normally taste test my sauces, but I figured if I'm cooking for other people, I should probably check to make sure it tastes good. Good thing I did cause it was way too vinegary. The final product had a slight Asian taste but it was mostly on the sweeter side. I tossed the veggies in this and then arranged the veggies in mounds in the center of large pieces of foil. On top of this, I placed the fish fillets. I minced some ginger and rubbed into the top, poured a little sauce on the fish and added some salt and pepper. After sealing the packets, I baked them in a 400 degree oven for about 16 minutes until they were done but still moist. In the mean time, I made some coconut rice. You basically make jasmine rice like you normally would, except you substitute half of the water for lite coconut milk. This makes the rice a little richer and slightly coconutty in flavor. I added the toasted coconut for garnish. This is probably one of my favorite ways to make an easy rice, which matched well with one of my favorite ways to cook fish. After the fish came out of the oven, I drizzled on some sesame oil and some sesame seeds, making a very delicious dish indeed. And clean-up is a snap!