Showing posts with label Bread. Show all posts

Monday, October 25, 2010

Soft Pretzel Kit with Homemade Cheese Sauce

I'm not that into sports, but one reason I do like to go to various games is for the food. Roasted peanuts, popcorn, ice cream, jumbo hot dogs. But one of my all-time favorites is the soft pretzel. Soft, doughy interior with a crispy, buttery exterior, studded with large salt crystals. If only there was a way to make them at home... Enter the Soft Pretzel Kit.

Soft Pretzel Kit

The kit comes with a flour mixture and a packet of salt crystals, so all you have to do is add some water. The dough comes together with the help of some elbow grease.

Pretzel Dough Ball

Then you follow the handy little guide for shaping the dough into pretzels. A little melted butter slathered on top, a liberal sprinkling of the provided salt, and into the oven they go.

Prebaked Pretzels


Tasty Soft Pretzels

To celebrate my first soft pretzels, I decided to go the extra mile make a homemade cheese sauce:

Ingredients
2 tbsp unsalted butter
2 tbsp flour
1 tsp salt
1 cup milk
1 cup shredded Cheddar cheese
1 tsp mustard
Salt and pepper to taste

Directions
In a medium saucepan, melt butter over medium heat. Mix in flour and salt. Stir constantly until the mixture starts to simmer. Slowly pour milk into the mixture. Continue stirring over medium heat until the mixture has thickened. Make sure there are no clumps. Stir in cheese and mustard and continue stirring until cheese is completely melted and the dip is smooth. Add salt and pepper to taste and serve dip warm.

Cheese Sauce

The pretzels turned out great. Not perfectly like the ones at sports games, but they were still really good. And that cheese sauce was awesome. You could almost eat it like a soup, or even drink it because it was so wonderfully cheesy. You could probably decrease the milk content in the sauce if you want it more like the thick, bright yellow nacho cheese you see at convenience stores and wonder if that nuclear color ever exists in nature. All in all, I'll call this pretzel kit a twisted success.

Friday, September 24, 2010

Knead-less Bread

In the back of my mind, I maintain a list of the various culinary skills I want to work on. On the list are learning to make sushi, putting together a good pie/pastry dough, using my smoker, and baking really good bread. This last item came to the forefront of my mind when I stumbled across a Cook's Illustrated recipe I've had for a couple of years. I love Cook's Illustrated because they a) test every component of a recipe to figure out what's important, and b) break down every step to make normally daunting recipes more manageable to the home cook. So here goes my first foray into bread baking.

Bread can be difficult if you don't know what to expect or what you are looking for. And even then, you may just have to accept the dense, flavorless brick that comes out of the oven. But this recipe promises a rustic-style loaf with a lot less work. Just like how stainless steel is not stain-proof (it stains less), this is not quite a no-knead recipe, but rather a knead-less one.

Knead-less Bread
Yields 1 loaf. Recipe from Cook's Illustrated.

Ingredients
3 cups all-purpose flour
1/4 tsp yeast
1 tsp salt
3/4 cup water, at room temperature
1/2 cup mild beer, at room temperature
1 tbsp white vinegar
Cooking spray

Directions
Wet & Dry

Whisk together the flour, yeast and salt in a large bowl. In a small bowl or mixing cup, mix together water, beer and vinegar. Fold the liquid mixture into the flour mixture until the dough comes together. It will look "shaggy" (you'll know it when you see it). Cover the bowl and let the dough sit at room temperature for at least 8 hours and up to 18 hours (this is something that is easy to set up before you go to bed). In lieu of lots of kneading, this recipe just lets the dough rise for longer, allowing the gluten to develop on its own.

Shaggy Dough

Prepare a 10" skillet (size, in this case, does matter) by lining it with an 18" by 12" sheet of parchment and spraying this with cooking spray. Turn the dough out onto a lightly floured surface and knead by hand 10-15 times until it is a smooth ball. Shape the dough by pulling the edges toward the middle. Transfer the dough, seam-side down, to the prepared skillet. Lightly mist the dough with cooking spray and loosely cover with plastic wrap. Allow to rise at room temperature until it has doubled in size and barely springs back when poked, about 2 hours.

Thirty minutes before you want to start baking, adjust the oven rack to the lowest position (to allow ample room). Place a large Dutch oven with its cover on the rack and preheat everything to 500 degrees F. When I knew I wanted to make this recipe, I kept my eye out for a good quality Dutch oven on sale. Finally, a local kitchen store slashed some of its prices for a summer sale and I knew the universe was telling me that it was bread time.

Risen Dough

Lightly flour the top of the dough and score it with a sharp knife (to release tension). Carefully remove the Dutch oven from the oven and remove the lid. Pick up the parchment and dough and carefully lower them into the pot. Let any excess parchment stick over the sides. Cover the pot and place it back in the oven. Reduce the temperature of the oven to 425 degrees F and bake, covered, for 30 minutes. This first high temperature baking in a covered pot helps to steam the bread and cook it through before you brown the outside in the next step.

Un Beau Boule

Remove the lid of the Dutch oven and continue baking the bread until the center of the loaf registers 210 degrees F on an instant-read thermometer and the crust is golden, about 20-30 minutes more. Carefully remove the bread from the pot and transfer to a wire rack. Cool completely, about 2 hours.

Sliced Beauty

For a total bread newb, this loaf turned out spectacularly. Everything about it was spot on. It was crusty and sturdy on the outside, but the inside was soft, delicate and it tasted bready (knead-less to say, I was happy). I broke out the homemade strawberry from earlier in the summer to celebrate this spectacular achievement. I will admit, the bread did not maintain this beauteous character for more than a couple days before it started to get soft around the edges, but the time we had together was just magical. If, like me, you want to dip your toe into the pool of bread-baking, start with this recipe. Before we know it, we'll be ready for the big plunge into kneaded bread.

Saturday, June 19, 2010

A Tale of Two Muffins: Orange-Peanut Butter & Carrot-Raisin

This month, I'm in charge of bringing breakfast for my lab-mates on Friday mornings. I like to break from the usual bagels or ho-hum store-bought coffee cakes, so last week I took a different route - homemade muffins. This is by no means groundbreaking, but it is rare that anyone makes anything with their own two hands for our TGIF meal. So just to make it extra special, I decided to make two muffins. One sumptuous, indulgent and surprising; one healthy, fresh and wholesome.

Orange-PB Muffins

Orange-Peanut Butter Muffins
Makes 12 servings

Ingredients
1/4 cup canola oil
1/3 cup honey
1/3 cup chunky peanut butter
1/4 cup orange marmalade
1 large egg
1 cup fresh orange juice
1.5 cups flour
1/2 tsp baking soda
1/2 tsp salt

Directions
Preheat oven to 400 degrees F. Spray a standard-sized, 12-cup muffin pan with non-stick cooking spray; set aside.

In an electric mixer, beat together the oil, honey, peanut butter, orange marmalade, egg, and orange juice.

In a medium bowl, whisk together flour, baking soda and salt. Gently beat in flour mixture into PB-orange mixture just until incorporated.
Divide batter among greased muffin cups. Bake for about 20 minutes or until a toothpick inserted in the center comes out clean. Cool in muffin pan on wire rack for 10 minutes, then remove from pan and allow to cool completely.

These muffins turned out quite deliciously. The oil and peanut butter give the muffin a smooth, moist texture. The peanut butter and orange are in harmony on your tongue, neither pounding you over the head with their individual flavor, but instead both blending into the background. These could also make a great cupcake with any number of frostings (off the top of my head I could think of vanilla, peanut butter, orange, honey, cinnamon, or chocolate, but the possibilities are endless).

Carrot-Raisin Muffins

Carrot-Raisin Muffins
Makes 12 servings

Ingredients
1 cup flour
1/2 cup whole wheat flour
1/2 cup sugar
2 tsp baking powder
1/4 tsp salt
1/2 tsp ground cinnamon
1/4 tsp ground allspice
1/4 tsp ground nutmeg
1/2 cup unsweetened applesauce
1/4 cup canola oil
2 large eggs, lightly beaten
1 large carrot, peeled and shredded
1/2 cup raisins

Directions
Preheat oven to 400 degrees F. Spray a standard-sized, 12-cup muffin pan with non-stick cooking spray. Set aside.

In a large bowl, combine flours, sugar, baking powder, salt, and spices.

Using a standing mixer, beat applesauce, oil and eggs. Add shredded carrot and raisins and beat mixture until well combined. Stir in flour mixture just until incorporated. Divide batter among 12 muffin cups (about 2/3 full). Bake about 15-20 minutes until a toothpick inserted in the center comes out clean.

Cool in pan on a wire rack for 10 minutes. Remove from pan and allow to cool completely.

This may sound weird, but of these two muffins, the carrot-raisin were my favorite. Don't get me wrong. I'm a huge peanut butter fan. But when I think muffin, these beauties are what I imagine. The tops are rough and rugged, emphasizing the extra fiber from the whole wheat flour within. Instead of more oil, unsweetened applesauce makes the muffins moist. The carrot and raisin provide their own sweetness and nutrients to the mix. You could easily add some nuts or sunflower seeds to these. If you're so inclined, the addition of some rolled oats could make these into granola muffins. And for all of their nutritional good, they also play nice with your taste buds, imparting their fresh flavors.

Cupcake Courier

As an aside, I want to mention my newest kitchen acquisition - the cupcake courier. I've seen various people carrying these and they really are a good idea. I bought mine from Amazon. Not only can it carry three dozen muffins or cupcakes in three stacked layers, but as you can see from the picture, it even separates the layers with enough room to decorate the cupcakes. In the past I've used the disposable foil bake-ware from the grocery store, but even then you often can't get all of your cupcakes in one tin. It does take up some extra storage space in my house, but it's well worth it.

Both of these muffins are delicious in their own particular ways. When it comes down to it, even without getting into food preferences, these two muffins offered my co-workers their own ways for starting their Friday. If you need that boost of sugar and feeling of luxury on your lengua to trick yourself into finishing the week, then there's a muffin for that. If you like to start your morning feeling healthy and empowered, there's a muffin for that. Now I just need to figure out how to make a muffin that can wash the dishes.

Wednesday, May 19, 2010

Strawberry-Turkey Panino

After an afternoon of jamming, I wanted a strawberry-themed lunch without resorting to a salad. Luckily, Southern Living had a recipe for a sandwich using fresh strawberries. I changed a little bit to suit my own needs and pantry, but the spirit of the sandwich remains the same.

Building the Panino

I started with two slices of whole wheat bread and built my sandwich containing 5 slices of smoked turkey lunch meat, 1 slice of muenster cheese, 4 basil leaves, and three sliced strawberries. Be sure to keep the cheese to the outside and the berries and basil to the inside of the sandwich to get the cheese melty but the produce still whole.

Panini Press

For equipment, I used my George Foreman grill. No need to buy a separate panini press when a nearly ubiquitous Foreman grill works just as well. I buttered both sides of the sandwich to get a good crust and put the sandwich on for just a couple minutes.

Strawberry-Turkey Panino

In less than five minutes I made myself a hot and berry-licious lunch sandwich. The original recipe calls for brie instead of muenster, but I feel they both work well with the strawberries and the turkey. The cheese doesn't overwhelm the smokey flavor of the meat or the luscious berries. And the basil adds a fresh pop of licoriceness to add extra intrigue. I would recommend using a sturdier bread such as Italian when making the sandwich so it does not look quite as flattened as mine, but other than that this idea for a lunch is both simple and flavorful.

I don't like to harp on grammar since I'm sure I make all sorts of egregious errors, but it is worth noting something that has been bothering me for some time. The Italian word for "sandwich" is "panino." When plural, it becomes "panini." So if you are referring to a single grilled sandwich, it is a panino, not a panini. And, worst of all, "paninis" is not a word as it would be the same as saying "sandwhicheses." We all have our pet peeves and this just happens to be one of mine, so thanks for bearing with me.

Tuesday, March 9, 2010

Bagel Dogs

Perusing the blogosphere, I came across a food item that immediately threw me back to my childhood. All of a sudden, I was sitting on a barstool at the counter in my mom's kitchen, legs swinging, patiently waiting for one of my favorite treats to heat up. The chime on the microwave goes off to let me know that delightful deliciousness is imminent. My mom opens the microwave, retrieves my treat, turns around and presents me with a delicious, poppy seed-dusted bagel dog. Scientifically- or mathematically-speaking, the greatness of bagel does is not an additive effect of the ingredients, but rather the effect is exponential. In other words, hot dog = good, bagel = good, bagel dog = magnificent (instead of doubly good). The chewiness of the bagel adds far more interest to the dog than a mere bun ever could. Based on this attack of nostalgia, you can imagine how excited I was to find a recipe for these beauties fromFood People Want.


Instead of copying the recipe, I will outline the basic steps in making a bagel dog. Food People Want has all of the measurements and details just right, so no need to reinvent the wheel. First, you make the dough. My dough hook failed to help me knead the dough, so I got my hands dirty and finished the job. The dough rises and gets punched down (one of my favorite parts of making bread). You cut the dough into 12 strips and wrap them around the dogs. I would recommend keeping the wrapping a little tight, especially being sure to secure the ends. The dough rises again around the hot dogs. Then you put the dogs into simmering water for a minute so they'll puff up. Bagels are made in this way too. I'm assuming it's this step that makes sure the end product is especially chewy. Lastly, you sprinkle on your toppings and put the dogs into the oven for about a half hour.


I used Hebrew National hot dogs and some feta-spinach chicken sausages for my bagel dogs. On top are sesame seeds, herbs and dried garlic and, of course, poppy seeds. My bread-baking abilities are still at the novice stage, but this recipe came out perfectly. The bagel was the perfect texture, creating a cushiony blanket around the hot dogs. I would recommend using tubed meats without skin. It was not always a problem, but sometimes it was difficult to get through the bagel and the dog in one bite. The best part is this recipe made 12 bagel dogs that freeze and reheat exceedingly well. I will be eating these portable edibles for at least the next week, and my inner child can't stop smiling.

Monday, January 25, 2010

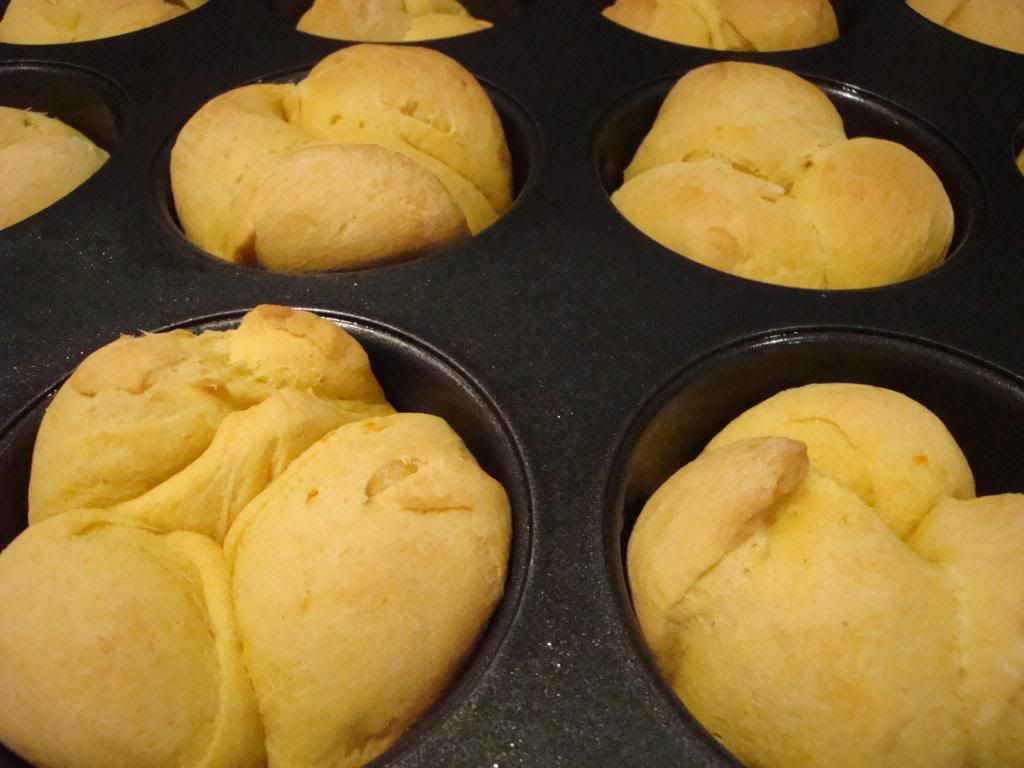
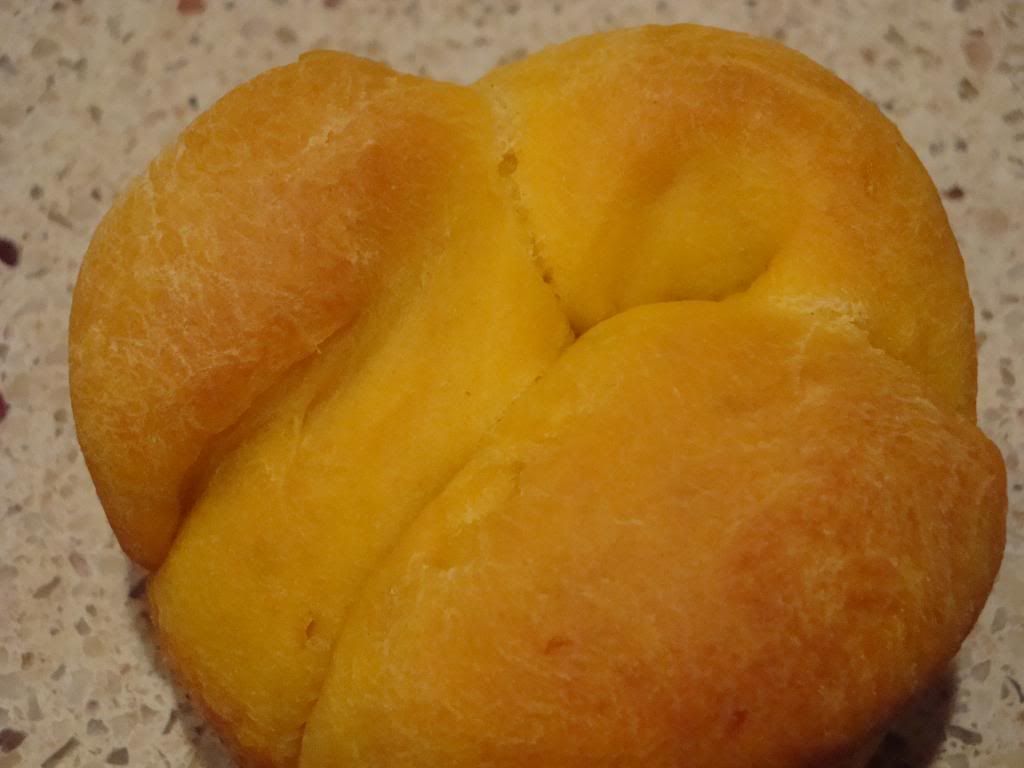
Clementine Pumpkin Cloverleafs

I miss reading Gourmet magazine. It has only been a few months since they had to close their doors, but it feels as if a year has passed since the last issue. Last February, the magazine published a recipe that I wanted to try for a couple reasons. Firstly, it uses citrus which is in season and wonderful right now. Secondly, I have very little experience using yeast to make breads. Most of my breads are quick and sweet (very cake-like). But now it's time to start working on rising techniques with this recipe for orange pumpkin cloverleafs.


I'm omitting the full recipe here because it is very long and I've provided the link above. I actually had a lot of fun making this roll. The initial kneading process was a little therapeutic. The dough slowly becomes more elastic as you work with it, which is very satisfying. After letting the dough rise, then punching it, then rising again, you divide the dough into small balls. Three balls go into each muffin tin cup, which are then baked.


The great part about this roll is that it separates into three little rolls. They are light when piping hot and become a bit more dense as they cool. You cannot taste the orange very well but the pumpkin is faintly there. But, in the end, it doesn't really matter. The point of it all is that I successfully made bread!

Thursday, June 11, 2009

Large Update - 6/11/2009

I have done a great deal of cooking in the last couple of weeks, so without wasting time, let's just start in with it.

Pineapple-Vanilla Jam

I did some apartment-sitting for a classmate while she got to vacation in Tahiti with her husband. She was very thankful and presented me with this gift upon her return. For those that don't speak French, it is pineapple-vanilla jam. The pineapple provides the stable base for the jam and the vanilla gives it a delightfully heady plume of aromatic flavor. It is very delectable on toast and just something different from your run-of-the-mill strawberry jam or orange marmalade.

CSA

My community supported agriculture has been fairly similar over the past weeks. The main features are strawberries, blueberries (not pictured), and lots of squashes: zucchini, Mediterranean zucchini and yellow squash. I accumulated so much zucchini that I had to do this:

Blueberry-Zucchini Bread

Paula Deen makes a mean zucchini bread. I had so much zucchini that I made two batches, which is supposed to make 2 loaves per batch, hence the high productivity. Instead of chocolate chips, I substituted one pint of blueberries in each batch. I also doubled up the spices (cinnamon and nutmeg) in the first batch and added some cardamom and ginger powder in the second batch. All in all, I made one large loaf, 4 mini-loaves, 4 large muffins and 6 regular muffins, all of which were delicious. On a random note, the blueberries turned the bread slightly blue-green instead of purple.

Brownie-Filled Chocolate Chip Cookies

On the subject of Southern cooking, Southern Living had on the inside cover of their latest issue something I could not resist making. They may look like normal chocolate chip cookies, but trust me, they're huge. Each has half a cup of dough in it. Plus, the real surprise is in the center: the cookie contains a brownie. That's right, Southern Living managed to stuff a baked good inside of another baked good. These treats are a tremendous endeavor to eat, but well worth it, even if you feel like you have to take a nap or hit the gym right afterward.

Polenta French Toast

Mom came into town for a visit and her birthday, so I/we did quite a bit of cooking and baking. For breakfast, I managed to find this wonderful gluten-free recipe care of Martha Stewart. You prepare one batch of polenta (with an hour of frequent stirring), adding in some milk, maple syrup, orange zest, cinnamon, and raisins. You then pour the polenta into baking dishes and let it set overnight. In the morning, you slice up the set polenta and pan-fry it until golden brown. Top it with maple syrup and some fresh North Carolina blueberries (or whatever state you happen to be in). For those who cannot eat toast, and even for those who want something out of the ordinary for breakfast, this is the perfect recipe. Just be warned that this is one of the more involved breakfast setups, but it can be well worth it.

Chocolate Pavlova

Mom brought a recipe with her to make a chocolate pavlova, also care of Martha. Pavlova is pretty much like a giant meringue cookie. This one was in the shape of a bird nest, filled with a chocolate mousse, then topped with whipped cream and chocolate shavings. This dessert had it all: chewy, creamy, crunchy, chocolate. This is a great way to end a meal with a cup of coffee on the side.

Flourless Chocolate Beet Cake

For Mom's birthday, I made this interesting flourless chocolate beet cake. You shred some beets, cook them in agave nectar until tender, then stir in some cocoa powder and some other additives, bake it for twice as long as the directions say, et voila! a cake. We topped it with some whipped cream and served it. It looks like we tried to make a red velvet cake but only got halfway there. The cake itself is a deep red-brown with a dense, moist, chocolate flavor and a subtle hint of beets, but definitely in a good way.

Funfetti Cake

Lastly, I've started a cake decorating class at Durham Technical Community College. Yesterday was our first chance to work on a cake. Above you can see the Funfetti cake I made for the class.

Decorated Cake

Two problems arose while decorating the cake. First, I did not want to make a full cake just for this class, so I used a box cake, meaning an overly moist work surface. Second, I did not own 6" cake pans, so I just cut down my cakes from 8", all without using a guide or measuring tool of any kind. End result: the whimsical cake.

Disaster Cake

I was slightly embarrassed by the cake at first, but I still wanted to bring it into my lab for everyone to eat. But my buttercream was not quite up to snuff. I probably needed another cup or so of confectioner's sugar in it (it already had 10 cups in it), so it slowly oozed down the sides of the cake. The end result: the top layer slipped off the bottom layer in a giant mess. So next week, I will stop cutting corners and shoot for the moon.

Sunday, October 26, 2008

Lots of Updates - 10.26.08

I've been staying busy busy for the past couple of weeks, so I haven't gotten around to updating the blog. But now I've found some time, so here's what I've been up to.

Shepherd's Pie

One of my pseudo-Scottish favorites, shepherd's pie is an easy casserole for entertaining friends or for a quiet evening at home. While boiling some potatoes for the top portion, cook ground beef in a pan, adding some onions, carrots and garlic. Once it's all cooked, stir in some flour to let it combine with the fat in the pan. Gradually stir in some tomatoes and beef stock and bring the mixture to a boil. Add Worcestershire sauce, sage, salt, and pepper, cover, and simmer for 25 minutes. While it's simmering, mash the potatoes with some butter, salt, pepper, and garlic powder. Adjust the consistency with some milk.

Stir mushrooms into the meat and cook until tender. Turn the mixture into a shallow ovenproof dish. You can either pipe the mashed potatoes with a star tip (fancy version) or you can delicately spread them over the top of the meat mixture (time and energy efficient version). Bake in a 400 degree oven for 30 minutes. Let cool a bit, slice and serve.

Grape-Mascarpone Upside-Down Cheesecake

I wanted to make a slightly different dessert, so I opted for this grape and mascarpone upside-down cheesecake. You puree some grape juice concentrate with some grapes, then simmer this in a saucepan with some whole grapes, sugar, raspberry vinegar, and cornstarch, cooking until it is thickened slightly. Pour this into the bottom of a springform pan (this will form the bottom of the cheesecake, which will be served as the top). With an electric mixer, combine cream cheese and mascarpone cheese with some sugar and flour. Pour this mixture over the grape mixture and bake until the center is just set. Allow to cool completely, then refrigerate for 4 hours. When ready to serve, invert onto a serving dish and remove the springform pan. This dessert came out nicely balanced: not artificially grapey and not overtly sweet, which were my main concerns. The last thing anyone wants for dessert is a diabetogenic cheesecake that tastes like Dimetapp.

Mushroom-Rice Soup and Red Wine Steak

With winter at our doorstep here in North Carolina, I was in the mood for soup, so I wanted to re-make some mushroom rice chowder I prepared about 3 years ago. You start by cooking mushrooms, leeks, shallots, and garlic in a pan with butter until everything is tender. Add 4 cups of chicken stock, 1 cup of wild rice, marjoram, thyme, and pepper. Simmer, covered, for about an hour until the rice is cooked. Slowly stir in 1 cup of half-and-half, cream cheese or sour cream (depending on how creamy and fattening you want your soup). Heat soup through but do not boil. Serve in large bowls and savor the warmth and flavors at your leisure.

Since I'm such a fungi (fun guy haha), I continued the mushroominess and made these steaks with red wine and mushroom sauce. Salt and pepper the steaks, then cook them up in a saucepan to the desired doneness. When finished, transfer to a covered, oven-safe dish and place it in an oven set on warm. In the same pan, pour out most of the fat, and add 8 ounces of mushrooms and some shallots, and cook until tender. Add some beef broth and heat until boiling. Mix cornstarch into half a cup of red wine, then pour this mixture into the pan. Cook this mixture until the sauce is thickened and adjust the flavors with salt and pepper. Plate the steaks and spread the sauce on top. The version I made turned out rather bland, so additional spices and maybe a bit less cornstarch would help. It did look nice, though, with some chopped parsley on top.

Zucchini Bread

For a nice treat for my lab, I made some zucchini bread. I have made so much banana bread over the past few years, I decided to try my hand at zucchini bread. I got the recipe from Food Network and tweaked it a bit. After mixing together 3.25 cups flour, 1.5 tsp salt, 1 tsp nutmeg, 2 tsp baking soda, 3 cups sugar, and 1 tsp cinnamon (I also added to this 1 tsp of cardamom, a wonderfully warm and underused spice), I made the wet mixture: 1 cup vegetable oil, 4 eggs, 1/3 cup water, 1 tsp lemon juice, and 2 cups zucchini. To grate the zucchini, you can do it the hard way with a hand grater or, as I found out, you can do it the easy way with the proper attachment to a food processor. I grated 2 zucchini in 15 seconds. Mix the wet mixture into the dry mixture until just mixed together. If you want, fold in 1 cup of chopped nuts (I used pecans). Bake this in 2 loaf pans (I only had 1 regular loaf pan and 3 mini loaf pans) for about 1 hour (or 45 minutes for mini-sized) until a tester comes out clean. I did have a difficult time getting the loaves out of the pans, but after that they were fine. I also used a light vanilla glaze on the large one before I brought it in for my lab to devour like piranha. It had a wonderful spiced flavor to it and the zucchini was more for consistency than for flavor.

In the past couple of weeks, I went to the NC Renaissance Fair as well as the State Fair. I meant to document the wonderful foods at both, but was so excited that I only remembered my camera when I was halfway through gorging. At the Renaissance Fair, we enjoyed a turkey leg, chocolate-covered strawberries, sausage on a stick, hot cider, strawberry shortcake, and fried mac-n-cheese. At the State Fair, we had a soft pretzel, another turkey leg, fried cheesecake, mint chocolate chip ice cream, a foot long corndog, and, the best of the best, fried oreos and Reese's peanut butter cups. The oreos were good, but the peanut butter cups were out of this world. Our original intent was to eat all of the other fried goodness (including, but not limited to, fried pickles, twinkies, Snickers, and Milky Ways), but we did not find the right booths until we were already stuffed. Luckily we carried around our many and varied stuffed animals, so that might come near the number of calories we consumed...at least if you fudge the numbers a bit.

Sunday, October 5, 2008

Pane di Formaggio - 10/04/08

Cheese Bread Outside

As I may have mentioned in a previous post, I got the recipe for a wonderful cheese bread from a family in Rome. Today, I decided to finally attempt to make it.

Cheese Bread Inside

Unlike many things you try for the first time, this recipe came out pretty darn close to what I intended. I think I will reduce the baking time a little bit, but other than that minor difference, I consider this a success. Unfortunately, I am not at liberty to disclose the recipe for the bread. I promised Pietro and his family that I would use this only for my personal purposes. All I will say is that there are three kinds of cheeses involved, some metric conversions, and an odd recipe for a bread. I know this is disappointing for those reading this (especially since the bread is wonderfully delicious), but if anything, I'm a man of my word. Grazie, Pietro.

Wednesday, June 11, 2008

Moving & Mussel Night - 6/10/08

I know I have not updated the blog in a little while. Truth is I am packing up everything I own for my big move to North Carolina. This means my schedule has been a little more full and some of my cooking equipment is being packed away. Also, I went on vacation recently, which means eating out every day. But I do want to put out one final entry before the move.

Salmon Farfalle

One goal I have is to eat all of the food in the house to lighten the load of the move. I had some salmon burgers left in the freezer, so I decided to use up those along with some farfalle pasta and a bottle of putanesca sauce to make this dish. It is very simple and not bad on flavor if you are in a pinch or, like me, moving. Not all of the food I am eating is this sad, though. I am being invited out by friends who want to get in the last few nights we'll have together for a while.

Moroccan Lamb Kabobs

I was invited to have dinner at a friend's family's home. I never like to show up to a dinner party empty handed, so I made these lamb kabob appetizers. The original recipe called for marinating the lamb in spices and buttermilk for at least 4 hours, which I'm sure makes the meat extra tender. I, however, wanted to optimize flavor and skip the dairy for one of the people in attendance. Hence, I used all of the spices in a rub: garlic powder, mint, parsley, cumin, salt, and pepper. I did not coat each piece, but I gave it a good amount of this spice mix. I then placed these on bamboo skewers (pre-soaked in water for about 30 minutes to prevent burning) alternatively with sliced red pepper, red onion, and a lemon wedge. I used my Foreman grill to cook these up with good grill marks in only about 2-3 minutes per batch.

Garlic Bread & Focaccia

Have you ever seen the pizza dough in the bakery area of Publix. Well, you can make an easy focaccia with it very quickly. First, make sure you let the dough come to room temperature. Sometimes I've been too impatient to take this step and the dough is very hard to work with when cold. Spread it out onto a greased pan of some sort. Here's a step you can omit if you want: push little dimples into your dough with your fingertips and spread some olive oil on top of the dough. The oil will well up into these pits for an extra burst of flavor. Now, you can put whatever you want on top of the dough. I usually use dried Italian herbs: garlic salt, basil, parsley, oregano, thyme, etc. But anything can work: sliced onions, fresh herbs, roasted peppers; cheese (mozzarella, feta, etc.), olives (hopefully pitted). Just remember that if you want a topping to be moist, put it on after you've baked the dough. Then just stick the dough into a 400 degree oven for about 15 minutes until it is turning golden brown on the top. The garlic rolls in the picture are pre-made rolls with a little butter and fresh garlic on top. The garlic, since it is raw, adds some bite to the bread.

Mussels

The main dish of the night: mussels. Mussels can be put into stews (see previous entry), paella, complex sauces from just about any type of cuisine and cultural background, but here's something I've learned: mussels are absolutely wonderful if you keep them simple. This is just the case. These mussels were steamed and then topped with melted butter and fresh garlic. Other small additions could be some white wine or a little saffron. The key is to have the seafood be the main feature. You want the fresh taste of the shellfish, almost tasting the ocean from which it came. When you are done with the mussels, feel free to mop up some of the sauce with your bread.

Passion Mango Drink

As a drink, they served a combination of passion fruit puree and mango juice blended with a little ice. This drink was simple in preparation, but wonderfully complex in flavor as the two fruits competed for your attention while still complementing each other. Lamentably, I was so ecstatic over the dessert that I forgot to take a picture before my plate was empty. One of my favorite foods, platanos maduros (ripe platains), was served with a warm, sweet mole. Before last night, I was used to mole being used only in more savory dishes as a part of the main course. But this was a combination of sesame seeds, pumpkin seeds (pepitas) and a dried pepper (I'm not sure which one, it was dark and rather large). These are toasted and the placed in a food processor with a little bit (not much) of tomato. I think it is then heated with a special dark (not very sweet) chocolate to make a delicious sauce for the platanos. It was not overly sweet and only had the faintest hint of spice. This dish was probably the most unexpected pleasures of the night.

Sunday, April 13, 2008

Sweet Breakfast - 4/13/08

My lab was having a day to work on some special recipes for patients on a high-fat, low-carbohydrate diet, so I went ahead and made some carb-tastic breakfast treats for everyone to enjoy. For avid readers, you may remember my banana bread trio was for a very similar event.

Monkey Bread

Monkey pull-apart bread is a wonderful treat and quite easy to make. The only drawback is you have to let it sit for a while before you can do anything with it. First, buy frozen bread dough. Thaw one loaf of dough and rip it into balls about three-quarters to half the size of a golf ball. Melt half of a stick of butter and set it aside. Mix together three-quarters cup of sugar with 1.5 tsp of cinnamon and one-half cup of chopped nuts (walnut, pecan or another softer nut). Grease a Bundt or other round pan with a hole in it. Dip each bread dough ball into the butter and then into the cinnamon-sugar-nut mix. Place the balls into the greased pan in an even manner. I find the best way to do all of this is to have one hand grab the dough ball, dip it in butter and toss it into the cinnamon-sugar-nut mix bowl. Have the other hand cover the ball in the mix and place it in the pan. You can use this same method for breading meats with an egg wash/buttermilk and breadcrumbs/cornflakes. Next, you have to let the dough balls rise for 3-6 hours in a warm, draft-free location until they are doubled in size. After the dough has risen, you can refrigerate it until you are ready to bake it and the dough will remain raised. Bake in a 350 degree oven for 25 minutes. When you remove it from the oven, invert it onto a serving plate. Allow this to cool for a few minutes then eat it by pulling the balls out by hand. This is a very communal food, so germophobes need not attempt it unless they want it all for themselves.

Muffins & Muffin Bars

I also made some muffins for breakfast. The first ones are cranberry-orange muffins that turned out a little dry (probably my fault). The other ones are apple-raisin-walnut mini- and regular-sized muffins. The second batch made so much batter that I made the minis, upgraded to the regulars and still had enough batter left over to make a muffin cake. I greased a 9" baking pan and filled it with what I had. I baked it until it was just done (it turned out very moist). To add insult to injury, I made a confectioner's sugar icing, flavored it with vanilla extract and drizzled it over the top of the sectioned pieces. Everyone raved about the food and devoured it quickly, which probably means I did something right.

Sunday, January 13, 2008

Italian Feast - 1/12/2008

I wanted to invite a couple of friends over for a nice meal, so I was brainstorming ideas for a nice, full meal. Here is what I ended up with:

Herb Focaccia

As an accompaniment, I made this herb focaccia. It was originally going to be a grilled vegetable focaccia, but I forgot to pick up a couple vegetables at the store. The dough itself has some oregano, thyme and caraway seeds. On top is fresh basil, garlic salt, rosemary, and romano cheese. In the past I have made focaccia using store-bought pizza dough, but it is always very difficult to work with and turns out rather puffy. I would be good for sandwiches, but for breadsticks like the ones above, it doesn't cut it.

Tortelloni Salad

As a starter/side dish, I served this tortelloni salad. In the salad are chicken tortelloni, fresh mushrooms, spinach, croutons, basil, and a dressing made with white wine vinegar. It turned out nice, although I do realize that it is just an excuse to get some vegetables in while still eating pasta.

Pesto Chicken Parmigiana

Now for the main course: pesto-stuffed chicken parmigiana. You pretty much make a chicken parmigiana, but before you cook the chicken, cut a pocket into the breast. After pan-frying for a nice golden brown, put a prepared pesto (leave it thick) into the pocket. Continue as you normally would including baking in the sauce covered with cheese for about 20-25 minutes. On the side you will also see some penne with a pasta sauce on top. I know what you're thinking: "Two pastas?" I just wanted to make sure we had enough food and the penne made a nice side dish.

Chocolate Tart

Chocolate Tart Slice

Dessert came from the baking book I received for Christmas: a dark chocolate tart. The dough is a chocolate tart dough which I managed to make well. If you've seen my apple pie on this site, then you know that I do not have the best luck with pastry doughs. This dough, though, came out very nicely. The filling is a chocolate ganache with a little bit more cream than the typical 1:1 ganache ratio plus some coffee to amplify the chocolate flavor. It turned out quite delicious and very rich. After eating the slice show above, I thought I should have made it only half as big. So if you try this at home, be warned that this is not something to serve in giant pieces.

Tuesday, October 23, 2007

Banana Bread Triplets - 10/20/2007

Some people in my research group work with patients on a high fat diet to reduce seizures. And when I say high fat, I mean really high fat...like Atkins times ten and without being able to cheat or else you might increse your seizures. To help their patients, they have Meal Days to work on new recipes to increase compliance. I planned on stopping by, so I thought they would enjoy some high carbohydrate food to "cleanse their palettes." All of these are spin-offs of my favorite banana bread recipe since one of my roommates had a ton of ripe bananas that she didn't want.

Banana Walnut Bread

First is a basic twist on the recipe: add walnuts. I think the crease in the top happened when I turned the bread out, possibly before it had cooled enough. >-< But it tasted good. I made sure to sprinkle nuts on top of the dough before it cooked so people were aware of what was inside.

Coconut Banana Bread

Next is banana bread with shredded coconut inside. I was actually one banana short when making this bread, so I figured the extra coconut would give the bread the support it needed. Before baking it, I toasted some reserved coconut and sprinkled it on top of the dough. This one also came out pretty good, but I don't think the flavors were as strong as the others.

Orange Banana Bread

For this last one, I added the zest of three oranges to the dough and baked it. The result was banana bread with a very aromatic orange flavor to it. Banana was the primary flavor, but orange was a more subtle undertone. All of the breads were met with great appreciation and critical acclaim, so I felt I had done a good job.